跳转到主内容

Philips PD9000 37 Buttons Replacement

你所需要的

  1. Philips PD9000 37 Buttons Replacement, Buttons: 步骤 1 中的图像 1,1
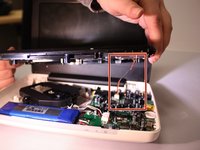
    • Lay the player flat so the outside casing is facing upwards. Using the screwdriver, unscrew all the case screws on the bottom of the player.
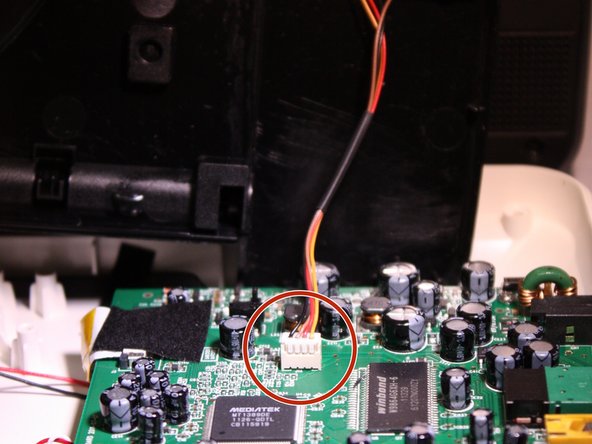
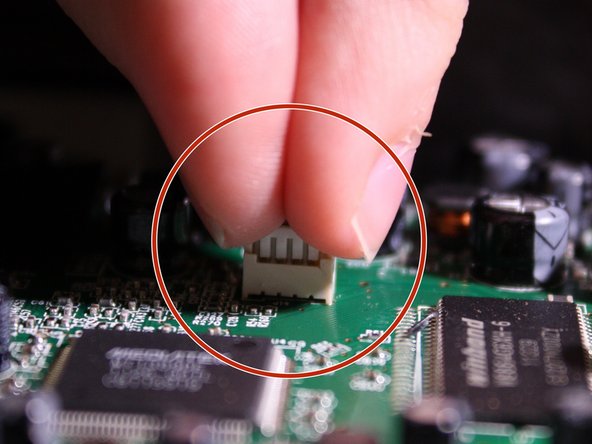
  2. Philips PD9000 37 Buttons Replacement: 步骤 2 中的图像 1,3 Philips PD9000 37 Buttons Replacement: 步骤 2 中的图像 2,3 Philips PD9000 37 Buttons Replacement: 步骤 2 中的图像 3,3
    • Open the disc flap and unscrew the screws inside. There will be three screws.

    • Using spudger, pry open the disk casing, and pull upwards removing it from the outer casing.

  3. Philips PD9000 37 Buttons Replacement: 步骤 3 中的图像 1,3 Philips PD9000 37 Buttons Replacement: 步骤 3 中的图像 2,3 Philips PD9000 37 Buttons Replacement: 步骤 3 中的图像 3,3
    • After casing has been detached, there will be a wire connecting the button panel on the disk flap case to the motherboard.

    • To detach this wire, use your fingers and tightly pinch the plastic connector, and gently pull upwards disconnecting it from the motherboard.

  4. Philips PD9000 37 Buttons Replacement: 步骤 4 中的图像 1,1
    • On the bottom side of the disk flap case, the back of the button panel will be visible. Using a Philips J0 screwdriver, unscrew all 6 screws.

  5. Philips PD9000 37 Buttons Replacement: 步骤 5 中的图像 1,3 Philips PD9000 37 Buttons Replacement: 步骤 5 中的图像 2,3 Philips PD9000 37 Buttons Replacement: 步骤 5 中的图像 3,3
    • Once unscrewed. gently pull upwards detaching the button panel from the casing.

结论

To reassemble your device, follow these instructions in reverse order.

0条评论

添加评论

浏览统计数据:

过去 24 小时: 0

过去 7 天: 4

过去 30 天: 7

总计 1,737