跳转到主内容

当前版本的文档还未经巡查,您可以查看最新的已查核版本

你所需要的

  1. 这个步骤还没有翻译 帮忙翻译一下

    : 步骤 1 中的图像 1,3 : 步骤 1 中的图像 2,3 : 步骤 1 中的图像 3,3
    • Looking at the bottom of the camera, slide the OPEN/LOCK switch to the left into the OPEN position.

    • The battery housing door should swing open.

  2. 这个步骤还没有翻译 帮忙翻译一下

    : 步骤 2 中的图像 1,2 : 步骤 2 中的图像 2,2
    • Flip the inside switch up to release the battery.

  3. 这个步骤还没有翻译 帮忙翻译一下

    : 步骤 3 中的图像 1,1
    • Grip the edge of the battery and pull it out.

    • Use a LUMIX Panasonic DMW-BLE9PP Battery Pack for replacement.

  4. 这个步骤还没有翻译 帮忙翻译一下

    : 步骤 4 中的图像 1,3 : 步骤 4 中的图像 2,3 : 步骤 4 中的图像 3,3
    • Some of these screws may have adhesive to keep the camera from being taken apart so push hard with the screwdriver and turn slowly to avoid stripping screws.

    • Use a Phillips #000 screwdriver to remove the five 4.5 mm screws located on the bottom of the camera and the top one on the left side, with the lens facing you.

    • Use a Phillips #000 screwdriver to remove the two 3.5 mm screws, one below the lens and one on the left side.

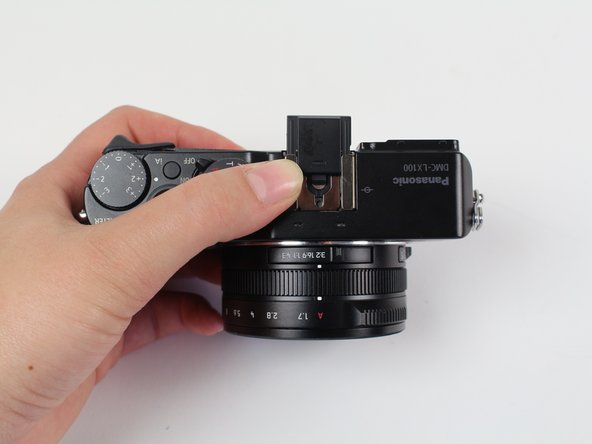
    • Use a Phillips #000 screwdriver to remove the 7.1 mm screw from the right side of the camera.

  5. 这个步骤还没有翻译 帮忙翻译一下

    : 步骤 5 中的图像 1,1
    • The viewfinder in this picture is taken off of the camera to more easily see where the screw is located. It is not actually removed from the camera.

    • Use a Phillips #000 screwdriver to remove the 2.5 mm screw underneath the viewfinder.

    • Pull the black plastic piece off of the viewfinder.

  6. 这个步骤还没有翻译 帮忙翻译一下

    : 步骤 6 中的图像 1,3 : 步骤 6 中的图像 2,3 : 步骤 6 中的图像 3,3
    • Slide out the black plastic piece that acts as a placeholder for an attachable lens on the top of the camera.

    • Remove the small metal insert that rests beneath the black plastic piece by pulling outward, away from the lens side of the camera.

    • You may need a spudger or prying device to remove the metal piece by lifting the back end up.

  7. 这个步骤还没有翻译 帮忙翻译一下

    : 步骤 7 中的图像 1,1
    • Some of these screws may have adhesive to keep the camera from being taken apart so push hard with the screwdriver and turn slowly to avoid stripping screws.

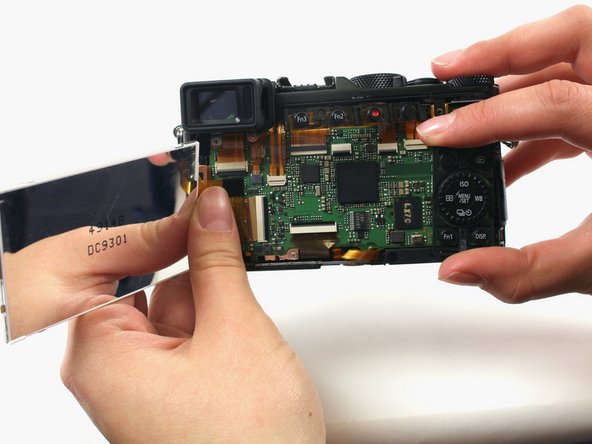
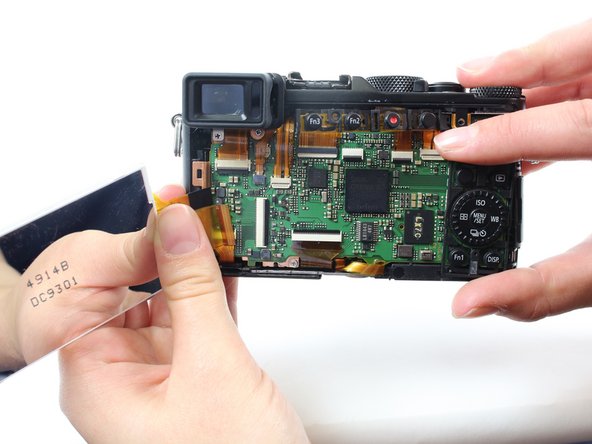
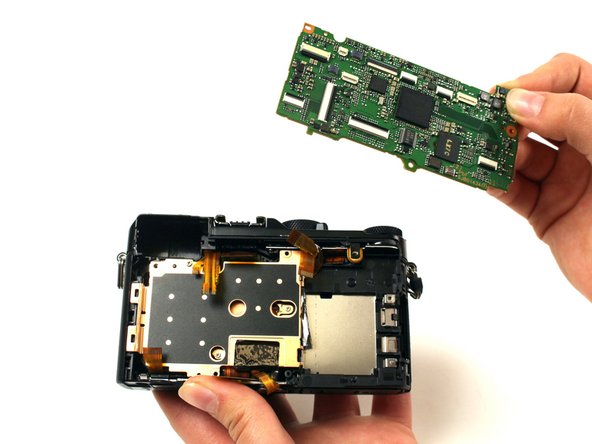
    • Use a Phillips #000 screwdriver to remove all four of the 7.1mm screws that are under the metal piece.

  8. 这个步骤还没有翻译 帮忙翻译一下

    : 步骤 8 中的图像 1,1
    • There may be adhesive holding the back on, so pry carefully to not break any of the ribbon cables underneath.

    • Pry off the back of the camera using a spudger starting from the top right side of the LCD screen.

  9. 这个步骤还没有翻译 帮忙翻译一下

    : 步骤 9 中的图像 1,1
    • Use a Phillips #000 screwdriver to remove the 7.5mm screw on the top right of the back of the camera that holds the metal backing in place.

  10. 这个步骤还没有翻译 帮忙翻译一下

    : 步骤 10 中的图像 1,3 : 步骤 10 中的图像 2,3 : 步骤 10 中的图像 3,3
    • Lift the LCD screen away from the device.

    • Pry off the silver metal backing with a spudger.

    • Pull out the ribbon cable that attaches the LCD screen to the motherboard.

    • If need be, use a plastic spudger to pry the ribbon cable out of its socket.

    • Remove the LCD screen.

  11. 这个步骤还没有翻译 帮忙翻译一下

    : 步骤 11 中的图像 1,1
    在这个步骤中使用的工具:
    Tweezers
    $4.99
    购买
    • You may need to use tweezers and a spudger to disconnect some of the ribbon cables so they do not break.

    • Disconnect the nine visible ribbon cables/ZIF connectors by flipping the black bars up and pulling the ribbon straight out of the connector.

    • Disconnect two more cables in the upper left corner of the board, hidden behind the visible cables.

    • Learn more about disconnecting ZIF connectors here.

  12. 这个步骤还没有翻译 帮忙翻译一下

    : 步骤 12 中的图像 1,1
    • Use a Phillips #000 screwdriver to remove the two 4.5 mm screws.

    • Use a Phillips #000 screwdriver to remove the 2.5 mm screw.

  13. 这个步骤还没有翻译 帮忙翻译一下

    : 步骤 13 中的图像 1,2 : 步骤 13 中的图像 2,2
    • Use two fingers to gently pull the viewfinder toward you and out of its housing.

    • The black plastic piece is still on the viewfinder in this image, but should have been removed during LCD screen removal.

  14. 这个步骤还没有翻译 帮忙翻译一下

    : 步骤 14 中的图像 1,2 : 步骤 14 中的图像 2,2
    • Start at the top of the camera and use the plastic spudger to pry the motherboard out of the camera.

终点

3等其他人完成本指南。

Sydney Dye

于01/11/16注册

1,206 声望

创作了2篇指南

团队

Cal Poly, Team 70-4, Forte Winter 2016 Cal Poly, Team 70-4, Forte Winter 2016 的会员

CPSU-FORTE-W16S70G4

4 名成员

创作了9篇指南

2条评论

This camera is a true dust harvester.

Thanks to this guide I have dared to clean the sensor successfully.

I know that I will have to return to the task in a few months but now I am more sure of the process.

Thanks a lot

guillem garces - 回复

Just a quick question! After replacing the motherboard, the camera works just fine or is it needed a software intervention?

Domenico Toscani - 回复

添加评论

浏览统计数据:

过去 24 小时: 3

过去 7 天: 18

过去 30 天: 54

总计 4,939