跳转到主内容
加入维修社区 - 创建账户

此翻译由机器生成,尚未经过人工审核。 会说这种语言吗? 查看评论。

PSP 1000 UMD 舱门更换

你所需要的

    1. PSP 1000 UMD 舱门更换, 电池: 步骤 1 中的图像 1,1
      • 将 PSP 翻转过来,使其背面朝向你。

      询问修复机器人

      添加评论

    2. PSP 1000 UMD 舱门更换: 步骤 2 中的图像 1,2 PSP 1000 UMD 舱门更换: 步骤 2 中的图像 2,2
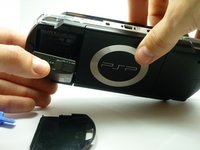
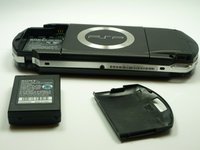
      • 找到 PSP 左后侧的电池盖板按钮。

      • 按压该按钮并取下电池盖板。

      添加评论

    3. PSP 1000 UMD 舱门更换: 步骤 3 中的图像 1,2 PSP 1000 UMD 舱门更换: 步骤 3 中的图像 2,2
      • 用手指将电池向上从系统中取出,如图所示。

      添加评论

    1. PSP 1000 UMD 舱门更换, 前外壳: 步骤 4 中的图像 1,1
      • 使用 Phillips 螺丝刀拧下图中所示的四颗螺丝。

      • 你需要揭开保修贴纸才能接触到下方的螺丝。

      添加评论

    2. PSP 1000 UMD 舱门更换: 步骤 5 中的图像 1,2 PSP 1000 UMD 舱门更换: 步骤 5 中的图像 2,2
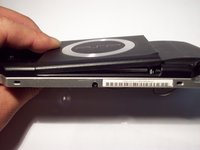
      • 拆下 PSP 底部的螺丝。请将其与其它螺丝分开放置。

      • 拆下背部右侧孔内的两颗螺丝。

      询问修复机器人
      添加评论

    3. PSP 1000 UMD 舱门更换: 步骤 6 中的图像 1,2 PSP 1000 UMD 舱门更换: 步骤 6 中的图像 2,2
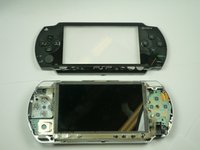
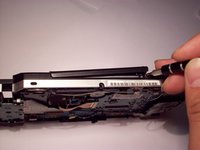
      • 如图所示,轻轻地将外层塑料外壳与系统其余部分分离。

      询问修复机器人
      添加评论

    1. PSP 1000 UMD 舱门更换, 液晶屏幕: 步骤 7 中的图像 1,1
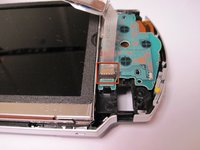
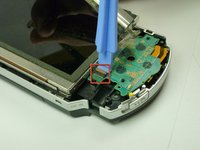
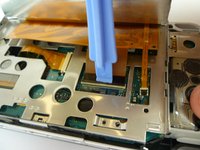
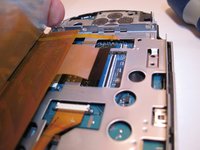
      • 按键电路板位于 LCD 屏幕底部,由两个卡扣固定。

      • 使用 PSP 开启工具将这些卡扣从凸起处撬开。这样即可松开卡扣。

      • 按键电路板仍通过一根排线与 PSP 相连!

      询问修复机器人
      添加评论

    2. PSP 1000 UMD 舱门更换: 步骤 8 中的图像 1,3 PSP 1000 UMD 舱门更换: 步骤 8 中的图像 2,3 PSP 1000 UMD 舱门更换: 步骤 8 中的图像 3,3
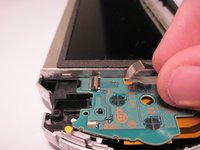
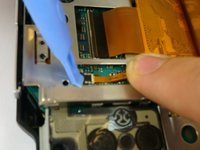
      • 按键电路板排线由一个锁扣固定。向上掀起锁扣,使其远离排线。

      • 将排线从锁扣中抽出。

      询问修复机器人

      添加评论

    3. PSP 1000 UMD 舱门更换: 步骤 9 中的图像 1,2 PSP 1000 UMD 舱门更换: 步骤 9 中的图像 2,2
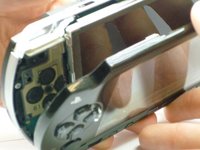
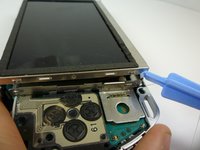
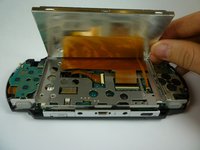
      • LCD 屏幕通过类似的卡扣固定在 LCD 中框上。将薄工具滑入卡扣和屏幕之间,在开始抬起屏幕的同时轻轻将它们撬开。

      询问修复机器人

      添加评论

    4. PSP 1000 UMD 舱门更换: 步骤 10 中的图像 1,1
      • LCD 屏幕仍有排线连接。请小心提起 LCD 屏幕,以免弄断它们。

      询问修复机器人

      添加评论

    5. PSP 1000 UMD 舱门更换: 步骤 11 中的图像 1,3 PSP 1000 UMD 舱门更换: 步骤 11 中的图像 2,3 PSP 1000 UMD 舱门更换: 步骤 11 中的图像 3,3
      • 窄排线的锁扣打开方向与排线插入的方向相反。将锁扣向排线方向掀开。锁扣会向上翻起并松开排线。将工具置于黑色部件后方,然后撬起这块黑色塑料件。

      • 宽排线的锁扣打开方向与排线连接的一侧相同,且开启方向背离排线。

      • 这两个锁扣均为黑色部件。

      • 轻轻将排线从锁扣中抽出。现在可以拆下 LCD 屏幕了。

      • 重新组装时,请注意锁扣的按压方向。较小的那个锁扣非常容易损坏。

      询问修复机器人

      添加评论

    1. PSP 1000 UMD 舱门更换, UMD 舱门: 步骤 12 中的图像 1,1
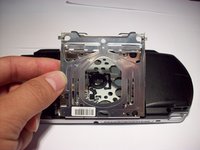
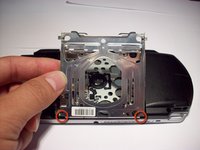
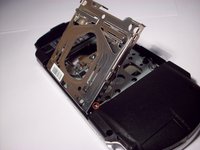
      • 现在 LCD 已拆下,拧下红色标记处的两颗螺丝。

      询问修复机器人

      添加评论

    2. PSP 1000 UMD 舱门更换: 步骤 13 中的图像 1,1
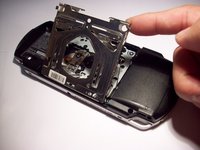
      • 首先,将 PSP 翻过来,使 UMD 驱动器朝上。

      • 然后使用一把小型一字螺丝刀,将左下角撬起。

      • 左侧卡扣松开后,右侧即可拆下。可能需要稍微晃动一下,请勿过度用力。

      询问修复机器人

      添加评论

      • 首先,让 PSP 正面朝上,拧下 UMD 舱门右下角、靠近右侧扬声器的那颗黑色螺丝,以便在下一步更容易撬起 UMD 舱门。

      询问修复机器人

      添加评论

    3. PSP 1000 UMD 舱门更换: 步骤 15 中的图像 1,2 PSP 1000 UMD 舱门更换: 步骤 15 中的图像 2,2
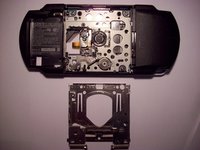
      • 握住托盘左侧并向右推。

      • 取出托盘。

      询问修复机器人

      添加评论

    4. PSP 1000 UMD 舱门更换: 步骤 16 中的图像 1,3 PSP 1000 UMD 舱门更换: 步骤 16 中的图像 2,3 PSP 1000 UMD 舱门更换: 步骤 16 中的图像 3,3
      • 由于问题出在门板松动,请清理所有部件上的污垢或碎屑。

      • 将托盘对准底部的 2 个铰链,然后向左滑动,将其滑回原位。锁扣此时仍应位于 UMD 中框上方。

      • 在将托盘降回原位的同时,对左侧施加轻微压力。

      询问修复机器人

      添加评论

    5. PSP 1000 UMD 舱门更换: 步骤 17 中的图像 1,2 PSP 1000 UMD 舱门更换: 步骤 17 中的图像 2,2
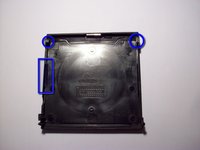
      • 接下来的这部分有点棘手。注意角落里用于弹簧臂的插槽和用于 UMD 托盘的插槽。

      • 将 PSP 倒置,使底部朝上。

      • 先将 UMD 托盘滑入 UMD 盖板上的插槽中。安装到位后,将弹簧对准其插槽。

      询问修复机器人

      添加评论

    6. PSP 1000 UMD 舱门更换: 步骤 18 中的图像 1,2 PSP 1000 UMD 舱门更换: 步骤 18 中的图像 2,2
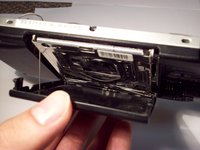
      • 小心合上 PSP 盖板,确保 UMD 托盘和弹簧保持在各自的插槽内。

      • 先插入盖板的左侧,然后是右侧的铰链。

      • 你可以用手或一把一字螺丝刀来完成这一步。

      添加评论

结论

要重新组装设备,请按相反顺序执行这些说明。

取消:我没有完成这个指南。

42等其他人完成本指南。

Henry Lee

于01/14/10注册

926 声望

创作了4篇指南

团队

Cal Poly, Team 5-6, Forte Winter 2010 Cal Poly, Team 5-6, Forte Winter 2010 的会员

CPSU-FORTE-W10S5G6

5 名成员

创作了72篇指南

4指南评论

thank u for the tutorial. great step by step because it was so easy to get my psp fixed on my own...no need to send in repairs and get charged for a $10 or less umd cover...more satisfaction when done on out own. thank u again

Sara CE - 回复 分享

Thanks! I just wanted to make a note that you don't actually have to take the screen off and mess with the ribbon cables. I just lifted it up, unscrewed those two screws, and snapped it back on. Just don't forget to put the screws back in before you put the cover on like I did.

Jeffery - 回复 分享

Hi, my UMD door opens too easily, just as i touch it sometimes, and i have to press it hard to close it. What should i do to make it stay close? i don’t understand why it has become so loose

Andrea Rusconi - 回复 分享

You can actually use a file and an exacto knife and some sandpaper on an aftermarket door. They tried to make an L-shaped reinforcement on the right side (if looking at the PSP from the back) that's why it's quite hard to get it in past those screws, just shave and file and sliver little by little, until it fits in without even having to take off the front case. You may also have to do some trimming and gluing of the latch catch on most of these aftermarket UMD doors.

whoohaaXL - 回复 分享

添加评论

浏览统计数据:

过去 24 小时: 30

过去 7 天: 225

过去 30 天: 1,088

总计 99,450