跳转到主内容
加入维修社区 - 创建账户

Nook Tablet Display Replacement

你所需要的

    1. Nook Tablet Display Replacement, Back Cover: 步骤 1 中的图像 1,1
      • Flip the Nook over.

      询问修复机器人
      添加评论

    2. Nook Tablet Display Replacement: 步骤 2 中的图像 1,2 Nook Tablet Display Replacement: 步骤 2 中的图像 2,2
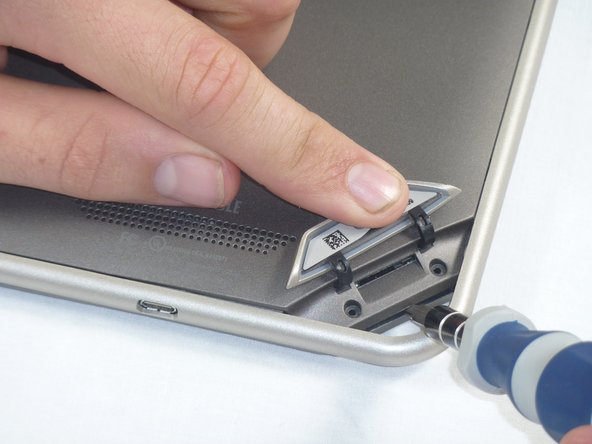
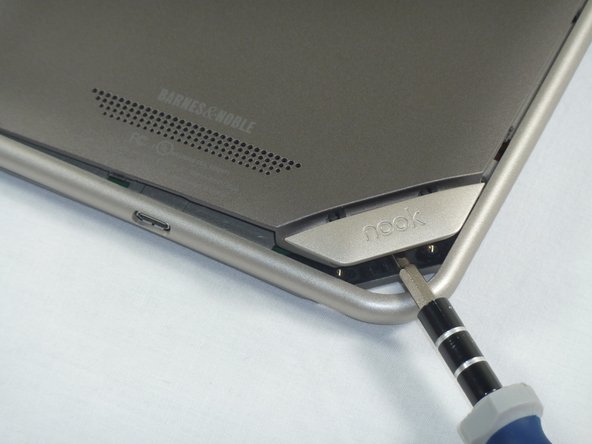
      • Lift the flap that reads "Nook" to reveal the tape that is underneath. Remove the memory card if one is present.

      • Remove the tape covering the round holes to reveal two T5 Torx screws.

      • Remove the two T5 Torx screws securing the back cover.

      添加评论

    3. Nook Tablet Display Replacement: 步骤 3 中的图像 1,2 Nook Tablet Display Replacement: 步骤 3 中的图像 2,2
      • Insert the flat end of a spudger between the front panel and the rear assembly.

      • Though these photos show a screwdriver, use a spudger or plastic opening tool in order to prevent damage to the device.

      • Use a spudger to lift the the back panel from the rest of the Nook.

      询问修复机器人

      添加评论

    4. Nook Tablet Display Replacement: 步骤 4 中的图像 1,2 Nook Tablet Display Replacement: 步骤 4 中的图像 2,2
      • Slide the spudger around the edges of the Nook to loosen the back panel.

      询问修复机器人

      添加评论

    5. Nook Tablet Display Replacement: 步骤 5 中的图像 1,1
      • Pull the back panel off the Nook.

      询问修复机器人

      添加评论

    1. Nook Tablet Display Replacement, Screen Bezel: 步骤 6 中的图像 1,2 Nook Tablet Display Replacement, Screen Bezel: 步骤 6 中的图像 2,2
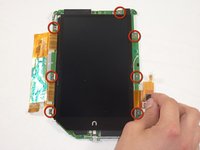
      • Using the T5 Torx screwdriver, remove the ten T5 screws from around the edges of the silver midframe.

      询问修复机器人

      添加评论

    2. Nook Tablet Display Replacement: 步骤 7 中的图像 1,2 Nook Tablet Display Replacement: 步骤 7 中的图像 2,2
      • Using a spudger or plastic opening tool, carefully pry the screen bezel away from the silver midframe.

      询问修复机器人

      添加评论

    1. Nook Tablet Display Replacement, Disconnect the Battery: 步骤 8 中的图像 1,2 Nook Tablet Display Replacement, Disconnect the Battery: 步骤 8 中的图像 2,2
      • Lift up the foam pad at the corner of the battery to reveal the battery connector.

      • Use a spudger or plastic opening tool to disconnect the battery cable from the motherboard.

      • These photos show a screwdriver, but we recommend using a nonconductive tool like a spudger to prevent a potential short.

      询问修复机器人

      添加评论

    1. Nook Tablet Display Replacement, Midframe: 步骤 9 中的图像 1,1
      • Lift up the foam that covers the power connector and volume connector.

      • Disconnect the power and volume cables from their sockets on the motherboard.

      询问修复机器人

      添加评论

    2. Nook Tablet Display Replacement: 步骤 10 中的图像 1,2 Nook Tablet Display Replacement: 步骤 10 中的图像 2,2
      • Carefully lift the silver midframe away from the motherboard and display assembly.

      • Be careful when handling the motherboard, making sure to not dislodge/shift any of its major components.

      询问修复机器人

      添加评论

    1. Nook Tablet Display Replacement, Display: 步骤 11 中的图像 1,2 Nook Tablet Display Replacement, Display: 步骤 11 中的图像 2,2
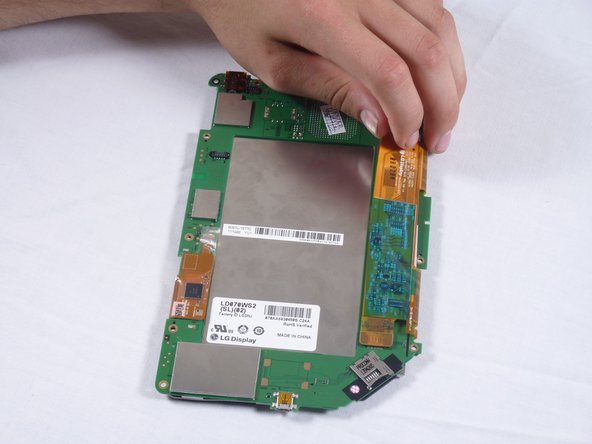
      • Orient the mother board as shown, so that the screen is facing downwards.

      • Grab the corner of the orange strip on the right side of the mother board as shown.

      • The orange strip is adhered to the mother board, gently lift the strip so that the adhesion is broken.

      • The strip will still be attached by the circuit connection to the mother board, proceed to the next step.

      询问修复机器人

      添加评论

    2. Nook Tablet Display Replacement: 步骤 12 中的图像 1,3 Nook Tablet Display Replacement: 步骤 12 中的图像 2,3 Nook Tablet Display Replacement: 步骤 12 中的图像 3,3
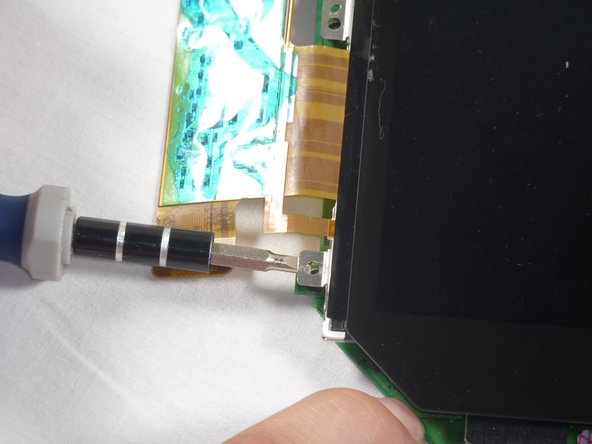
      • The orange strip will still be attached at this point

      • Insert the end of a flat head screw driver between the connection of the strip and mother board and pry upward.

      • Grab the strip and gently pull upward to finish the disconnection.

      询问修复机器人

      添加评论

    3. Nook Tablet Display Replacement: 步骤 13 中的图像 1,2 Nook Tablet Display Replacement: 步骤 13 中的图像 2,2
      • On the left side of the motherboard, you will see another orange strip, this one is taped down to the motherboard.

      • Remove the tape.

      询问修复机器人

      添加评论

    4. Nook Tablet Display Replacement: 步骤 14 中的图像 1,3 Nook Tablet Display Replacement: 步骤 14 中的图像 2,3 Nook Tablet Display Replacement: 步骤 14 中的图像 3,3
      • After the tape has been removed, the strip will still be attached to the motherboard by the hinge pictured here.

      • Slide the tip of a flat head screwdriver under the hinge and pry the hinge upward.

      • The orange strip should now be detached from the mother board.

      询问修复机器人

      添加评论

    5. Nook Tablet Display Replacement: 步骤 15 中的图像 1,3 Nook Tablet Display Replacement: 步骤 15 中的图像 2,3 Nook Tablet Display Replacement: 步骤 15 中的图像 3,3
      • The screen is adhered to the mother board at the screw holes marked

      • Break the adhesion by inserting the edge of a flat head screwdriver inbetween the motherboard and the pieces of the screen at the marked holes

      • Lift the screen from the display.

      添加评论

结论

To reassemble your device, follow these instructions in reverse order.

取消:我没有完成这个指南。

12等其他人完成本指南。

团队

Cal Poly, Team 1-4, Propen Fall 2012 Cal Poly, Team 1-4, Propen Fall 2012 的会员

CPSU-PROPEN-F12S1G4

4 名成员

创作了15篇指南

2指南评论

Where can one get a replacement screen for the glow-light first model?

Hank - 回复 分享

I need battery

Mister A - 回复 分享

添加评论

浏览统计数据:

过去 24 小时: 1

过去 7 天: 9

过去 30 天: 40

总计 33,094