跳转到主内容
加入维修社区 - 创建账户

Nintendo Wii mini Motherboard Replacement

你所需要的

  1. Nintendo Wii mini Motherboard Replacement, Unscrew the Bottom: 步骤 1 中的图像 1,2 Nintendo Wii mini Motherboard Replacement, Unscrew the Bottom: 步骤 1 中的图像 2,2
    • Remove the two rubber feet at the back of the console to reveal the hidden screws.

    • Remove the four 6mm Phillips #0 screws.

    询问修复机器人

    添加评论

  2. Nintendo Wii mini Motherboard Replacement, Remove the Cover: 步骤 2 中的图像 1,3 Nintendo Wii mini Motherboard Replacement, Remove the Cover: 步骤 2 中的图像 2,3 Nintendo Wii mini Motherboard Replacement, Remove the Cover: 步骤 2 中的图像 3,3
    • Turn the Wii mini right-side up. Then run a plastic opening tool around the middle edge of the console to loosen the top piece.

    • Gently lift the top piece of the console and set it aside.

    询问修复机器人

    添加评论

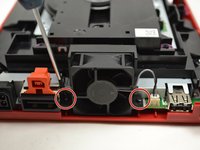
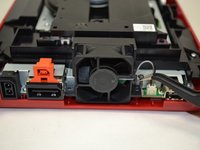
  3. Nintendo Wii mini Motherboard Replacement, Unscrew the Fan: 步骤 3 中的图像 1,2 Nintendo Wii mini Motherboard Replacement, Unscrew the Fan: 步骤 3 中的图像 2,2
    在这个步骤中使用的工具:
    Tweezers
    $4.99
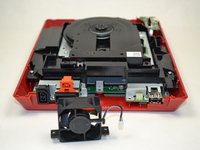
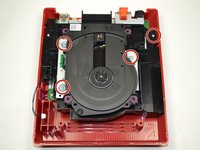
    • Turn the Wii mini around so that the back of the device is facing you.

    • Using a Phillips #0 Screwdriver, unscrew the two 6mm screws on either side of the fan piece.

    • You may need to use tweezers to pull out the screws once they are loosened.

    询问修复机器人
    添加评论

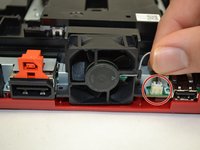
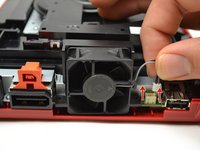
  4. Nintendo Wii mini Motherboard Replacement, Detach the Fan Connector: 步骤 4 中的图像 1,3 Nintendo Wii mini Motherboard Replacement, Detach the Fan Connector: 步骤 4 中的图像 2,3 Nintendo Wii mini Motherboard Replacement, Detach the Fan Connector: 步骤 4 中的图像 3,3
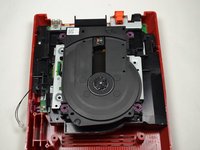
    • Using your fingers, gently pull the top of the pin connector straight up to detach the fan from the console.

    • Do not wiggle the connector or cable while removing. This may cause the connector to come loose

    • Remove the fan piece and set it aside.

    询问修复机器人
    添加评论

  5. Nintendo Wii mini Motherboard Replacement, Power Board: 步骤 5 中的图像 1,3 Nintendo Wii mini Motherboard Replacement, Power Board: 步骤 5 中的图像 2,3 Nintendo Wii mini Motherboard Replacement, Power Board: 步骤 5 中的图像 3,3
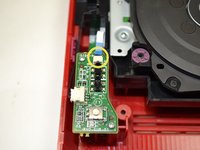
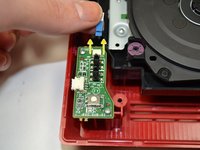
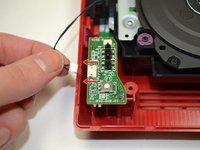
    • Using your fingers, slide out the blue ribbon cable from the the top of the power board.

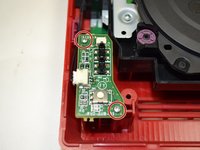
    • Using a Phillips #0 Screwdriver, unscrew the two 4mm screws at the top and bottom of the power board.

    询问修复机器人

    添加评论

  6. Nintendo Wii mini Motherboard Replacement: 步骤 6 中的图像 1,2 Nintendo Wii mini Motherboard Replacement: 步骤 6 中的图像 2,2
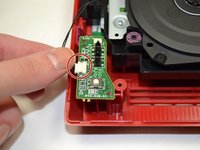
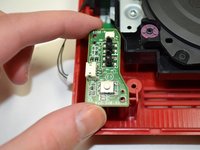
    • Using your fingers, gently pull the pin connector to disconnect the power board from the disc drive.

    询问修复机器人

    添加评论

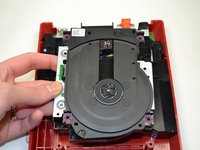
  7. Nintendo Wii mini Motherboard Replacement: 步骤 7 中的图像 1,2 Nintendo Wii mini Motherboard Replacement: 步骤 7 中的图像 2,2
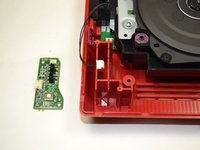
    • Lift the power board from the console and set it aside.

    询问修复机器人
    添加评论

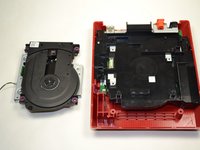
  8. Nintendo Wii mini Motherboard Replacement, Disc Drive: 步骤 8 中的图像 1,2 Nintendo Wii mini Motherboard Replacement, Disc Drive: 步骤 8 中的图像 2,2
    • Using a Phillips #0 Screwdriver, unscrew the four 6mm screws.

    询问修复机器人
    添加评论

  9. Nintendo Wii mini Motherboard Replacement: 步骤 9 中的图像 1,2 Nintendo Wii mini Motherboard Replacement: 步骤 9 中的图像 2,2
    • Lift the disc drive out of the console and set it aside.

    询问修复机器人

    添加评论

  10. Nintendo Wii mini Motherboard Replacement, Unscrew the Tray: 步骤 10 中的图像 1,1
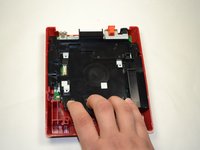
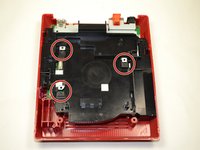
    • Using a Phillips #0 Screwdriver, unscrew the 6 mm screw at the top of the black tray.

    添加评论

  11. Nintendo Wii mini Motherboard Replacement, Remove the Tray: 步骤 11 中的图像 1,3 Nintendo Wii mini Motherboard Replacement, Remove the Tray: 步骤 11 中的图像 2,3 Nintendo Wii mini Motherboard Replacement, Remove the Tray: 步骤 11 中的图像 3,3
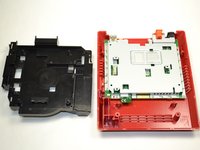
    • Using your fingers, pull the black plastic tray toward you to loosen it from the console.

    • Make sure the black square pieces are separated from the metal square pieces before trying to lift out the tray.

    • Once separated, lift the plastic tray out of the console and set it aside.

    • Trying to remove the tray before it is completely loosened may result in damage to the metal square pieces.

    询问修复机器人

    添加评论

  12. Nintendo Wii mini Motherboard Replacement, Unscrew the Metal Casing: 步骤 12 中的图像 1,2 Nintendo Wii mini Motherboard Replacement, Unscrew the Metal Casing: 步骤 12 中的图像 2,2
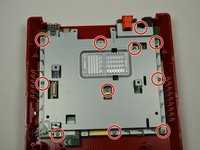
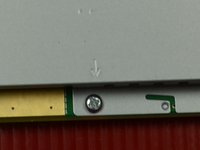
    • Using a Phillips #0 screwdriver, remove the eleven 5 mm screws holding the silver metal plate to the console.

    • These screws are indicated by small arrows on the metal plate. (See Photo #2)

    询问修复机器人

    添加评论

  13. Nintendo Wii mini Motherboard Replacement, Remove Metal Casing: 步骤 13 中的图像 1,2 Nintendo Wii mini Motherboard Replacement, Remove Metal Casing: 步骤 13 中的图像 2,2
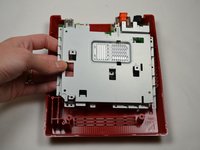
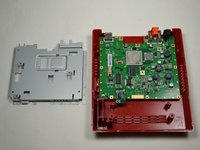
    • Lift out the metal plate and set it aside.

    询问修复机器人

    添加评论

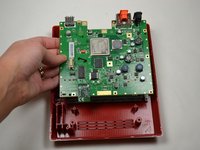
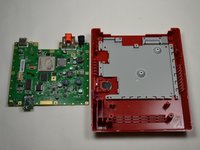
  14. Nintendo Wii mini Motherboard Replacement, Remove Motherboard: 步骤 14 中的图像 1,2 Nintendo Wii mini Motherboard Replacement, Remove Motherboard: 步骤 14 中的图像 2,2
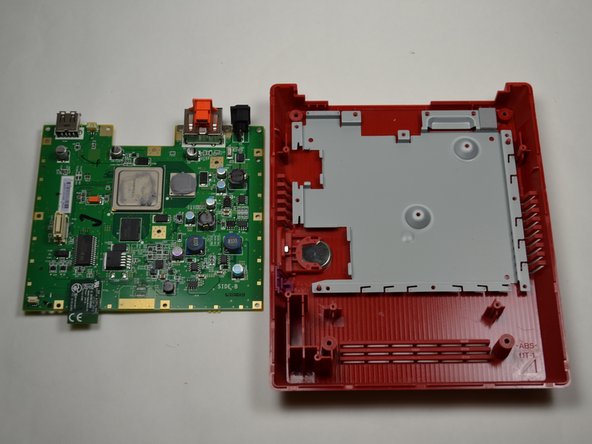
    • Lift out the motherboard and set it aside.

    询问修复机器人

    添加评论

结论

To reassemble your device, follow these instructions in reverse order.

取消:我没有完成这个指南。

11等其他人完成本指南。

团队

UWT Liner: Group 5 UWT Liner: Group 5 的会员

Community

3 名成员

创作了11篇指南

1指南评论

Can you fit a Wii Motherboard inside this casing, and use the dvd drive, if so I have a few wiis with broken DVD drives I would like to repair and this would be a cheap solution.

Christopher Wortman - 回复 分享

添加评论

浏览统计数据:

过去 24 小时: 4

过去 7 天: 30

过去 30 天: 97

总计 7,079