Two screws are hidden underneath two rubber feet highlighted in red.
Use the tip of a spudger to pry the rubber feet out of the lower case.
Depending on the age of your device, the rubber feet may crumble apart as you pry them out. If so, use a fine-tipped tool to scrape out any stuck pieces of rubber.
Carefully lift the lower casing from its bottom edge.
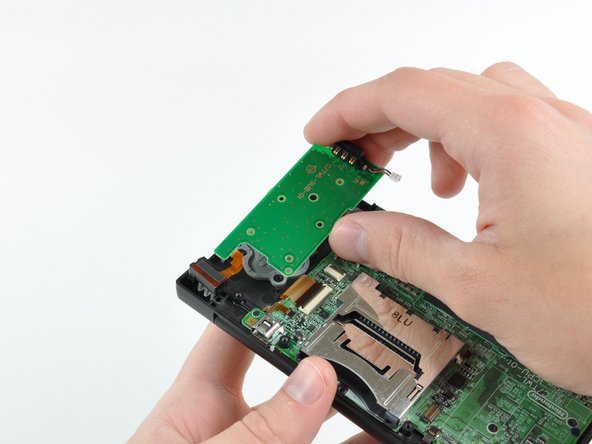
The lower case is still attached to the motherboard by the volume and SD board cable highlighted in red. Do not try to completely remove the lower case of the DSi yet.
Pry the volume and SD board cable up from its socket on the motherboard using a spudger.
Once the cable is completely removed, then you may take off the entire outer casing.
So when I was attempting to repair my DSI, the red cable became unplugged and now my system won’t turn on. What can I do to fix this before I go the option of getting replaced or ordering replacement parts?
I need help. I busted off the connection of the power board to the mother board. Is there any way I can solder the red and black wires directly? Because the white piece is broken and gone now.
Hi I would like to ask about the buttons because in my case a plastic like bubble appeared on top of the contact gray button and it doesn’t make the pop sound anymore like the others that also means that it doesn’t work anymore could you help me?