跳转到主内容
加入维修社区 - 创建账户

此翻译由机器生成,尚未经过人工审核。 会说这种语言吗? 查看评论

Nintendo DSi 下屏更换

你所需要的

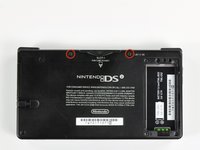
    1. Nintendo DSi 下屏更换, 取下电池盖: 步骤 1 中的图像 1,2 Nintendo DSi 下屏更换, 取下电池盖: 步骤 1 中的图像 2,2
      • 拧下将电池盖固定在下壳的两颗十字螺丝。

      • 螺丝会留在电池盖上。

      • 抓住电池盖并将其从下壳中取出。

      • 如果难以取出电池盖,请轻轻敲击设备的另一面使其在重力作用下分离。

      询问修复机器人

      添加评论

    2. Nintendo DSi 下屏更换, 取出电池: 步骤 2 中的图像 1,2 Nintendo DSi 下屏更换, 取出电池: 步骤 2 中的图像 2,2
      • 使用撬棒工具(或者指甲),从上侧挑起电池。

      • 电池上侧有小塑料片突起,便于移除电池。

      • 进水指示贴在电池下方。请轻轻撬动,否则可能会损坏指示贴。

      • 抓起电池并将其从 DSi 中取出。

      添加评论

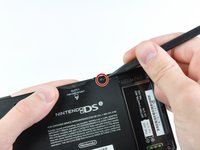
    1. Nintendo DSi 下屏更换, 底壳: 步骤 3 中的图像 1,2 Nintendo DSi 下屏更换, 底壳: 步骤 3 中的图像 2,2
      • 两个螺丝隐藏在两个以红圈显示的橡胶脚垫下。

      • 使用撬棒的尖端将橡胶脚垫从底壳中撬出。

      • 根据设备的使用年限,橡胶脚垫可能会在您撬出时碎裂。如果是这样,请使用细尖工具刮掉任何卡在螺丝孔中的橡胶脚垫残留。

      添加评论

    2. Nintendo DSi 下屏更换: 步骤 4 中的图像 1,1
      • 卸下以下将底壳固定到 DSi 主体的螺丝:

      • 六颗 5.2 毫米十字 #00 螺丝。

      • 一颗 2.7 毫米十字 #00 螺丝。

      添加评论

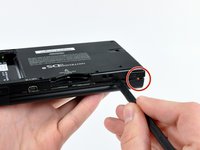
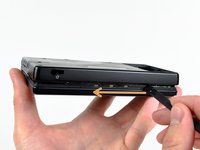
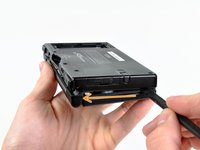
    3. Nintendo DSi 下屏更换: 步骤 5 中的图像 1,3 Nintendo DSi 下屏更换: 步骤 5 中的图像 2,3 Nintendo DSi 下屏更换: 步骤 5 中的图像 3,3
      • 将撬棒插入 DSi 右上角附近的底壳和下面板之间。

      • 小心地沿着外壳的边缘划动撬棒,在主体和外壳之间形成一个开口。

      • 继续在 DSi 的主体上划动撬棒,直到底壳的大部分被分离。

      询问修复机器人

      添加评论

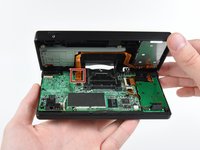
    4. Nintendo DSi 下屏更换: 步骤 6 中的图像 1,2 Nintendo DSi 下屏更换: 步骤 6 中的图像 2,2
      • 小心地从底部边缘提起底壳。

      • 底壳仍然通过红圈突出显示的音量和 SD 卡排线连接到主板。请勿尝试完全移除 DSi 的底壳。

      • 使用撬棒将音量和SD卡排线从主板上的排线插槽中撬出。

      • 完全移除排线后,即可取下整个底壳。

      添加评论

    1. Nintendo DSi 下屏更换, Wi-Fi 板: 步骤 7 中的图像 1,1
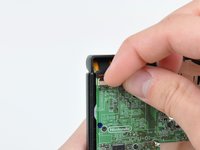
      • 将 Wi-Fi 板向耳机插口侧从主板上拔下。

      询问修复机器人
      添加评论

    2. Nintendo DSi 下屏更换: 步骤 8 中的图像 1,1
      • 将 Wi-Fi 天线从 Wi-Fi 板上的座子上向上拉起。

      添加评论

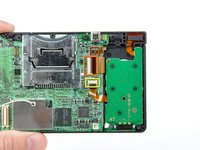
    1. Nintendo DSi 下屏更换, 主板: 步骤 9 中的图像 1,1
      • 使用撬棒的尖端将电源板的插头从主板上的座子上撬起。

      添加评论

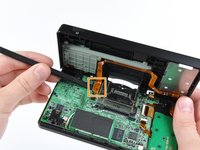
    2. Nintendo DSi 下屏更换: 步骤 10 中的图像 1,2 Nintendo DSi 下屏更换: 步骤 10 中的图像 2,2
      在这个步骤中使用的工具:
      Tweezers
      $4.99
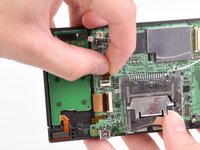
      • 使用手指甲或塑料撬棒来翻起排线座上的塑料片。

      • 下屏触摸排线

      • 下屏 LCD 显示排线

      • 电源板排线

      • 在翻起这些塑料片时,要确保翻起的是这些塑料片,而不是塑料片底下的排线座。

      • 在翻起这三个座子上的塑料片后,使用手指或镊子来轻轻地将这些排线从座子上拉出。

      添加评论

    3. Nintendo DSi 下屏更换: 步骤 11 中的图像 1,2 Nintendo DSi 下屏更换: 步骤 11 中的图像 2,2
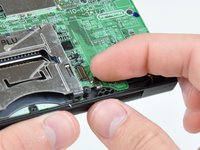
      • 用指甲或塑料撬棒的边缘小心地掀起触摸屏排线固定扣。

      • 确保你翻起的是固定扣,而不是排线座本身。

      • 用撬棒的尖端将触摸屏排线从排线座中拉出。

      添加评论

    4. Nintendo DSi 下屏更换: 步骤 12 中的图像 1,2 Nintendo DSi 下屏更换: 步骤 12 中的图像 2,2
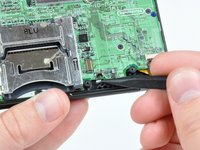
      • 使用指甲或塑料撬棒的边缘,小心地掀起双摄像头排线的固定扣。

      • 确保你翻起的是固定扣,而不是排线座本身。

      • 使用撬棒的尖端将双摄像头排线从排线座中直接拉出。

      添加评论

    5. Nintendo DSi 下屏更换: 步骤 13 中的图像 1,1
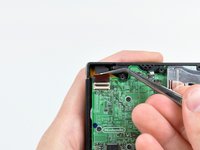
      • 用撬棒的尖端,将麦克风天线从主板上的插座撬起。

      询问修复机器人
      添加评论

    6. Nintendo DSi 下屏更换: 步骤 14 中的图像 1,1
      • 拆下固定主板到DSi中框的以下四颗十字螺丝。

      • 三根较长的螺丝。

      • 一根较短的螺丝。

      • 将麦克风和 Wi-Fi 天线电缆从靠近耳机插孔的主板切口中拉出。

      询问修复机器人

      添加评论

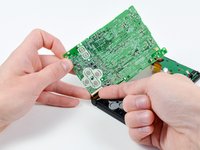
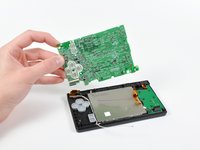
    7. Nintendo DSi 下屏更换: 步骤 15 中的图像 1,3 Nintendo DSi 下屏更换: 步骤 15 中的图像 2,3 Nintendo DSi 下屏更换: 步骤 15 中的图像 3,3
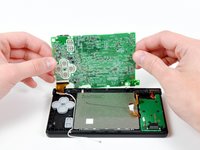
      • 稍微将主板向上抬起,以露出 ABXY 按钮上方的上方 LCD 排线。

      • 使用指甲或塑料撬棒的边缘,小心地掀起上部 LCD 排线固定挡板。

      • 确保你翻起的是固定扣,而不是排线座本身。

      • 从DSi上取下主板。

      添加评论

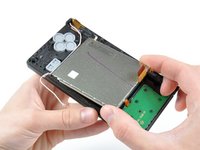
    1. Nintendo DSi 下屏更换, 组装液晶下屏: 步骤 16 中的图像 1,2 Nintendo DSi 下屏更换, 组装液晶下屏: 步骤 16 中的图像 2,2
      • 使用撬棒从DSi的下半机盖撬起下屏的金属后盖。

      • 从DSi中取出下组装液晶屏

      添加评论

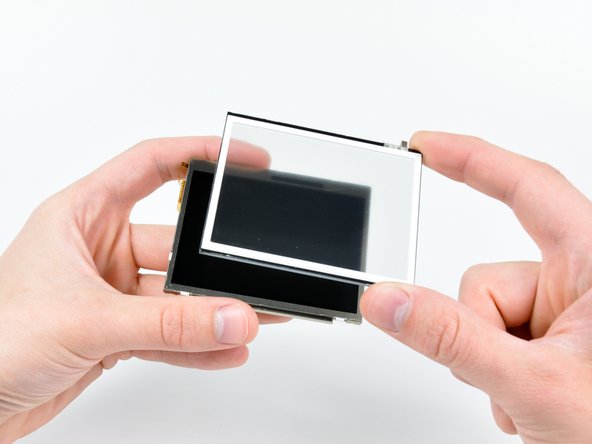
    1. Nintendo DSi 下屏更换, 下屏: 步骤 17 中的图像 1,2 Nintendo DSi 下屏更换, 下屏: 步骤 17 中的图像 2,2
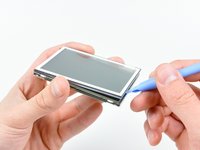
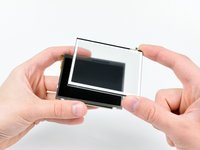
      • 将开启工具的边缘插入下触摸屏和下液晶显示屏之间。

      • 沿着触摸屏的周边仔细滑动开启工具的边缘,将其从下液晶显示屏上分离。

      • 从下液晶显示屏上取下触摸屏。

      • 留下下液晶显示屏。

      询问修复机器人

      添加评论

结论

要重新组装设备,请按相反顺序执行这些说明。

取消:我没有完成这个指南。

19等其他人完成本指南。

4指南评论

On Step 9 please add something like this to the description. I didn’t fully understand what was said and i ended up breaking my power connector off the motherboard. I luckily went to Ebay and someone had a replacement thankfully that i was able to solder back on the motherboard. ——————To remove the power wire connector off the motherboard use a small flathead screwdriver to push the white part of the connector straight up. If you try to pull it back like a standard connector it will break! ————-

Anthony - 回复 分享

Needs to be more specific in removing the touch screen as mine didn't come off properly and I had to get a new

[deleted] - 回复 分享

Hello! I have a DSi with a missing lower display. It won’t turn on (even pluged in). Can anyone tell me if it’s supposed to turn on with the lower display missing? If it is not supposed to turn on without the lower display, then I can buy a replacement display so it probably work, but if it supposed to turn on even without the lower display, then there is some extra problem there.

Simos Kondylakis - 回复 分享

It seems to me like the display being plugged in shouldn't determine if the DSi can be powered on. Just guessing, but there is probably some other issue.

Flowies - 回复 分享

添加评论

浏览统计数据:

过去 24 小时: 9

过去 7 天: 75

过去 30 天: 365

总计 24,766