跳转到主内容
加入维修社区 - 创建账户

Nexus S Motherboard Replacement

你所需要的

    1. Nexus S Motherboard Replacement, Rear Panel: 步骤 1 中的图像 1,1
      • Gently insert a plastic opening tool between the rear panel and the inner rear frame near the rear-facing camera.

      • Use your plastic opening tool to pry up the rear case around the perimeter of the Nexus S.

      询问修复机器人

      添加评论

    2. Nexus S Motherboard Replacement: 步骤 2 中的图像 1,1
      • Remove the rear panel from the Nexus S.

      询问修复机器人

      添加评论

    1. Nexus S Motherboard Replacement, Battery: 步骤 3 中的图像 1,1
      • Using the edge of a plastic opening tool, lift the battery from the end closest to the headphone jack.

      • Remove the battery from the Nexus S.

      询问修复机器人

      添加评论

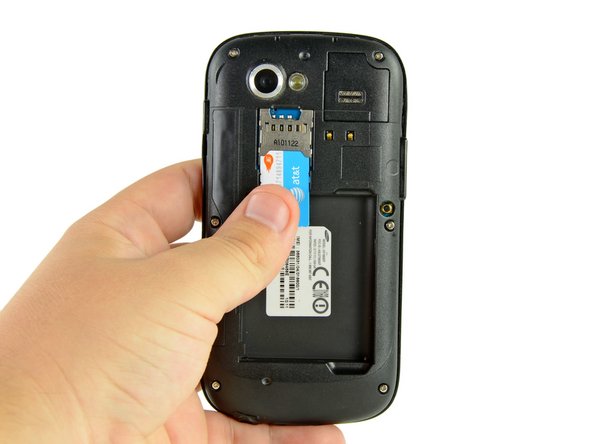
    1. Nexus S Motherboard Replacement, SIM Card: 步骤 4 中的图像 1,2 Nexus S Motherboard Replacement, SIM Card: 步骤 4 中的图像 2,2
      • Use your thumb to slide the SIM card downwards from the SIM card slot.

      • Remove the SIM card.

      询问修复机器人

      添加评论

    1. Nexus S Motherboard Replacement, Rear Inner Frame: 步骤 5 中的图像 1,1
      • Remove the six Phillips screws securing the rear inner frame to the inner case.

      询问修复机器人

      添加评论

    2. Nexus S Motherboard Replacement: 步骤 6 中的图像 1,1
      • Insert the flat edge of a plastic opening tool in between the rear inner frame and the top left corner of the Nexus S.

      • Pry the opening tool upwards to pop the top right corner from the clips securing it to the inner assembly.

      询问修复机器人

      添加评论

    3. Nexus S Motherboard Replacement: 步骤 7 中的图像 1,2 Nexus S Motherboard Replacement: 步骤 7 中的图像 2,2
      • Insert the plastic opening tool to the right of the power button.

      • Slide the plastic opening tool downwards along the perimeter of the Nexus S to release the clips on the right side.

      询问修复机器人

      添加评论

    4. Nexus S Motherboard Replacement: 步骤 8 中的图像 1,2 Nexus S Motherboard Replacement: 步骤 8 中的图像 2,2
      • In the same manner as previously described, release the bottom clips located near the bottom of the Nexus S.

      询问修复机器人

      添加评论

    5. Nexus S Motherboard Replacement: 步骤 9 中的图像 1,1
      • Insert and pry the plastic opening tool to release the final clip securing the rear inner frame to the inner assembly.

      询问修复机器人

      添加评论

    6. Nexus S Motherboard Replacement: 步骤 10 中的图像 1,1
      • Lift and remove the rear inner frame from the Nexus S.

      询问修复机器人

      添加评论

    1. Nexus S Motherboard Replacement, Motherboard: 步骤 11 中的图像 1,1
      • Disconnect the following cables from their respective sockets on the motherboard:

      • Headphone jack cable

      • Digitizer cable connector

      • Camera/SIM board connector

      询问修复机器人

      添加评论

    2. Nexus S Motherboard Replacement: 步骤 12 中的图像 1,3 Nexus S Motherboard Replacement: 步骤 12 中的图像 2,3 Nexus S Motherboard Replacement: 步骤 12 中的图像 3,3
      • Insert the flat edge of a plastic opening tool underneath the headphone jack connector and pry upwards.

      • Make sure to pry on the connector and not the socket itself. Prying the socket may cause severe damage.

      • Repeat the procedure for the digitizer and rear camera/SIM board connectors.

      询问修复机器人

      添加评论

    3. Nexus S Motherboard Replacement: 步骤 13 中的图像 1,1
      • Remove the three Phillips screws securing the motherboard to the front display assembly.

      询问修复机器人

      添加评论

    4. Nexus S Motherboard Replacement: 步骤 14 中的图像 1,2 Nexus S Motherboard Replacement: 步骤 14 中的图像 2,2
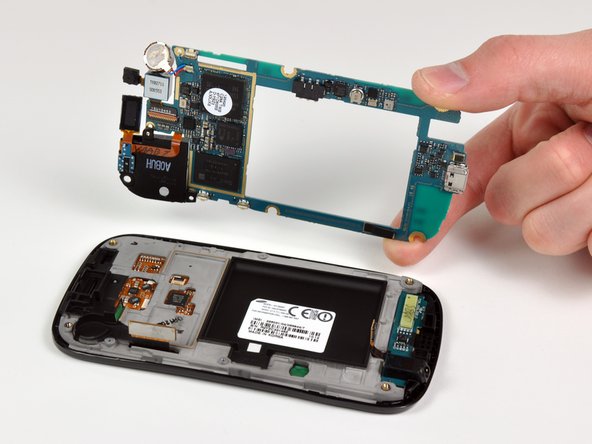
      • Wedge the plastic opening tool near the bottom right corner of the motherboard and pry upwards to dislodge it from its recess.

      • Lift and remove the motherboard.

      询问修复机器人

      添加评论

结论

To reassemble your device, follow these instructions in reverse order.

取消:我没有完成这个指南。

15等其他人完成本指南。

0指南评论

添加评论

浏览统计数据:

过去 24 小时: 1

过去 7 天: 16

过去 30 天: 47

总计 14,667