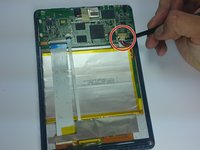
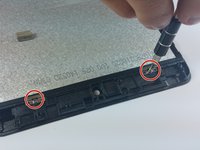
跳转到主内容

Nextbook 8 Screen Replacement

你所需要的

  1. Nextbook 8 Screen Replacement, Battery: 步骤 1 中的图像 1,2 Nextbook 8 Screen Replacement, Battery: 步骤 1 中的图像 2,2
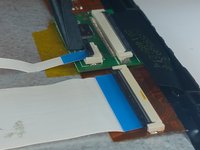
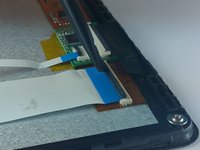
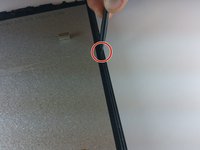
    • Use the plastic opening tool to remove the back cover. Carefully slide the tool between the front glass and back cover.

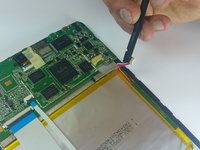
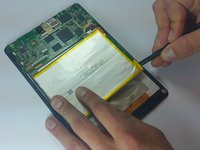
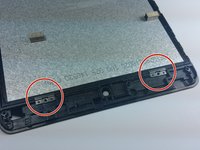
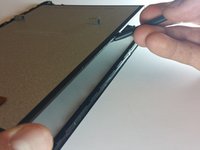
    • Slide the tool along the edge to work the back cover off.

    • It helps to have an extra tool to stick in the gap and keep the back cover separated from the glass as you slide the other tool.

  2. Nextbook 8 Screen Replacement: 步骤 2 中的图像 1,2 Nextbook 8 Screen Replacement: 步骤 2 中的图像 2,2
    • Remove the tape covering the motherboard.

    • Remove the silver tape holding the white ribbon cables to the battery.

  3. Nextbook 8 Screen Replacement: 步骤 3 中的图像 1,2 Nextbook 8 Screen Replacement: 步骤 3 中的图像 2,2
    • Use a spudger to carefully disconnect the battery connector from the motherboard.

    • When working with electronics, it's important to choose a tool that's ESD-safe to avoid accidental damage to the device. The regular black nylon spudger or a plastic opening tool should be used whenever possible.

  4. Nextbook 8 Screen Replacement: 步骤 4 中的图像 1,1
    • Use a spudger to lift up the black bar on the two ZIF connectors located above the battery.

    • Pull the ribbon cables out of the connectors with tweezers or two fingers.

  5. Nextbook 8 Screen Replacement: 步骤 5 中的图像 1,2 Nextbook 8 Screen Replacement: 步骤 5 中的图像 2,2
    • Using the flat end of a spudger, carefully work the spudger under the battery, lifting it off of the device.

    • The battery is very malleable, so do not try to pull it off all at once.

  6. Nextbook 8 Screen Replacement, Screen: 步骤 6 中的图像 1,1
    • Remove the silver and gold sticker at the bottom of the device.

    • Hold the brown circuit board down with your finger while you remove the sticker

  7. Nextbook 8 Screen Replacement: 步骤 7 中的图像 1,2 Nextbook 8 Screen Replacement: 步骤 7 中的图像 2,2
    • Use a spudger to lift up the black tabs on the three ZIF connectors.

    • Use ESD safe tweezers to pull the ribbon cables out of the three connectors.

  8. Nextbook 8 Screen Replacement: 步骤 8 中的图像 1,2 Nextbook 8 Screen Replacement: 步骤 8 中的图像 2,2
    • Remove the 5 black screws on the motherboard.

    • Carefully lift the motherboard off of the device and remove.

  9. Nextbook 8 Screen Replacement: 步骤 9 中的图像 1,2 Nextbook 8 Screen Replacement: 步骤 9 中的图像 2,2
    • Remove the two screws that hold the brackets in place.

    • Remove the two silver brackets that hold the screen in place.

  10. Nextbook 8 Screen Replacement: 步骤 10 中的图像 1,2 Nextbook 8 Screen Replacement: 步骤 10 中的图像 2,2
    • Remove the one silver screw on the small green circuit board at the bottom of the device.

    • Set aside the small circuit board for now.

  11. Nextbook 8 Screen Replacement: 步骤 11 中的图像 1,1
    • Remove the two silver screws from the bottom of the device.

  12. Nextbook 8 Screen Replacement: 步骤 12 中的图像 1,3 Nextbook 8 Screen Replacement: 步骤 12 中的图像 2,3 Nextbook 8 Screen Replacement: 步骤 12 中的图像 3,3
    • With the device face down, use a spudger to lift the screen off of the glass from the right side.

结论

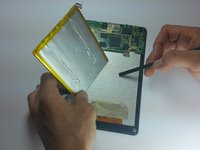
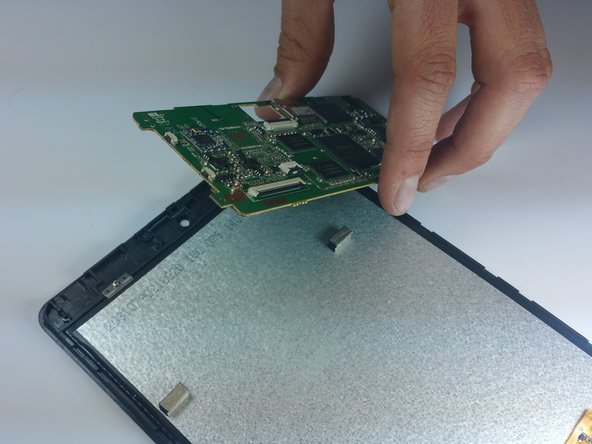
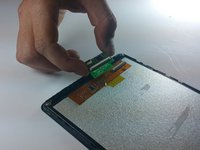
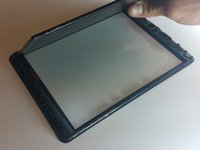
To reassemble your device, follow these instructions in reverse order.

21等其他人完成本指南。

Dylan Wiese

于03/11/15注册

1,853 声望

创作了5篇指南

团队

Colorado Springs, Team 5-1, Panko Spring 2015 Colorado Springs, Team 5-1, Panko Spring 2015 的会员

UCCS-PANKO-S15S5G1

3 名成员

创作了10篇指南

一条评论

where do I find the actual screen though

WiKiT Woo WoNKa - 回复

添加评论

浏览统计数据:

过去 24 小时: 0

过去 7 天: 5

过去 30 天: 12

总计 23,853