简介
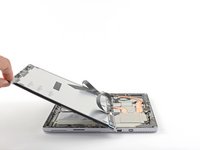
Follow this guide to replace the heat sink and thermal paste on a Microsoft Surface Pro 4.
There is a significant chance that you may break the unreinforced and fragile display panel during this procedure. Be sure to apply adequate heat and be extremely careful while slicing through the adhesive. Wear safety glasses in case the glass shatters.
Applying new thermal paste during reassembly may improve the performance of your Surface. If you wish to do that, make sure you have new thermal paste and either high-concentration isopropyl alcohol or a specialized thermal paste cleaner.
你所需要的
-
-
If your screen glass is cracked, keep further breakage contained and prevent bodily harm during your repair by taping the glass.
-
Lay overlapping strips of clear packing tape over the Surface’s screen until the whole face is covered.
-
Do your best to follow the rest of the guide as described. However, once the glass is broken, it will likely continue to crack as you work, and you may need to use a metal prying tool to scoop the glass out.
-
-
-
Heat an iOpener and apply it to the right edge of the Surface's screen for two minutes.
-
-
-
Take note of the screen adhesive layout before continuing:
-
These areas only contain adhesive and are safe to cut.
-
The display board and flex cables sit here close to the edge. Cut carefully and don't insert the pick more than 1/8 inch (3 mm).
-
Fragile antenna cables lie under this part of the screen. Carefully follow the procedure in step 13 to avoid damaging them. The adhesive is also the thickest here.
-
-
-
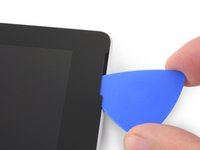
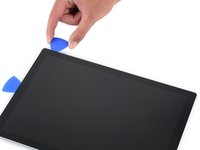
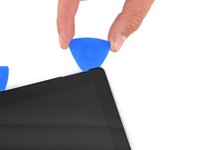
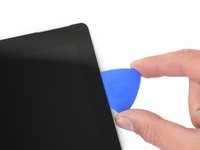
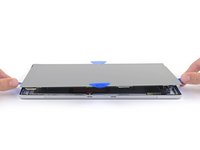
Insert an opening pick into the top-right speaker cutout on the screen and slide the pick between the glass and speaker grille.
-
-
-
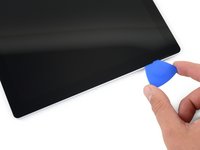
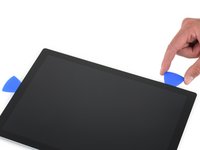
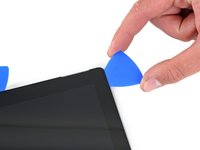
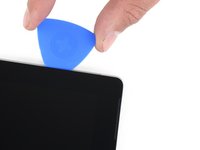
Slide the pick down the right edge of the Surface to slice through the adhesive under the screen.
-
Leave this opening pick in the right edge to prevent the adhesive from resealing.
-
-
-
Reheat your iOpener and apply it to the bottom edge of the Surface's screen for two minutes.
-
-
-
-
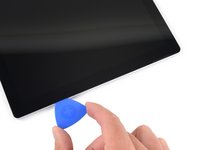
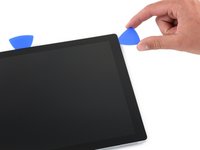
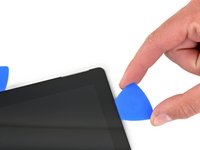
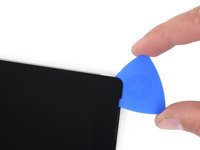
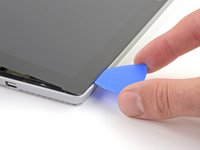
Insert the point of a pick under the screen where you just stopped cutting. Don't insert the pick deeper than the edge of the bezel.
-
Carefully roll the pick to the right, pressing the long edge of the pick into the screen adhesive underneath the bezel, cutting the adhesive as you go. Don't slide the pick along the edge of the Surface.
-
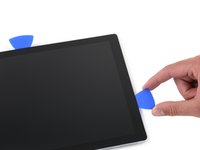
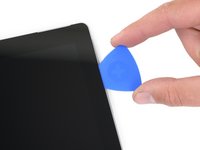
Repeat this motion of inserting the point of the pick where you just cut, and rolling to the right all along the top edge of the Surface, until the pick is 2.5 inches (64 mm) from the right edge of the Surface.
-
-
-
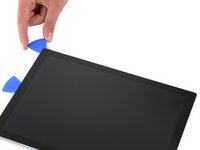
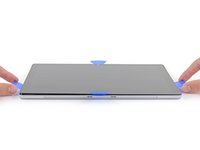
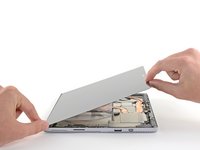
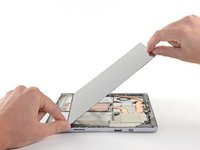
Very slowly lift the screen assembly away from the Surface case. If you encounter any resistance, stop and check that all the adhesive is separated.
-
Use an opening pick to cut through any remaining adhesive.
-
-
在这个步骤中使用的工具:Tweezers$3.99
-
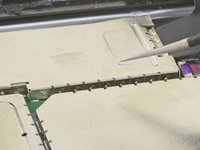
Use one tip of a pair of angled tweezers to pry up the EMI shield from the gaps between the "teeth."
-
Repeat this procedure at different points around the perimeter of the shield until it is free.
-
-
-
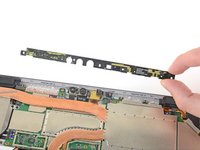
Use your tweezers to remove the two EMI shields covering the display cable connectors.
-
-
-
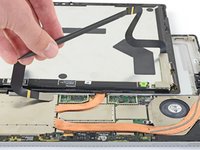
Remove the screen from the Surface.
-
During reassembly, pause here and follow this guide to replace the screen adhesive.
-
-
-
Use a T5 Torx screwdriver to remove the four 4.5 mm screws securing the antenna support bracket.
-
-
在这个步骤中使用的工具:Tweezers$4.99
-
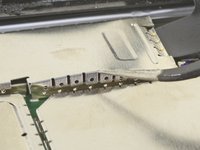
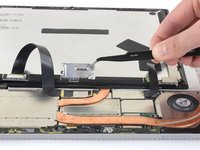
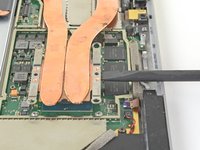
Insert one point of a pair of pointed tweezers into a gap in the corner of the EMI shield covering the heat sink.
-
Use the tweezers to pry the EMI shield away from the motherboard as much as you can without bending it. Do not remove it yet.
-
-
-
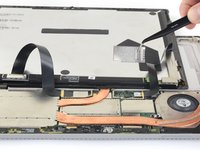
Use a T3 Torx screwdriver to remove two screws from the heat sink:
-
One 2.4 mm screw along the top of the rectangular plate covering the battery.
-
One 2.2 mm screw along the bottom of the rectangular plate covering the battery
-
-
-
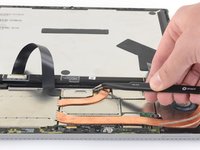
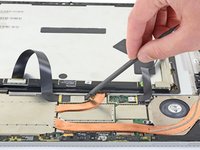
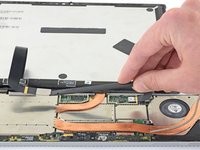
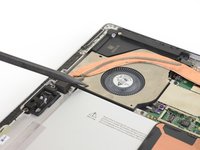
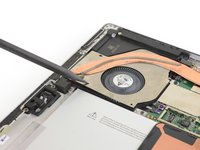
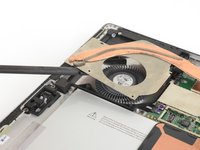
Use the flat end of a spudger to gently pry the heat sink straight up and off of the CPU.
-


To reassemble your device, follow the above steps in reverse order.
Take your e-waste to an R2 or e-Stewards certified recycler.
Repair didn’t go as planned? Try some basic troubleshooting, or ask our Answers community for help.
To reassemble your device, follow the above steps in reverse order.
Take your e-waste to an R2 or e-Stewards certified recycler.
Repair didn’t go as planned? Try some basic troubleshooting, or ask our Answers community for help.
10等其他人完成本指南。
