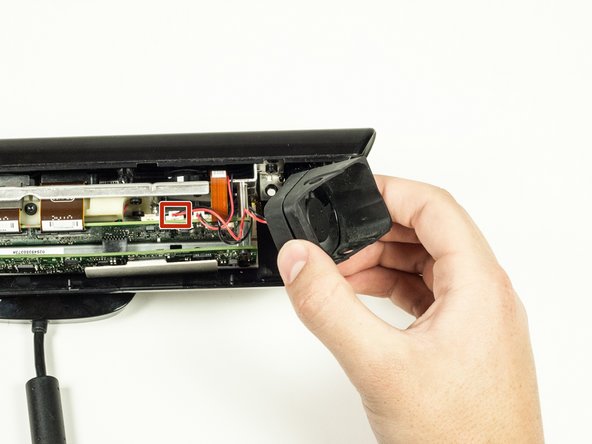
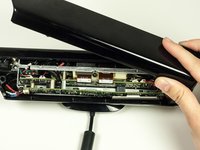
跳转到主内容

Microsoft Kinect Case Replacement

你所需要的

  1. Microsoft Kinect Case Replacement, Case: 步骤 1 中的图像 1,3 Microsoft Kinect Case Replacement, Case: 步骤 1 中的图像 2,3 Microsoft Kinect Case Replacement, Case: 步骤 1 中的图像 3,3
    • Remove the two plastic strips off the bottom of the main Kinect housing using the metal spudger's sharper side.

    • Peel off the two Xbox 360 stickers from the bottom of the case to reveal two hidden screws.

    • Some force may be required to remove the adhesive. Applying heat to the adhesive may make it easier to remove.

    • Do not overheat as it may cause damage to the internal components.

  2. Microsoft Kinect Case Replacement: 步骤 2 中的图像 1,1
    • Unscrew the six 12mm T10 Torx screws.

  3. Microsoft Kinect Case Replacement: 步骤 3 中的图像 1,3 Microsoft Kinect Case Replacement: 步骤 3 中的图像 2,3 Microsoft Kinect Case Replacement: 步骤 3 中的图像 3,3
    • Remove the top portion of the case from the rest of the body.

    • Detach the side portions of the case from the body.

    • Remove the fan piece from the side of the body. Unplug it from the logic board to fully remove it.

    • When unplugging the fan, be sure to pull from the white connector at the end of the wire to avoid breaking it.

  4. Microsoft Kinect Case Replacement: 步骤 4 中的图像 1,1
    • Remove the bottom portion of the case by sliding it out from under the body.

    • The bottom of the case may be difficult to remove if there is any residual adhesive. If the residual adhesive prevents you from removing the case, apply gentle heat and wiggle the case out.

  5. Microsoft Kinect Case Replacement: 步骤 5 中的图像 1,2 Microsoft Kinect Case Replacement: 步骤 5 中的图像 2,2
    • Remove the four 7mm T10 Torx screws (two on each side of the metal body).

  6. Microsoft Kinect Case Replacement: 步骤 6 中的图像 1,2 Microsoft Kinect Case Replacement: 步骤 6 中的图像 2,2
    • Remove the front portion of the case containing the lens coverings for the cameras.

    • The LED component is connected to the front portion of the case. To disconnect it, just pull it out of its plastic connector.

结论

To reassemble your device, follow these instructions in reverse order.

4等其他人完成本指南。

Sumi Kime

于04/22/15注册

234 声望

创作了2篇指南

团队

Cal Poly, Team 14-7, Amido Spring 2015 Cal Poly, Team 14-7, Amido Spring 2015 的会员

CPSU-AMIDO-S15S14G7

4 名成员

创作了6篇指南

0条评论

添加评论

浏览统计数据:

过去 24 小时: 0

过去 7 天: 2

过去 30 天: 12

总计 1,490