跳转到主内容
加入维修社区 - 创建账户

此翻译由机器生成,尚未经过人工审核。 会说这种语言吗? 查看评论

MacBook Pro 17英寸一体式显示屏更换

你所需要的

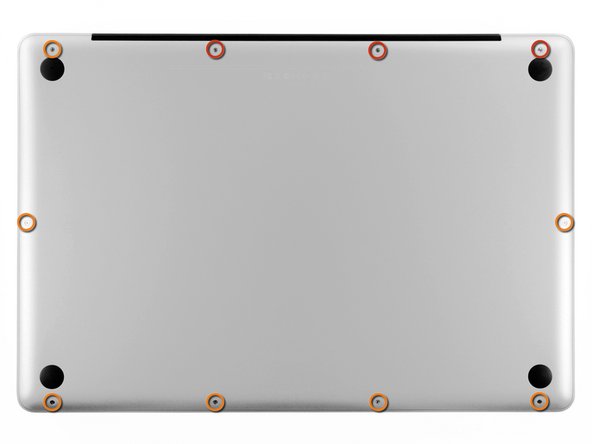
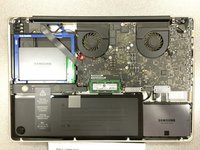
    1. MacBook Pro 17英寸一体式显示屏更换, 底壳: 步骤 1 中的图像 1,1
      • 拆下以下十个将背板固定在上壳上的螺丝:

      • 三颗13.5mm十字螺丝。

      • 七颗3mm十字螺丝。

      添加评论

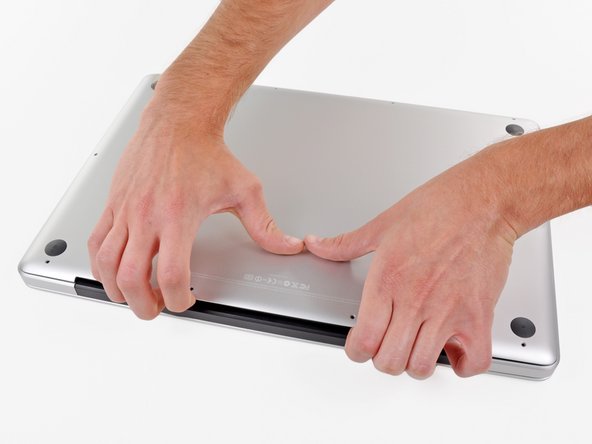
    2. MacBook Pro 17英寸一体式显示屏更换: 步骤 2 中的图像 1,2 MacBook Pro 17英寸一体式显示屏更换: 步骤 2 中的图像 2,2
      • 用手指楔入下壳和通风口之间,然后向上抬起以释放将下壳固定在上壳上的两个夹子。

      • 在重新组装过程中,小心地对齐下壳,然后用力按压,直到两个夹子接合。

      • 移走后壳。

      添加评论

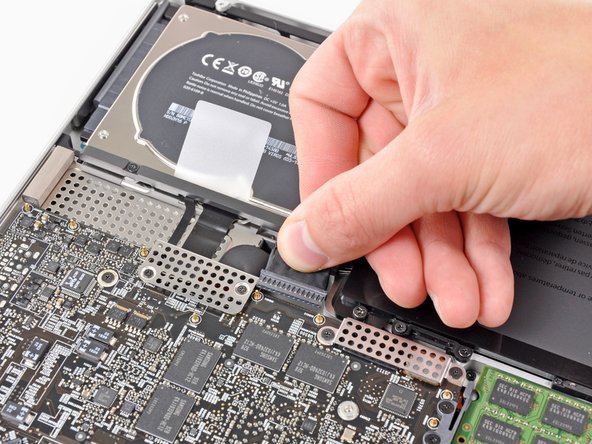
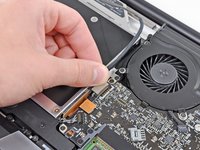
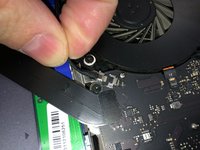
    1. MacBook Pro 17英寸一体式显示屏更换, 电池: 步骤 3 中的图像 1,3 MacBook Pro 17英寸一体式显示屏更换, 电池: 步骤 3 中的图像 2,3 MacBook Pro 17英寸一体式显示屏更换, 电池: 步骤 3 中的图像 3,3
      • 每当靠近逻辑板工作时,首先断开电池以避免短路总是明智的。

      • 如果有,抓住连接到电池连接器的塑料卡舌并将其拉向设备的前缘。对于2011年后期的型号,电池连接器将没有标签,只是一个插头,直接插入主板-用于直接向上撬起插头。

      • 如果塑料卡舌丢失,请使用撬棍将连接器从插座中撬起。

      • 平行于逻辑板面拉动卡舌。

      添加评论

    1. MacBook Pro 17英寸一体式显示屏更换, 屏幕: 步骤 4 中的图像 1,2 MacBook Pro 17英寸一体式显示屏更换, 屏幕: 步骤 4 中的图像 2,2
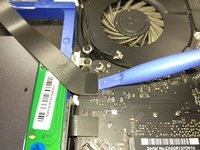
      • 断开摄像头电缆之前,必须先将粘在逻辑板上的小塑料固定器移开。在2011年末的型号中,您可以跳过此步骤,因为相机电缆连接器上没有塑料固定器。

      • 使用撬棍的尖端将小塑料电缆固定器从摄像头电缆插座中推出,以留出足够的间隙以拆下摄像头电缆。

      添加评论

    2. MacBook Pro 17英寸一体式显示屏更换: 步骤 5 中的图像 1,2 MacBook Pro 17英寸一体式显示屏更换: 步骤 5 中的图像 2,2
      • 将摄像头电缆拉向光驱开口,将其从逻辑板断开。

      • 相机电缆插座非常脆弱。不要对这个插座施加任何向上的力,因为它可能会从逻辑板上折断。将摄像头电缆与逻辑板的正面平行拉。

      添加评论

    3. MacBook Pro 17英寸一体式显示屏更换: 步骤 6 中的图像 1,1
      • 小心地将蓝牙线缆朝风扇方向拉,以将其从蓝牙板上断开。

      • 沿平行于光驱表面的方向拉动线缆。

      添加评论

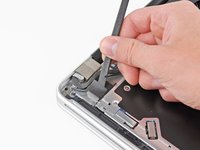
    4. MacBook Pro 17英寸一体式显示屏更换: 步骤 7 中的图像 1,2 MacBook Pro 17英寸一体式显示屏更换: 步骤 7 中的图像 2,2
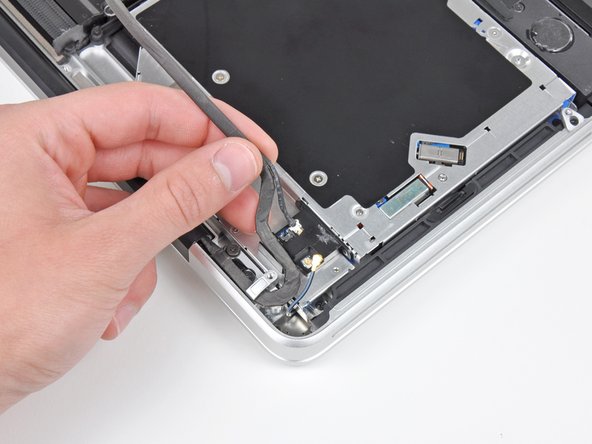
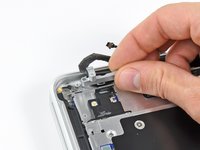
      • 使用撬棒的平头端揭开蓝牙板外壳顶部和侧面的薄塑料盖板。对于 2011 年末款机型,请查看另一张图片,因为其连接器位置完全不同。

      询问修复机器人
      添加评论

    5. MacBook Pro 17英寸一体式显示屏更换: 步骤 8 中的图像 1,1
      • 使用撬棒的扁平端撬起蓝牙天线连接器,将其从蓝牙连接器板的插孔上分离。

      询问修复机器人

      添加评论

    6. MacBook Pro 17英寸一体式显示屏更换: 步骤 9 中的图像 1,2 MacBook Pro 17英寸一体式显示屏更换: 步骤 9 中的图像 2,2
      • 如果存在,请拆下蓝牙板附近的这一小块电磁屏蔽泡沫。

      • 将摄像头排线从蓝牙板外壳模塑的槽中取出。

      询问修复机器人

      添加评论

    7. MacBook Pro 17英寸一体式显示屏更换: 步骤 10 中的图像 1,2 MacBook Pro 17英寸一体式显示屏更换: 步骤 10 中的图像 2,2
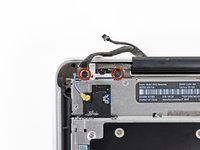
      • 拧下将摄像头排线压板固定在上壳上的两颗 7.1 mm 十字螺丝。

      • 从上壳上取下摄像头排线压板。

      询问修复机器人

      添加评论

    8. MacBook Pro 17英寸一体式显示屏更换: 步骤 11 中的图像 1,3 MacBook Pro 17英寸一体式显示屏更换: 步骤 11 中的图像 2,3 MacBook Pro 17英寸一体式显示屏更换: 步骤 11 中的图像 3,3
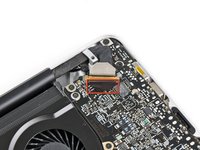
      • 掀起显示屏排线固定架上的黑色塑料翻盖,并将其朝 MacBook 的直流输入口(DC-In)方向翻转。

      • 将显示屏排线从插孔中拔出。

      • 显示屏排线插孔非常脆弱。在断开连接时,不要向上提起连接器,以免插孔从逻辑板上断裂。请保持线缆与逻辑板平面平行地进行拔出。

      询问修复机器人
      添加评论

    9. MacBook Pro 17英寸一体式显示屏更换: 步骤 12 中的图像 1,2 MacBook Pro 17英寸一体式显示屏更换: 步骤 12 中的图像 2,2
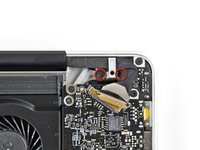
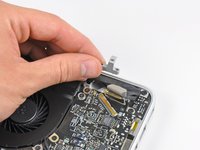
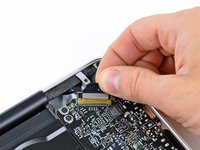
      • 拧下两颗用于将显示屏排线压板固定在机身上方的 7.1 mm 十字螺丝。

      • 拆下显示屏排线压板。

      询问修复机器人
      添加评论

    10. MacBook Pro 17英寸一体式显示屏更换: 步骤 13 中的图像 1,2 MacBook Pro 17英寸一体式显示屏更换: 步骤 13 中的图像 2,2
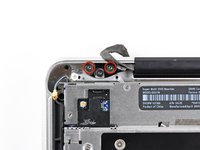
      • 从两个显示屏支架的每个支架上各拆下两颗 6.8 mm T6 Torx 螺丝(总共四颗螺丝)。

      • 为了方便后续步骤,我们特意留下一颗螺丝,用于将每个显示屏支架固定在机壳上。

      添加评论

    11. MacBook Pro 17英寸一体式显示屏更换: 步骤 14 中的图像 1,1
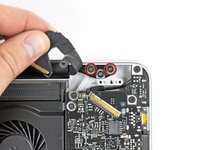
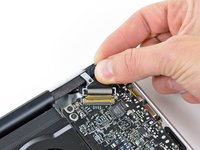
      • 打开 MacBook Pro,使显示屏与机身上壳呈垂直状态。

      • 如图所示,将打开的 MacBook Pro 放在桌面上。

      • 用左手握住显示屏和机身上壳,拆下下显示屏支架上剩余的一颗 T6 Torx 螺丝。

      询问修复机器人
      添加评论

    12. MacBook Pro 17英寸一体式显示屏更换: 步骤 15 中的图像 1,1
      • 请务必用左手将显示屏和上盖固定在一起。否则,松脱的显示屏/上盖可能会掉落,从而损坏各组件。

      • 拧下将显示屏固定在上盖上的最后一颗 T6 Torx 螺丝。

      询问修复机器人

      添加评论

    13. MacBook Pro 17英寸一体式显示屏更换: 步骤 16 中的图像 1,3 MacBook Pro 17英寸一体式显示屏更换: 步骤 16 中的图像 2,3 MacBook Pro 17英寸一体式显示屏更换: 步骤 16 中的图像 3,3
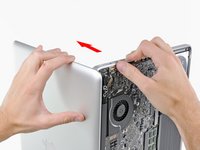
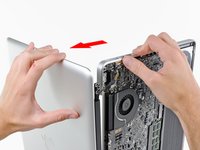
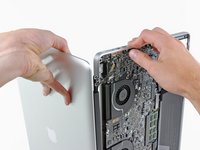
      • 用右手抓住外壳上部,将其稍微向显示屏顶部旋转,使上部显示屏支架避开外壳上部的边缘。

      • 将显示屏稍微向远离外壳上部的方向旋转。

      • 提起显示屏,使其脱离外壳上部,注意不要钩住任何支架或线缆。

      • 重新组装时,将显示屏放入到位并安装显示屏支架 Torx 螺丝,然后合上盖子并将笔记本电脑倒置,检查屏幕与机身的对齐情况。如有必要,可拧松螺丝并重新调整显示屏,然后再拧紧。

      询问修复机器人

      添加评论

结论

要重新组装设备,请按相反的顺序执行这些说明。

取消:我没有完成这个指南。

43等其他人完成本指南。

由衷感谢以下译者:

en zh

100%

ChenTianyu正在帮助我们修复这个世界! 您也想加入吗?
开始翻译 ›

9指南评论

This guide was a bit difficult to follow because the photos didn't represent 'exactly' what I was seeing. I was able to find the corresponding connections.

The trouble I'm having is the guide seems to end a few steps too soon. I still have a display inside the upper shell, the piece with the Apple logo. I'm very concerned for the well-being of the 'old' pieces in question. I have to save the upper case piece while extracting the display.

Any ideas please?

buz - 回复 分享

The title is misleading, and only covers the upper shell removal. I believe your issue is that you want to replace the display panel only, and not the enclosure or camera device. In most cases, however, technicians will simply counsel replacement of the entire upper shell, as replacing inner display components will rack up service hours and end up costing the equivalent of a new shell.

From an iFixit perspective, however, this is moot. You could find a display panel component on ebay, and do the work. I hope you found a more in-depth guide.

brendonwbrown - 回复 分享

According to comments from iFixit on the teardown (MacBook Pro 17" 一体成型机身拆解), they don’t consider the upper case assembly to be repairable. See comments on step 23 of the teardown.

If anyone has been able to open and close the upper case without damaging it, please share the procedure with the rest of us!

shamino - 回复 分享

How much of this do I need to do simply to replace the LVDS cable?

RB1234 - 回复 分享

17” 2011 Macbook Pro 2.5 (BTO) has a different section at the left hand side, the part where the cables for the wireless hook up. Pay attention to the layout and think before untying any screws. The board that hooks up the wireless is “in” a separate bridge, installed next to the DVD writer with independent screws for suspension.

Mel - 回复 分享

添加评论

浏览统计数据:

过去 24 小时: 7

过去 7 天: 39

过去 30 天: 148

总计 77,282