简介
Use this guide to remove or replace the audio board in a Late 2020 MacBook Air (M1). The 3.5 mm audio jack is connected to this board.
你所需要的
-
在这个步骤中使用的工具:Magnetic Project Mat$19.95
-
If your MacBook is running Big Sur v11.1 or later, disabling Auto Boot may not work. You can proceed normally, but make sure to disconnect the battery as soon as you're inside.
-
Use a P5 driver to remove the following screws:
-
Two 7.9 mm screws
-
Two 7.3 mm screws
-
Six 2.6 mm screws
-
-
-
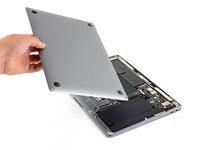
Wedge your fingers between the display and the lower case and pull upward to pop off the lower case.
-
Remove the lower case.
-
Set it in place and press firmly to engage the two hidden clips underneath. You should feel and hear them snap into place.
-
-
-
Use the flat end of a spudger to pry up and unlatch the metal locking arm on the battery connector.
-
Lift straight up on the metal locking arm to pull the battery connector out of its socket on the logic board.
-
If necessary, push the rear, wire side of the connector into place first, then rock the front of the connector into place.
-
-
-
Use a T3 Torx driver to remove the three 1.4 mm screws securing the audio board connector cover.
-
-
-
-
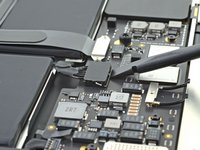
Slide the pointed end of a spudger underneath the speaker cable and pry straight up to disconnect it.
-
-
-
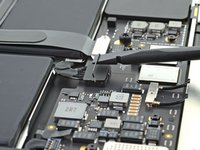
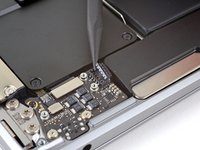
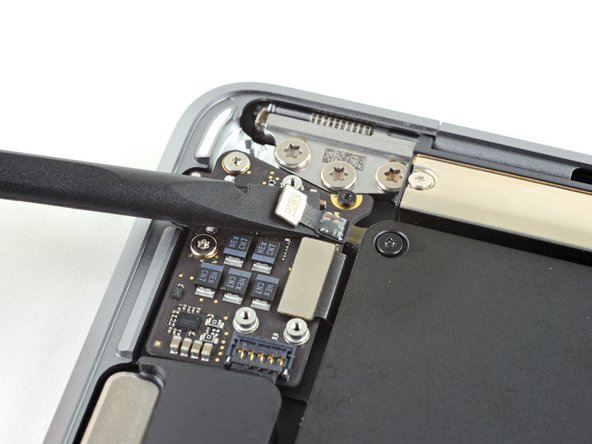
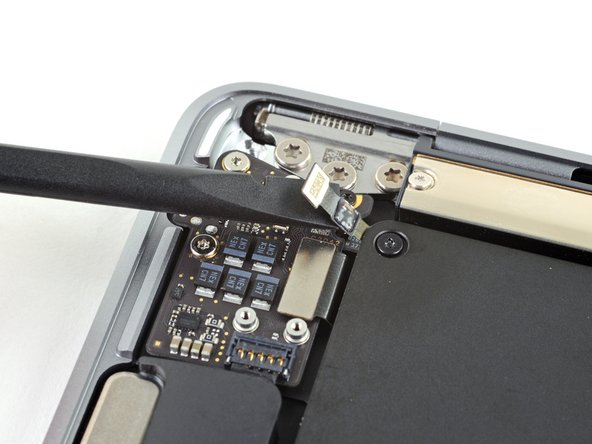
Use the flat end of a spudger to pry the Touch ID cable straight up to disconnect it from the audio board.
-
Continue to slide the spudger underneath the Touch ID cable to release it from the audio board.
-
-
-
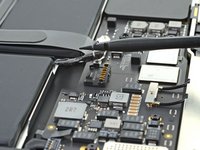
Use the flat end of a spudger to pry the audio board connector straight up to disconnect it from the board.
-
-
-
Remove the three screws securing the audio board:
-
Two 4.8 mm T5 Torx screws
-
One 2.5 mm T3 Torx screw
-
-
-
Use a spudger to pry the audio board out of the upper case until you can grip it with your fingers.
-
Remove the audio board.
-


Compare your new replacement part to the original part—you may need to transfer remaining components or remove adhesive backings from the new part before installing.
To reassemble your device, follow the above steps in reverse order.
Once you've completed your repair, your laptop may not power back on until connected to power.
Take your e-waste to an R2 or e-Stewards certified recycler.
Repair didn’t go as planned? Check out our Answers community for troubleshooting help.
11等其他人完成本指南。


2条评论
Ich hatte einen Wasserschaden und seit diesem funktionieren die Lautsprecher nicht mehr. Es kommt kein Ton raus aus beiden Seiten. Zunächst hörte ich noch das Neustartgeräusch. Nachdem ich aber den dann Laptop auseinandergebaut, getrocknet und wieder zusammengebaut hatte kein Ton mehr. Die Lautsprecher selbst wurde allerdings nicht wirklich nass. Kann die Audioplatine hier die Ursache sein und ein Austausch helfen? Die anderen Funktionen, wie Touch-ID, die über die Audioplatine laufen, funktionieren allerdings noch. Gibt es sonst noch ein einzelnes Bauteil oder Kabel, welches dafür verantwortlich sein könnte?
Ich gehe davon aus, dass die Lautsprecher an sich noch intakt sind.
Richard,
Entschuldigen Sie zunächst mein schlechtes Deutsch. Es lohnt sich wahrscheinlich, die Audioplatine auszubauen und anschließend zu reinigen. Verwenden Sie zum Reinigen der Anschlüsse >90% Isopropylalkohol und eine weiche Bürste wie eine Zahnbürste. Auf sichtbare Korrosion prüfen. Konzentrierte sich der Wasserschaden auf die Nähe der Audioplatine? Ich glaube nicht, dass Wasser den Lautsprechern Schaden zufügen würde, es sei denn, sie würden in Wasser getaucht, oder dass das Wasser speziell ihren Stecker beschädigt hätte. Viel Glück bei deiner Reparatur. Ich bin gespannt, ob Sie das Problem lösen.