简介
Use this guide to replace the upper case.
你所需要的
-
在这个步骤中使用的工具:P5 Pentalobe Screwdriver Retina MacBook Pro and Air$5.99
-
Remove the following ten screws:
-
Two 9 mm 5-point Pentalobe screws
-
Eight 2.6 mm 5-point Pentalobe screws
-
-
-
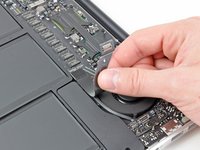
Grab the clear plastic pull tab attached to the battery connector and pull it toward the front edge of the Air to disconnect the battery from the logic board.
-
-
-
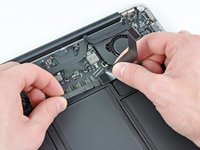
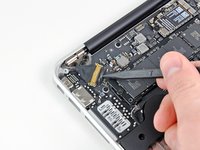
Use the flat end of a spudger to pry the I/O board cable connector upward out of its socket on the I/O board.
-
-
-
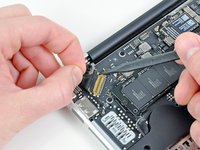
Disconnect the I/O board by pulling the power cable away from its socket on the logic board.
-
-
-
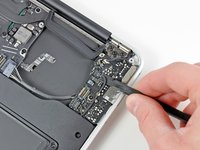
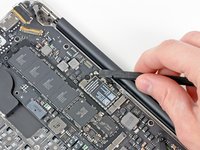
Pull the camera cable parallel to the face of the I/O board toward the corner of the Air to disconnect it from its socket, using the tip of a spudger to help push the connector out of its socket.
-
-
-
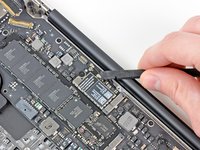
Remove the single 3.6 mm T5 Torx screw securing the I/O board to the upper case.
When inserting new board, make sure the headphones jack socket rim is registered properly with the case hole before tightening T5 screw.
-
-
-
-
Remove the following five screws securing the battery to the upper case:
-
Three 6.3 mm T5 Torx screws
-
Two 2.4 mm T5 Torx screws
-
-
-
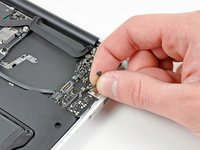
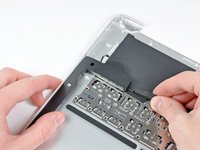
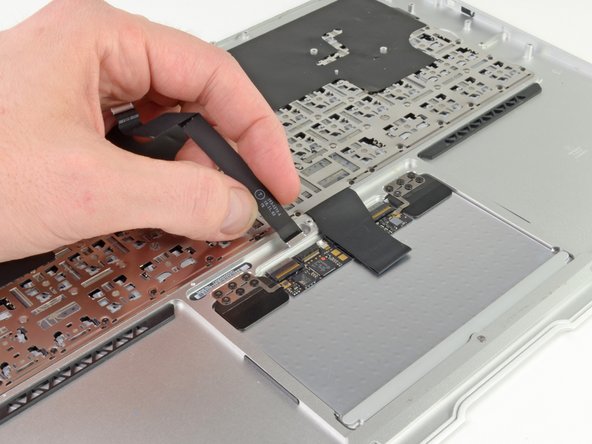
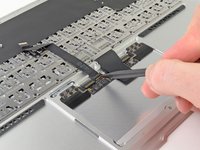
Use the tip of a spudger or your fingernail to flip up the retaining flap on the trackpad ribbon cable ZIF socket.
-
Pull the trackpad ribbon cable straight out of its socket toward the front edge of the Air.
-
-
-
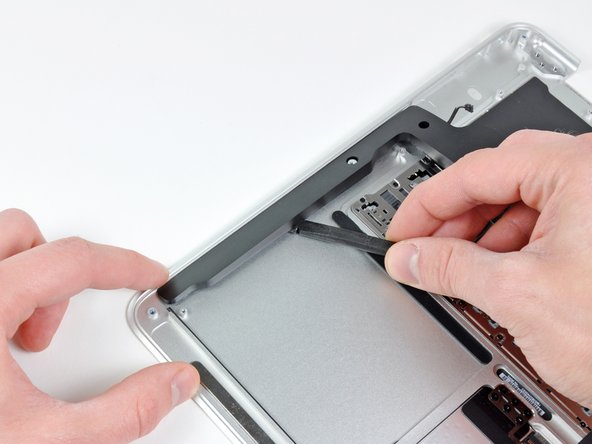
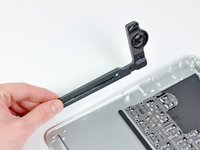
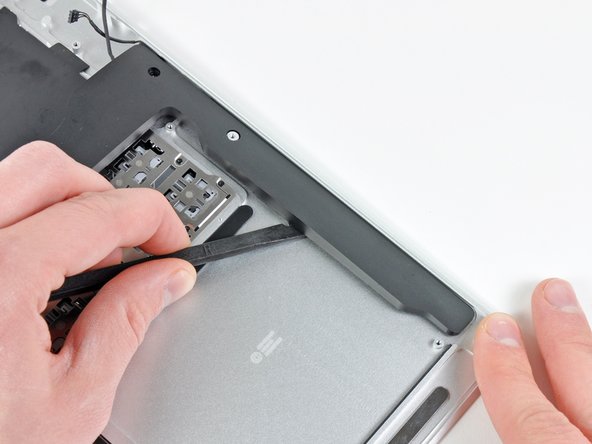
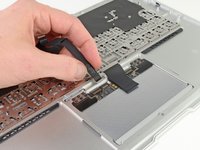
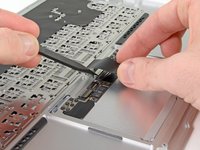
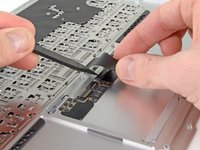
Gently push the tip of a spudger under the black plastic flap stuck to the display data cable lock to make the lock pop upward and away from the socket.
-
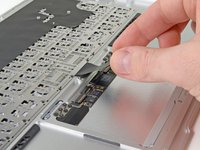
While holding the lock away from the socket, use the tip of a spudger and your fingers to gently remove the display data cable from its socket by sliding it toward the corner of the Air.
-
-
-
Use the flat end of a spudger to pry both antenna cable connectors up and off their sockets on the AirPort/Bluetooth card.
-
-
-
Remove the single 2.85 mm T5 Torx screw securing the SSD to the logic board.
-
-
-
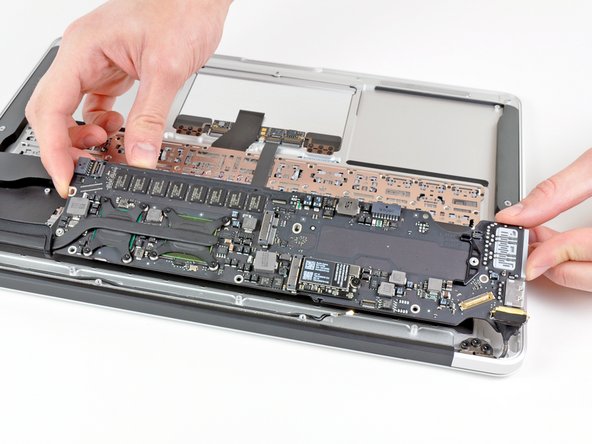
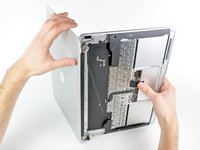
Carefully remove the logic board assembly from the upper case, minding any cables that may get caught.
I also had an issue with the logic board installation as the above comment mentioned. I found easiest way is to just remove the speaker that you just re-installed. It's 1 screw - take that speaker out and now that wire that was bumping logic board is out of the way, and just then re-install the speaker.
When replacing the logic board, make sure the two rf connectors are out of the way before you put the screws back.
-
-
-
Gently de-route the antenna cables out of the channel cut into the upper case.
-
-
-
Remove the single 2.7 mm T5 Torx screw securing the right speaker to the upper case.
-
-
-
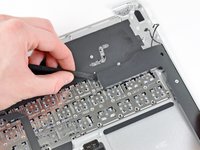
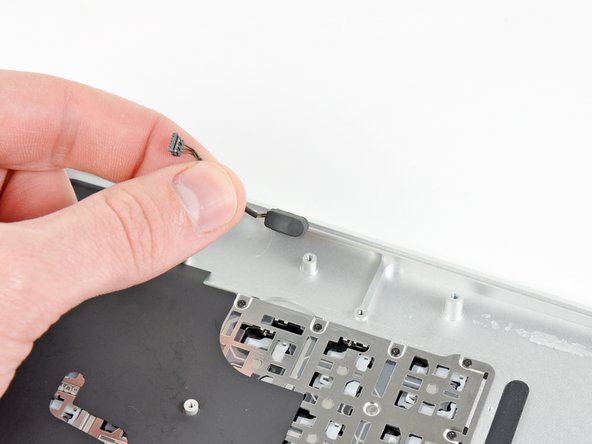
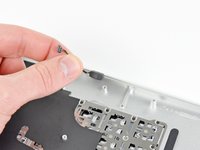
Use the tip of a spudger to pry the microphone away from the left side of the upper case.
-
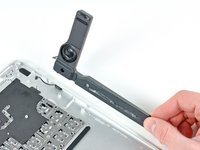
Remove the microphone from the upper case.
-
Upper case remains.
Thing to note when re-attaching the microphone - make sure that its sensor, which is located at bottom, is aligned with the hole.
-
-
-
Remove the following seven screws:
-
Six 1.6 mm Phillips screws securing the the trackpad to the upper case.
-
One 1.4 mm T5 Torx set screw near the front edge of the upper case.
Great guide. The only problem was that I didn't have such small Phillips screwdriver for the last step, so I needed to make a quick trip to a shop. Although it's standard tool, perhaps it makes sense to add it to required tools section?
@Jaroslaw Lipski (or anyone else) - I ran into the same problem in that I did not have a small enough Phillips screwdriver for the last step -- Does anyone know what exact screwdriver I need?
PH00 and push high pressher. but sometime false and cannot screw any more. its too difficult and never back. I cannot and buy keyboard and trackpad.
taizoy0725 - 回复
-


To reassemble your device, follow these instructions in reverse order.
To reassemble your device, follow these instructions in reverse order.
36等其他人完成本指南。

7指南评论
I'm pretty experienced in dismantling/reassembling Aluminum MacBook Pros, plastic MacBooks, aluminum Powerbooks and various iBooks and this was not bad at all. Mostly just time-consuming.
I'm not sure I'd rate it as "difficult" for those with previous experience. The screw count is particularly low by comparison to other machines I've worked on, and there are only a few different types of screw.
The new top case arrived with the adhesives to re-secure the speakers, new screws to attach the trackpad, and the microphone was pre-installed.
Excellent guide, and a great help as always. Thanks!
I just repaired my mba after spilling some juice on it... I did it in about 2hours, i kept track of the screws in each step and i must say it wasn't difficult at all, and i have no experience with computer so.. Just be careful with some wires and when you disconnect the monitor but that's all. I'm so happy my mba works again! The upper case and the tools arrived very quick and with adhesives and some extra screws (much appreciated since the stock screws were kind of damaged and i had to break one) for the trackpad. Thanks ifixit!
Just completed the upper case replacement today due to a failed keyboard and also a failed touch pad (due to liquid damage). Took a few hours to take it apart (and be careful as I was doing it) found hardest part was keeping track of screws and parts. I ended up using plastic red/white Solo cups with the Step # written on each cup (so you don't confuse the screws per step). Undoing the retaining clips for ribbon wires was hardest part highly recommend using a spudger with a fine tip as these are very tiny parts.
The instructions were great. I used a white plastic ice-tray to hold the screws and fill each cube up sequentially. All you have to do, is work backwards through the recesses to where you started. No way to mix things up and hard to tip over.
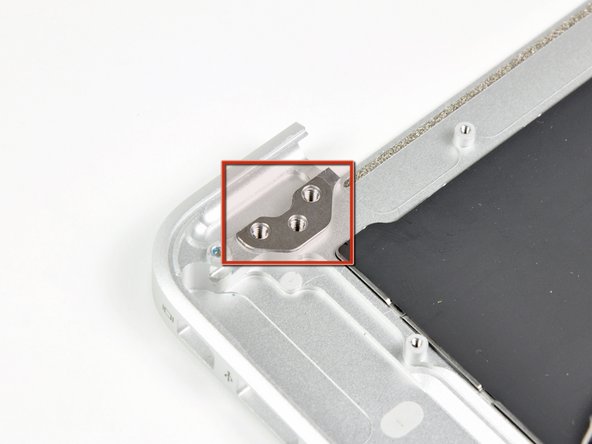
Photos and descriptions are so good I was able to do this with no experience. My wife and I did it together which was like a cheap date. Two people came in handy mating the display to the hinges while keeping the shims lined up.
We had to temporarily tape the shims in place to get things to line up for screw installation.That was the crux move of this repair.Thank you for the write up.
Great guide - ice tray idea was good - wrote numbers of the compartments with a sharpie, and wrote them on the printed guide. Took around 1.5 hours to do a keyboard (ie, bottom half of laptop) swap.
Noted that the rubber gasket around the fan didnt quite go back properly (should be noted it seems to need to be fitted before the logic board goes back).
Also I picked up a replacement bottom half from ebay with the speakers and mike already in place, so that removed the most dubious part of the exercise.
Wouldnt call this hard - id call it medium…. Hard is a screen swap on a 3DS - I failed on that one… RIP 3ds
Also was surprised how easy the screen connector was to open / close, and by how small the flaps are on the other flatflex connectors.