跳转到主内容
加入维修社区 - 创建账户

此翻译由机器生成,尚未经过人工审核。 会说这种语言吗? 查看评论

Mac Pro 第一代电源更换

你所需要的

    1. Mac Pro 第一代电源更换, 机箱盖板: 步骤 1 中的图像 1,1
      • 抬起拉杆以解锁机箱。

      询问修复机器人

      添加评论

    2. Mac Pro 第一代电源更换, 拆下侧盖板: 步骤 2 中的图像 1,1
      在这个步骤中使用的工具:
      Anti-Static Wrist Strap
      $7.95
      • 拆下 Mac Pro 的侧盖板。

      • 在接触任何内部组件之前,请通过触摸接地表面来释放静电。触摸金属 PCI 插槽盖板,或任何其他接地的金属表面效果很好。你也可以佩戴 防静电腕带

      询问修复机器人

      添加评论

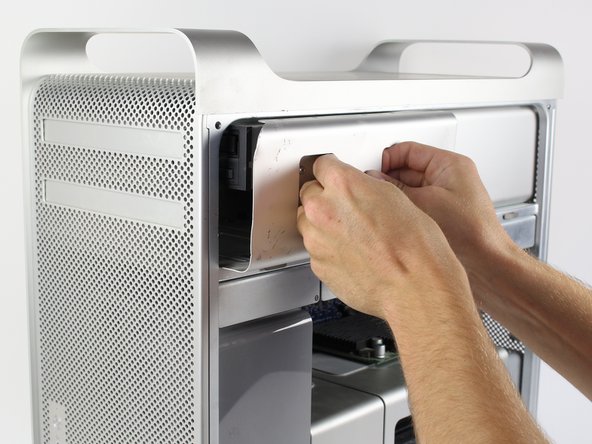
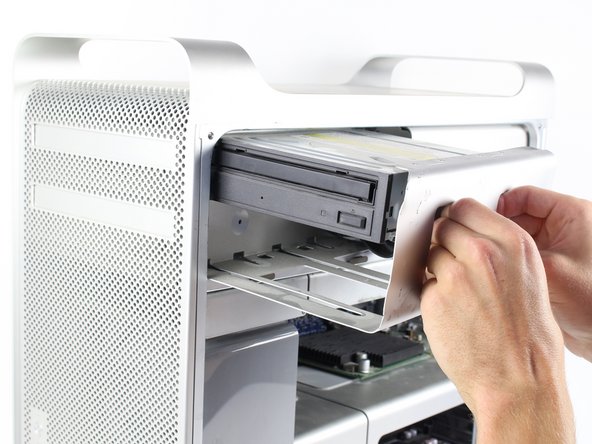
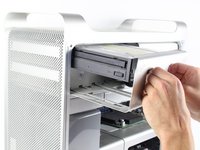
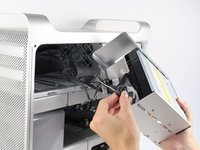
    1. Mac Pro 第一代电源更换, 拆卸光驱: 步骤 3 中的图像 1,3 Mac Pro 第一代电源更换, 拆卸光驱: 步骤 3 中的图像 2,3 Mac Pro 第一代电源更换, 拆卸光驱: 步骤 3 中的图像 3,3
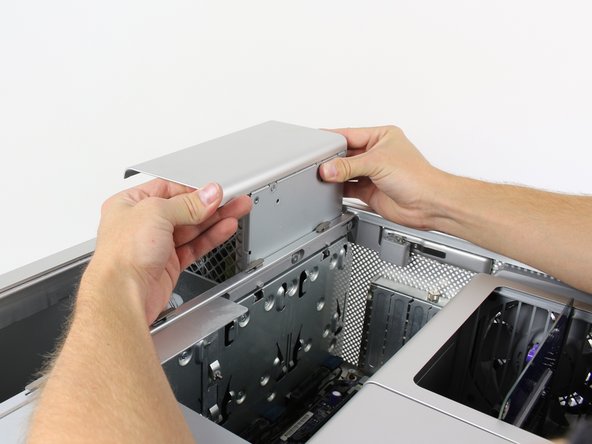
      • 必须拆下光驱才能接触到电源单元。

      • 紧紧握住所示舱位的把手,用力向外拉,以拆卸光驱托架。

      添加评论

    2. Mac Pro 第一代电源更换, 断开磁盘驱动器连接: 步骤 4 中的图像 1,2 Mac Pro 第一代电源更换, 断开磁盘驱动器连接: 步骤 4 中的图像 2,2
      • 握住两个连接器,分别将其从各自的插孔中拔出。

      询问修复机器人

      添加评论

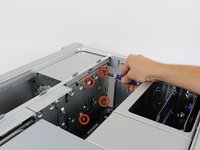
    3. Mac Pro 第一代电源更换, 拆卸电源单元: 步骤 5 中的图像 1,2 Mac Pro 第一代电源更换, 拆卸电源单元: 步骤 5 中的图像 2,2
      • 使用 2 mm Phillips 螺丝刀拧下标记出的 4 颗 6-32 六角螺丝。

      • 下方还有多颗十字螺丝。无需拆卸这些螺丝即可取出电源单元。

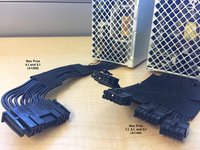
      • 请注意,Mac Pro 1,1 到 3,1 的电源单元与 Mac Pro 4,1 和 5,1 的电源单元有所不同。

      询问修复机器人

      添加评论

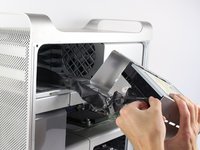
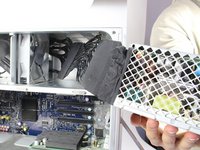
    4. Mac Pro 第一代电源更换, 拆卸电源: 步骤 6 中的图像 1,3 Mac Pro 第一代电源更换, 拆卸电源: 步骤 6 中的图像 2,3 Mac Pro 第一代电源更换, 拆卸电源: 步骤 6 中的图像 3,3
      • 取出电源时请小心,因为它连接了多根电缆,且留出的余量很小。

      • 握住电源外壳左侧的把手,同时捏住电源外壳右侧,向上用力拉动将其取出。

      添加评论

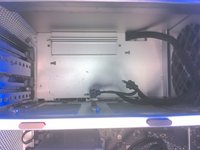
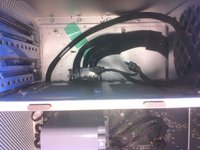
    5. Mac Pro 第一代电源更换, 如果电源只能拉出几英寸: 步骤 7 中的图像 1,2 Mac Pro 第一代电源更换, 如果电源只能拉出几英寸: 步骤 7 中的图像 2,2
      • 对于 Mac Pro(2008 年初/9 年初),也称为 MacPro3,1,其电源螺丝是 2.5 mm 内六角螺丝,而非 T-10。此外,必须先拆下光驱后面的盖板(2 颗十字螺丝),以露出电源线连接器;在取出电源之前,必须断开这些连接器并将其滑到风扇下方。

      添加评论

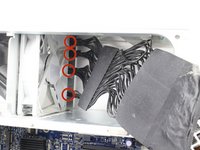
    6. Mac Pro 第一代电源更换, 断开电源: 步骤 8 中的图像 1,2 Mac Pro 第一代电源更换, 断开电源: 步骤 8 中的图像 2,2
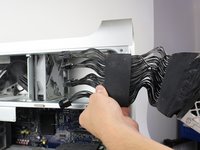
      • 找到四根带有标记的线缆。

      • 按下每个线缆连接器上方的卡扣,同时紧握连接器将其向后拉,即可卸下。

      添加评论

结论

要重新组装设备,请按相反顺序执行这些说明。

取消:我没有完成这个指南。

79等其他人完成本指南。

Eric Kuhta

于10/12/14注册

1,241 声望

撰写一个指南

团队

Cal Poly, Team 6-24, Maness Fall 2014 Cal Poly, Team 6-24, Maness Fall 2014 的会员

CPSU-MANESS-F14S6G24

4 名成员

创作了72篇指南

23指南评论

15 min power on after off

Manish Kumar - 回复 分享

Hi

Very difficult to find the exact size of the bit for the screwdriver. And it is very tight to unscrew one of the screws.

Maybe I had spoiled the head of the screw.

What is the solution?

Thank you in advance.

Michel

Michel - 回复 分享

missing a very crucial step before step 6. if you don't remove the cover (where cd rom is) and unplug the PSU cable, you'll damage something.

for screws, 2.5mm didn't work for me, but i used a 3/32 hex with ball end, and at an angle, it will loosen screws.

Tino - 回复 分享

Doesn't work for a micron. Step 6 is impossible. Can't get the power supply out of its place more than a few centimeters. The side closest to the backplate of the casing can't come up only some millimeters, while also the fixed!! power cord is a serious obstruction.

Moreover there are nowhere cover plates left, so this is not a comparable situation as described in step 7.

Hugo Walg - 回复 分享

My last remark should be forgotten. The power cord has been connected to the Mac pro to give the impression that it's mounted fixedly to the power supply. But if you pull with very much force (an attempt of despair), it then again appears to be a 3-hole connector like is the case for common computers. If you don't know these systems, this is very treacherous.

Hugo Walg - 回复 分享

添加评论

浏览统计数据:

过去 24 小时: 9

过去 7 天: 53

过去 30 天: 275

总计 89,425