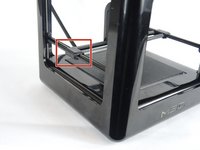
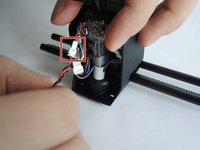
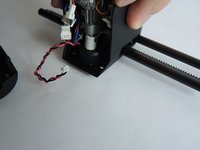
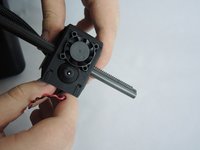
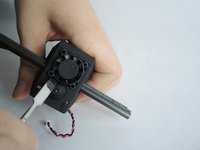
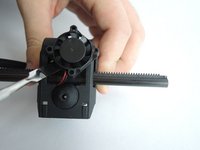
跳转到主内容

M3D Micro Fan Replacement

你所需要的

  1. M3D Micro Fan Replacement, Fan: 步骤 1 中的图像 1,3 M3D Micro Fan Replacement, Fan: 步骤 1 中的图像 2,3 M3D Micro Fan Replacement, Fan: 步骤 1 中的图像 3,3
    • To release the x-rods, pull the x-rods away from the plastic sliders on the y-rods, and flip the slider upwards to release the tracks.

  2. M3D Micro Fan Replacement: 步骤 2 中的图像 1,3 M3D Micro Fan Replacement: 步骤 2 中的图像 2,3 M3D Micro Fan Replacement: 步骤 2 中的图像 3,3
    • Slide the tracks off the second slider and remove the printer head and x-tracks from the center of the printer. To remove the front cover of the print head, firmly grip the cover and gently pull it off.

  3. M3D Micro Fan Replacement: 步骤 3 中的图像 1,2 M3D Micro Fan Replacement: 步骤 3 中的图像 2,2
    • Disconnect the red and black wires at the white connector. They should easily separate.

  4. M3D Micro Fan Replacement: 步骤 4 中的图像 1,3 M3D Micro Fan Replacement: 步骤 4 中的图像 2,3 M3D Micro Fan Replacement: 步骤 4 中的图像 3,3
    • The fan is held loosely in place at the base of the printer head. Use a metal spudger to gently pry it out of the printer head.

  5. M3D Micro Fan Replacement: 步骤 5 中的图像 1,1
    • Pull the fan all the way out of the printer head.

结论

To reassemble your device, follow these instructions in reverse order.

Yuliya Marusyk

于09/28/17注册

282 声望

创作了2篇指南

团队

USF Tampa, Team S3-G2, Nance Fall 2017 USF Tampa, Team S3-G2, Nance Fall 2017 的会员

USFT-NANCE-F17S3G2

4 名成员

创作了10篇指南

0条评论

添加评论

浏览统计数据:

过去 24 小时: 1

过去 7 天: 6

过去 30 天: 19

总计 1,146