跳转到主内容
加入维修社区 - 创建账户

Logitech UE MegaBoom Power Button Replacement

你所需要的

    1. Logitech UE MegaBoom Power Button Replacement, Outer Mesh: 步骤 1 中的图像 1,3 Logitech UE MegaBoom Power Button Replacement, Outer Mesh: 步骤 1 中的图像 2,3 Logitech UE MegaBoom Power Button Replacement, Outer Mesh: 步骤 1 中的图像 3,3
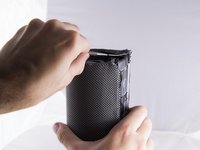
      • Locate the ends of the speaker.

      • Put a plastic opening tool in-between the rubber end and the mesh.

      • Apply a upward force in order to pry open the end.

      • Apply this procedure to the other side as well.

      • Will take force.

      • Using metal tools may permanently mar your device.

      添加评论

    2. Logitech UE MegaBoom Power Button Replacement: 步骤 2 中的图像 1,3 Logitech UE MegaBoom Power Button Replacement: 步骤 2 中的图像 2,3 Logitech UE MegaBoom Power Button Replacement: 步骤 2 中的图像 3,3
      • Take the Jimmy and pry up the rubber strip that has the volume buttons on it.

      • You will hear clicks as it pries up, don't worry.

      • Remove all the rubber you pried off.

      添加评论

    3. Logitech UE MegaBoom Power Button Replacement: 步骤 3 中的图像 1,2 Logitech UE MegaBoom Power Button Replacement: 步骤 3 中的图像 2,2
      在这个步骤中使用的工具:
      Tweezers
      $4.99
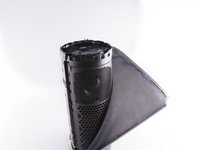
      • Use tweezers to lift end of plastic retainer on edge of mesh out of its channel.

      • Work the plastic retainer out of the channel all the way around the speaker.

      • Be gentle, it is easy to damage the fabric.

      • Repeat for other side.

      添加评论

    1. Logitech UE MegaBoom Power Button Replacement, Power Button: 步骤 4 中的图像 1,2 Logitech UE MegaBoom Power Button Replacement, Power Button: 步骤 4 中的图像 2,2
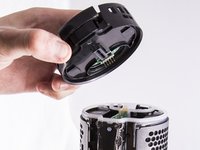
      • Locate the end of the speaker which contains the power button.

      • The circuit board which contains the power button should be visible.

      • Grasp the outer rim of this end cap and pull in an upward motion.

      • This might require some force.

      询问修复机器人

      添加评论

    2. Logitech UE MegaBoom Power Button Replacement: 步骤 5 中的图像 1,1
      • Insert a opening tool between the circuit board and one of the black clips which is holding the board in place.

      • Using the opening tool pry up on the clip allowing the board to be freed. Pry up on the second clip to fully release the board.

      • Using your fingers lift the board out of place.

      询问修复机器人

      添加评论

结论

To reassemble your device, follow these instructions in reverse order.

取消:我没有完成这个指南。

另外一个人完成了本指南。

团队

Cal Poly, Team S9-G2, Banghart Fall 2017 Cal Poly, Team S9-G2, Banghart Fall 2017 的会员

CPSU-BANGHART-F17S9G2

4 名成员

创作了30篇指南

3指南评论

Will it still be waterproof after repairing?

TechBrush - 回复 分享

that would be a negative unless you really know what you are doing and can waterproof it

Justin Doubikin - 回复 分享

nice piece. i was able to follow the guide and got it right taking out the board. please where can one purchase the power button board. thanks

tony - 回复 分享

添加评论

浏览统计数据:

过去 24 小时: 3

过去 7 天: 17

过去 30 天: 68

总计 5,478