跳转到主内容
加入维修社区 - 创建账户

Logitech UE Hyperboom Motherboard Replacement

你所需要的

  1. Logitech UE Hyperboom Motherboard Replacement, Handle: 步骤 1 中的图像 1,2 Logitech UE Hyperboom Motherboard Replacement, Handle: 步骤 1 中的图像 2,2
    • Unscrew the two black flat-top screws that attach the handle to the speaker with your hands.

    • You may need pliers to grip the screws.

    询问修复机器人

    添加评论

  2. Logitech UE Hyperboom Motherboard Replacement, Top Panel: 步骤 2 中的图像 1,2 Logitech UE Hyperboom Motherboard Replacement, Top Panel: 步骤 2 中的图像 2,2
    • Use your hands to carefully pry the plastic cover off of the speaker.

    询问修复机器人

    添加评论

  3. Logitech UE Hyperboom Motherboard Replacement: 步骤 3 中的图像 1,3 Logitech UE Hyperboom Motherboard Replacement: 步骤 3 中的图像 2,3 Logitech UE Hyperboom Motherboard Replacement: 步骤 3 中的图像 3,3
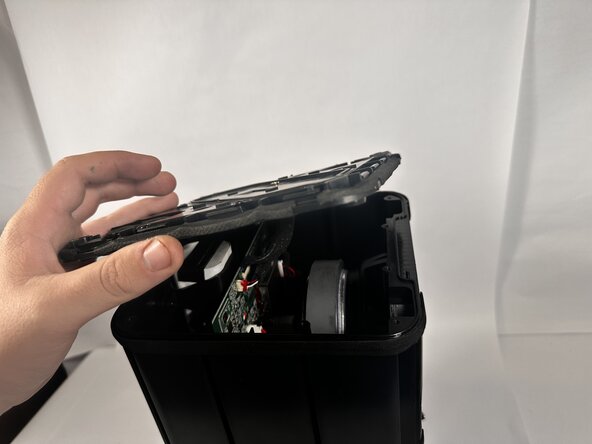
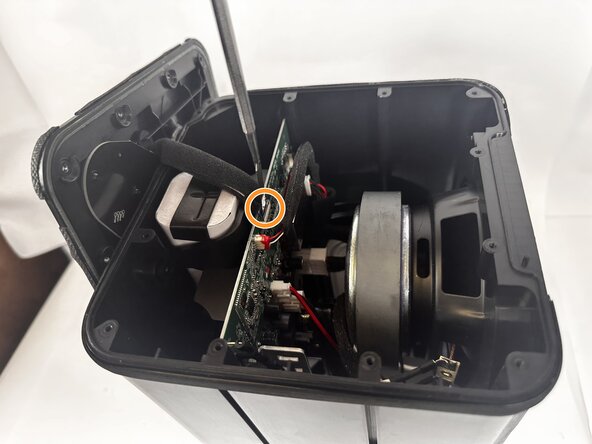
    • Use a Phillips #0 screwdriver to remove the ten 11.7mm screws on the top panel.

    • Remove the top panel to access the internal components.

    • Use a metal spudger to completely disconnect the top panel.

    询问修复机器人

    添加评论

  4. Logitech UE Hyperboom Motherboard Replacement, Speaker Drivers and Tweeters: 步骤 4 中的图像 1,2 Logitech UE Hyperboom Motherboard Replacement, Speaker Drivers and Tweeters: 步骤 4 中的图像 2,2
    • Use the Jimmy to pry the fiber mesh cover away from the speaker.

    • Take the fiber mesh off of the speaker completely.

    询问修复机器人

    添加评论

  5. Logitech UE Hyperboom Motherboard Replacement: 步骤 5 中的图像 1,3 Logitech UE Hyperboom Motherboard Replacement: 步骤 5 中的图像 2,3 Logitech UE Hyperboom Motherboard Replacement: 步骤 5 中的图像 3,3
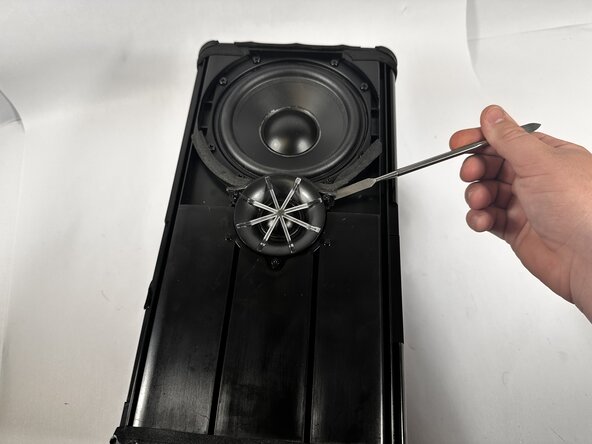
    • Use the Phillips #0 screwdriver to unscrew the three 9.2mm screws around the tweeter speaker.

    • Use the Phillips #0 screwdriver to unscrew the eight 10.1mm screws around the speaker driver.

    • Use a metal spudger to pry the tweeter speaker out of the socket.

    询问修复机器人

    添加评论

  6. Logitech UE Hyperboom Motherboard Replacement: 步骤 6 中的图像 1,3 Logitech UE Hyperboom Motherboard Replacement: 步骤 6 中的图像 2,3 Logitech UE Hyperboom Motherboard Replacement: 步骤 6 中的图像 3,3
    • Use a metal spudger to break the adhesive seal around the speaker driver.

    • Use your hands to push the speaker driver out of its socket.

    • A lot of force will be necessary, so it is possible the power and ground cables might disconnect from the force of dislodging the speaker driver.

    • Disconnect the power and ground cables from both the speaker driver and tweeter.

    询问修复机器人

    添加评论

  7. Logitech UE Hyperboom Motherboard Replacement: 步骤 7 中的图像 1,1
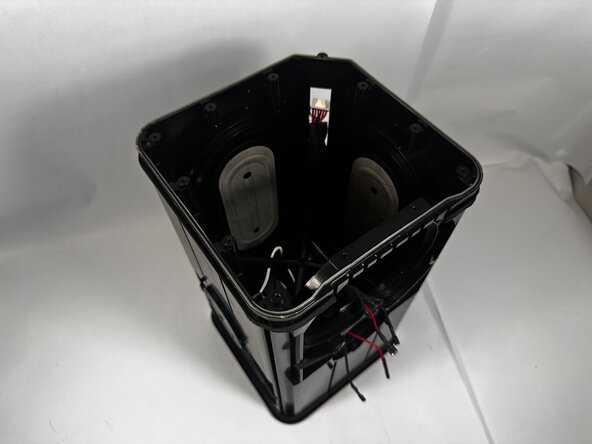
    • Turn the speaker over, and face the two other speaker driver towards you.

    • Use the Phillips #0 screwdriver to remove the three 9.2mm screws around the speaker tweeter.

    • Use the Phillips #0 screwdriver to remove the eight 10.1mm screws around the speaker driver.

    询问修复机器人

    添加评论

  8. Logitech UE Hyperboom Motherboard Replacement: 步骤 8 中的图像 1,2 Logitech UE Hyperboom Motherboard Replacement: 步骤 8 中的图像 2,2
    • Use a metal spudger to break the adhesive between the tweeter and the casing.

    • Disconnect the power and ground cables from the tweeter speaker to remove it completely.

    询问修复机器人

    添加评论

  9. Logitech UE Hyperboom Motherboard Replacement: 步骤 9 中的图像 1,3 Logitech UE Hyperboom Motherboard Replacement: 步骤 9 中的图像 2,3 Logitech UE Hyperboom Motherboard Replacement: 步骤 9 中的图像 3,3
    • Use your hands to remove the speaker driver from its socket.

    • Disconnect the power and ground cables to remove it completely.

    询问修复机器人

    添加评论

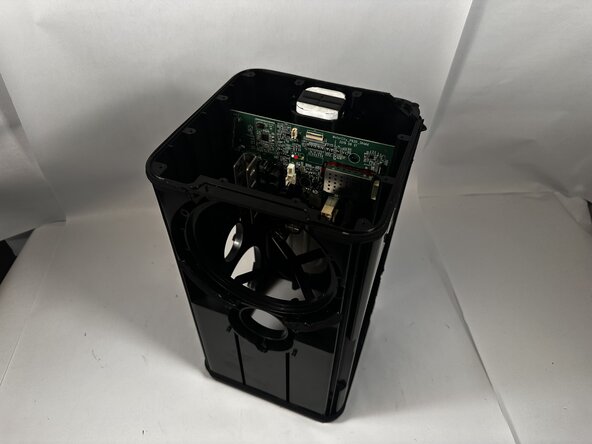
  10. Logitech UE Hyperboom Motherboard Replacement, Motherboard: 步骤 10 中的图像 1,2 Logitech UE Hyperboom Motherboard Replacement, Motherboard: 步骤 10 中的图像 2,2
    • Disconnect all of the cables connected to the motherboard.

    询问修复机器人

    添加评论

  11. Logitech UE Hyperboom Motherboard Replacement: 步骤 11 中的图像 1,3 Logitech UE Hyperboom Motherboard Replacement: 步骤 11 中的图像 2,3 Logitech UE Hyperboom Motherboard Replacement: 步骤 11 中的图像 3,3
    • Use a Phillips #0 screwdriver to remove the four supporting 7.9mm screws.

    • Slide the motherboard out of the top of the speaker.

    询问修复机器人

    添加评论

结论

To reassemble your device, follow these instructions in reverse order.

取消:我没有完成这个指南。

0指南评论

添加评论

浏览统计数据:

过去 24 小时: 2

过去 7 天: 12

过去 30 天: 61

总计 104