简介
The TK820 is a wireless low-profile keyboard and trackpad combo unit released by Logitech in 2014. It is not a particularly serviceable keyboard as it is glued shut, but can be partially disassembled with a small to moderate amount of effort.
I was able to complete disassembly with a hair-dryer so you don't necessarily need a fancy or high-power heat gun.
你所需要的
-
-
To start, flip the keyboard onto its back side, remove the battery cover, and remove all batteries.
-
There is one visible screw between the two battery bays - start by removing this
 询问修复机器人
-
-
-
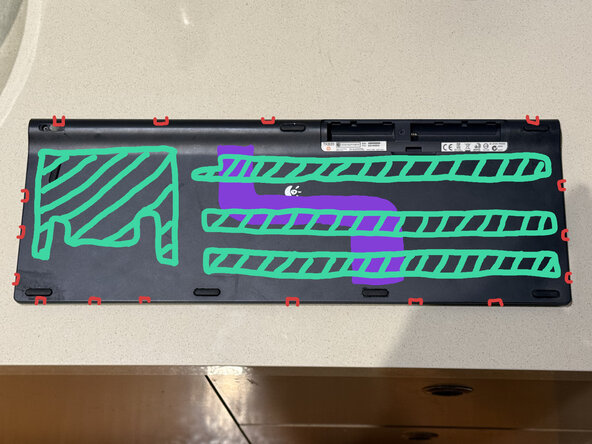
The next series of screws are behind some of the rubber feet. Feet with screws under them have been circled in orange.
-
Remove the top-left rubber foot (cylindrical bump end, side away from the battery slots) and remove the screw underneath it.
-
Remove the three bottom-rightmost rubber feet (non-cylindrical-bump end, 3x feet closest to the battery slots side) and remove the screws underneath.
-
You don't need to remove any of the other feet - there's nothing under them
-
-
-
-
Beyond the screws just removed, the keyboard is glued shut, and the frame is also held closed with a number of small plastic clasps.
-
The teal shaded sections of the picture of the keyboard back show the areas where the glue is, and the purple shows the ribbon cable (which also has glue on it) - aim a heatgun at these before attempting to prise the keyboard open for best success.
-
The plastic clasps are shown in orange around the edge of the same picture. They should come apart quite easily with a spudger but be mindful of where they are as you begin to prise the keyboard apart
-
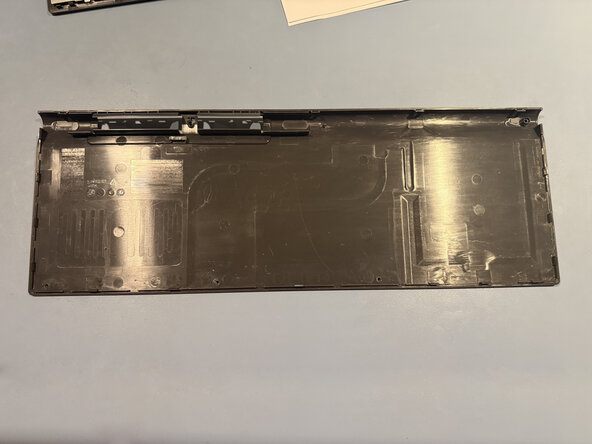
Continue prising the edge and heatgunning the back and inside of the keyboard until it comes apart fully
-
Don't try and remove the blue plastic strip around the edge until the next step, as it is screwed in.
-
-
-
The blue strip around the edge of the key tray is secured with one screw at either end of the cylindrical bump top of the keyboard - remove these and the strip should come out easily
-
-
-
The PCB / control board for the keyboard is held down by two final screws, and also by the negative battery terminal just to the side of it.
-
Remove the screws, then push the negative terminal wire down enough to unhook it from the plastic clip it is in. Once unhooked, the PCB should lean out with ease.
-
The cables connecting the trackpad and keyboard to the PCB are secured with small latches which can be slid out to remove the cables.
-
Note that the on/off switch on the PCB slots in to the physical switch going through to the front of the keyboard - it will need to be angled back in to the same right spot when re-assembling.
-





To reassemble your device, follow these instructions in reverse order.

