跳转到主内容
加入维修社区 - 创建账户

Logitech MX Keys disassembly guide

你所需要的

    1. Logitech MX Keys disassembly guide, Logitech MX Keys: 步骤 1 中的图像 1,2 Logitech MX Keys disassembly guide, Logitech MX Keys: 步骤 1 中的图像 2,2
      • Remove the rubber-feet from the underside

      • The three up top are necessary for this step, but we'll be removing the bottom three later, so best to do them all at the same time

      • Unscrew the three screws behind the top rubber feet

      • Note the leftmost screw is offset to the right, and not in the center

      • In my case the adhesive physically covered the screws - Lightly press with a small Phillips [PH 0] and you'll find them

      • Use a plastic opener to remove the cover

      添加评论

    2. Logitech MX Keys disassembly guide: 步骤 2 中的图像 1,3 Logitech MX Keys disassembly guide: 步骤 2 中的图像 2,3 Logitech MX Keys disassembly guide: 步骤 2 中的图像 3,3
      • Remove the battery. Note it's lightly glued on the underside.

      • Unscrew two (slightly larger, silver) phillips screws that secure the PCB

      • Unscrew the last small black PCB screw on the top right corner

      • Remove the orange tape securing the serial cable (put it to one side, you'll need to put it back if reassembling)

      • Remove the small jumper with twisted red/black wires coming from it

      • Carefully lift the serial connector (it's hinged) and lift the data cable up and away

      • Remove PCB

      添加评论

    3. Logitech MX Keys disassembly guide: 步骤 3 中的图像 1,1
      • Remove last PCB screw

      询问修复机器人

      添加评论

    4. Logitech MX Keys disassembly guide: 步骤 4 中的图像 1,3 Logitech MX Keys disassembly guide: 步骤 4 中的图像 2,3 Logitech MX Keys disassembly guide: 步骤 4 中的图像 3,3
      • Unscrew all the black screws along the top (9)

      • You'll have to remove the "head" of the keyboard which is attached with latches that click in. Use a plastic tool to help. It should separate completely from the keyboard.

      添加评论

    5. Logitech MX Keys disassembly guide: 步骤 5 中的图像 1,3 Logitech MX Keys disassembly guide: 步骤 5 中的图像 2,3 Logitech MX Keys disassembly guide: 步骤 5 中的图像 3,3
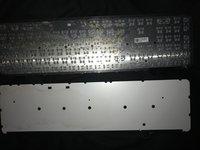
      • Be careful trying to separate the layers of the keyboard. You may damage the backlight guide.

      添加评论

结论

To reassemble your device, follow these instructions in reverse order.

取消:我没有完成这个指南。

20等其他人完成本指南。

Marts

于02/16/22注册

446 声望

撰写一个指南

19指南评论

Do you know how I can turn the keyboard backlight so it stays on, even if if t runs down the battery faster.
I really need that back light. I am willing to risk breaking my keyboard for the reward of having the light. If I am really lucky changing the circuit to add a manual switch for that dang back light :)

I have basic skills and I am still learning...

Thank to all the Content Makers and Fix-It guide makers...!

perhaps I could find the correct voltage for the light and prob with a test light to find the circuit for the back light with out damaging something important, like the old days_?

nazo - 回复 分享

Put a cover over the right top LED (green when turned on) - this is also the "window" for the ambient light sensor. By making it "dark", the backlight will be fully on when your hands are close to the keyboard.

Riaan Du Toit - 回复 分享

Hello,

Excellent tutorial!

Could you show me where the 2 red and black wires are connected (data cable I think)?

Mine got cut by accident.

Christophe - 回复 分享

hey, please look at Step 3 and you will see the red and black cables you are looking for

Marts - 回复 分享

Hello, the front and back plate are made from plastic or metal ? thank you

raduadyi - 回复 分享

添加评论

浏览统计数据:

过去 24 小时: 51

过去 7 天: 322

过去 30 天: 1,306

总计 81,559