简介
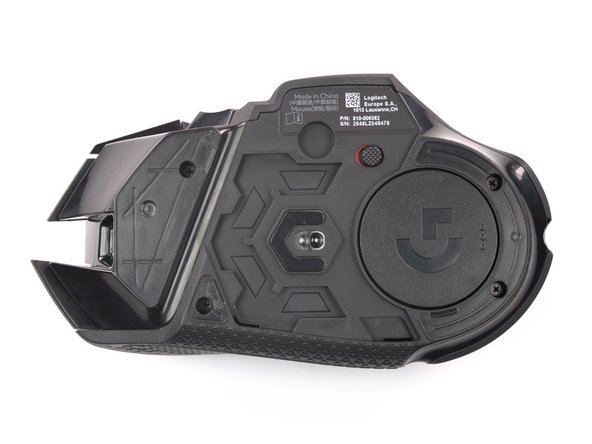
Use this guide to replace a worn-out or dead battery in your Logitech G502 Lightspeed.
If you plan to reuse the mouse feet, you’ll need to apply heat to loosen the adhesive and remove the feet with minimal bending. Bent or torn mouse feet may require replacement.
If the battery is swollen, take appropriate precautions. For your safety, discharge your battery below 25% before disassembling your device. This reduces the risk of a dangerous thermal event if the battery is accidentally damaged during the repair.
You might need replacement adhesive to reattach the new battery. Check the guide and your replacement battery in advance.
你所需要的
-
-
Insert the tip of an opening pick underneath the front foot at the gap in its recess.
-
When possible, grab with your fingers and slowly pull to peel it off completely.
-
-
-
Insert the tip of an opening pick underneath the tiny front right foot at the gap in its recess.
-
-
-
Insert the tip of an opening pick underneath the rear foot starting at the gap in its recess.
-
When possible, grab with your fingers and slowly pull to peel it off completely.
-
-
-
-
Use your fingers to remove the weight hatch by pulling the bottom part of the thumb rest straight down.
-
-
-
Remove the four 5.4 mm long Phillips screws at the underside of the mouse.
-
-
-
Insert an opening pick between the bottom plate and the upper shell starting at the rear of the mouse.
-
Slide the opening pick along the gap between the two halves towards the outer flank of the mouse.
-
Twist the opening pick to disengage the clips holding both halves together.
-
-
-
Flip the mouse over on its (removed) feet and hinge the top shell open towards the right side.
-
-
-
Hold the battery cable close to the connector and carefully "walk it out" by pulling parallel to the motherboard rocking the connector side to side.
-
-
-
Use a spudger or your fingernail to flip up the small, hinged locking flap of both ZIF connectors to disconnect and free the interconnect cables.
-
-
-
Insert the tip of an opening pick between the battery and its plastic tub.
-
Use an opening pick to pry the battery up slightly to loosen the adhesive underneath.
-
-
-
Slowly pull the opening pick towards the rear of the mouse to slide the battery out from under the plastic tab and out of its tub.
-
If possible, turn on your device and test your repair before installing new adhesive and resealing.
Secure the new battery with pre-cut adhesive or double-sided adhesive tape if the battery comes without one. Press the new battery firmly into place.
To reassemble your device, follow these instructions in reverse order. Apply new adhesive where necessary after cleaning the relevant areas with isopropyl alcohol (>90%).
For optimal performance, calibrate your newly installed battery: Charge it to 100% and keep charging it for at least 2 more hours. Then use your device until it shuts off due to low battery. Finally, charge it uninterrupted to 100%.
Take your e-waste to an R2 or e-Stewards certified recycler.
Repair didn’t go as planned? Try some basic troubleshooting, or ask our Answers community for help.
18等其他人完成本指南。
4条评论
The battery model is "AHB521630"
Thank u for the Instruction, has take less than 10 Min


