跳转到主内容
加入维修社区 - 创建账户

Kurio Xtreme Power/Volume Buttons Replacement

你所需要的

    1. Kurio Xtreme Power/Volume Buttons Replacement, Back Panel: 步骤 1 中的图像 1,1
      • Remove the rubber case by beginning to peel from one of the top corners and continue peeling until the cover is completely removed.

      询问修复机器人

      添加评论

    2. Kurio Xtreme Power/Volume Buttons Replacement: 步骤 2 中的图像 1,2 Kurio Xtreme Power/Volume Buttons Replacement: 步骤 2 中的图像 2,2
      • Unscrew the four 4 mm black screws using a Phillips #000 screw driver.

      • There are two screws on each side of the device (four total).

      询问修复机器人

      添加评论

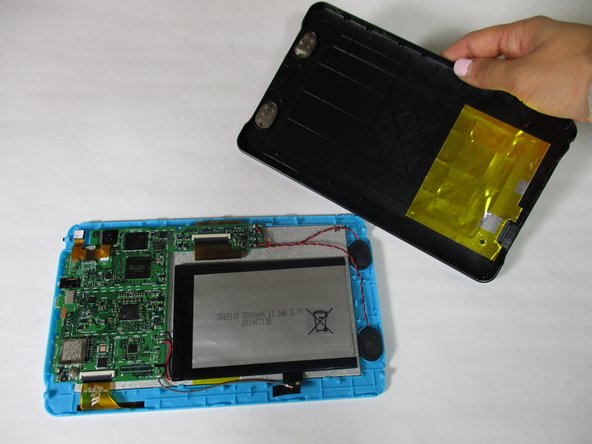
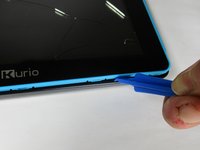
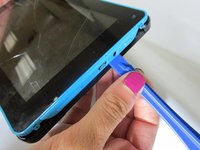
    3. Kurio Xtreme Power/Volume Buttons Replacement: 步骤 3 中的图像 1,3 Kurio Xtreme Power/Volume Buttons Replacement: 步骤 3 中的图像 2,3 Kurio Xtreme Power/Volume Buttons Replacement: 步骤 3 中的图像 3,3
      • Insert the plastic opening tool in between the edges of the blue front casing and black back casing.

      • Slide the plastic opening tool around the perimeter of the device. This may require that you repeatedly run the opening tool up and down the edges of the device.

      • Be sure not to break any of the plastic clamps along the edges of the device when removing the back cover.

      • Carefully lift the back panel off of the rest of the device.

      询问修复机器人

      添加评论

    1. Kurio Xtreme Power/Volume Buttons Replacement, Power/Volume Buttons: 步骤 4 中的图像 1,1
      • Remove the three 4 mm screws on the motherboard with a Phillips #000 screwdriver.

      询问修复机器人

      添加评论

    2. Kurio Xtreme Power/Volume Buttons Replacement: 步骤 5 中的图像 1,2 Kurio Xtreme Power/Volume Buttons Replacement: 步骤 5 中的图像 2,2
      • Remove the orange data display ribbon wire above the battery by prying open the ZIF connector with the plastic opening tool.

      询问修复机器人

      添加评论

    3. Kurio Xtreme Power/Volume Buttons Replacement: 步骤 6 中的图像 1,2 Kurio Xtreme Power/Volume Buttons Replacement: 步骤 6 中的图像 2,2
      • Remove the orange data display ribbon wire to the left of the battery by prying open the ZIF connector with the plastic opening tool.

      询问修复机器人

      添加评论

    4. Kurio Xtreme Power/Volume Buttons Replacement: 步骤 7 中的图像 1,1
      • Remove the speakers out of the plastic molds by lifting up the black and red wires.

      • Be careful not to disconnect the black and red wires from the motherboard.

      询问修复机器人

      添加评论

    5. Kurio Xtreme Power/Volume Buttons Replacement: 步骤 8 中的图像 1,2 Kurio Xtreme Power/Volume Buttons Replacement: 步骤 8 中的图像 2,2
      • Remove the motherboard by lifting it out of the casing. Set it upside down below the casing.

      • The motherboard will still be connected to the battery and the speakers.

      询问修复机器人

      添加评论

    6. Kurio Xtreme Power/Volume Buttons Replacement: 步骤 9 中的图像 1,3 Kurio Xtreme Power/Volume Buttons Replacement: 步骤 9 中的图像 2,3 Kurio Xtreme Power/Volume Buttons Replacement: 步骤 9 中的图像 3,3
      • Remove the volume buttons and/or power button by soldering them at their bases.

      • Volume down

      • Volume up

      • Power

      询问修复机器人

      添加评论

结论

To reassemble your device, follow these instructions in reverse order.

取消:我没有完成这个指南。

另外一个人完成了本指南。

Mallory Myers

于09/22/15注册

1,190 声望

创作了7篇指南

团队

Baylor, Team 6-10, Williams Fall 2015 Baylor, Team 6-10, Williams Fall 2015 的会员

BU-WILLIAMS-F15S6G10

3 名成员

创作了14篇指南

0指南评论

添加评论

浏览统计数据:

过去 24 小时: 1

过去 7 天: 9

过去 30 天: 22

总计 1,148