跳转到主内容
加入维修社区 - 创建账户

此翻译由机器生成,尚未经过人工审核。 会说这种语言吗? 查看评论

Kurio 7 屏幕更换

你所需要的

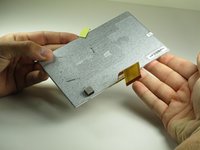
    1. Kurio 7 屏幕更换, 后盖: 步骤 1 中的图像 1,3 Kurio 7 屏幕更换, 后盖: 步骤 1 中的图像 2,3 Kurio 7 屏幕更换, 后盖: 步骤 1 中的图像 3,3
      • 首先拆下 Kurio 7 的橡胶盖板。

      询问修复机器人

      添加评论

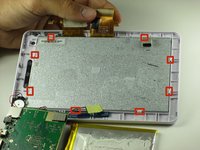
    2. Kurio 7 屏幕更换: 步骤 2 中的图像 1,2 Kurio 7 屏幕更换: 步骤 2 中的图像 2,2
      • 从外壳上拧下 4 颗 30 mm 的 Phillips #00 螺丝。

      询问修复机器人
      添加评论

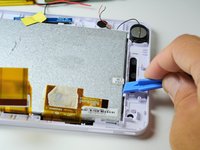
    3. Kurio 7 屏幕更换: 步骤 3 中的图像 1,2 Kurio 7 屏幕更换: 步骤 3 中的图像 2,2
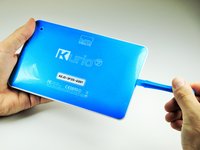
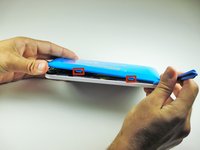
      • 将塑料开启工具插入设备前盖与后盖之间的缝隙中。

      • 沿着设备边缘滑动塑料开启工具。轻轻撬开连接前盖和后盖的卡扣。

      • 注意不要折断连接前盖和后盖的卡扣。

      询问修复机器人
      添加评论

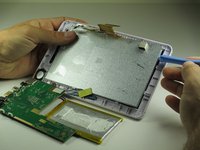
    4. Kurio 7 屏幕更换: 步骤 4 中的图像 1,2 Kurio 7 屏幕更换: 步骤 4 中的图像 2,2
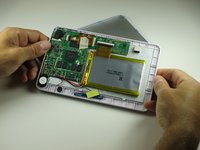
      • 一旦所有卡扣都已松开,后盖应该可以轻松取下。

      • 轻轻取下后盖。内部有布线,在取下过程中可能会钩住后盖。这些线缆直接焊接到对应的部件上,很难重新连接。

      询问修复机器人
      添加评论

    1. Kurio 7 屏幕更换, Kurio 7 主板拆卸指南: 步骤 5 中的图像 1,2 Kurio 7 屏幕更换, Kurio 7 主板拆卸指南: 步骤 5 中的图像 2,2
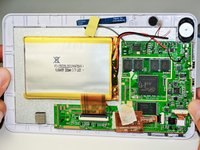
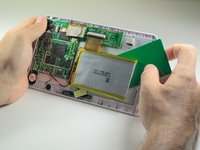
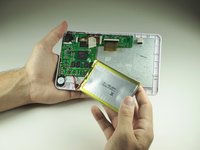
      • 使用一张塑料信用卡或其他薄片物体,将电池从屏幕上分离开。

      • 请务必小心且缓慢地移动卡片,以免损坏、折断或使电池变形。

      • 小心地将电池放在一旁。

      询问修复机器人

      添加评论

    2. Kurio 7 屏幕更换: 步骤 6 中的图像 1,2 Kurio 7 屏幕更换: 步骤 6 中的图像 2,2
      • 使用 Phillips #00 螺丝刀拧下固定主板的八颗 40 mm 螺丝。

      询问修复机器人

      添加评论

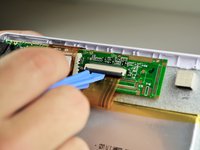
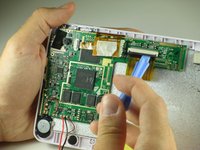
    3. Kurio 7 屏幕更换: 步骤 7 中的图像 1,3 Kurio 7 屏幕更换: 步骤 7 中的图像 2,3 Kurio 7 屏幕更换: 步骤 7 中的图像 3,3
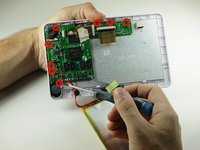
      • 将塑料开启工具放置在黑色排线夹的底部,像杠杆一样向上拉,以松开底座。这应该能松开固定排线与底座的卡扣。

      • 将排线从底座中拉出。

      询问修复机器人

      添加评论

    4. Kurio 7 屏幕更换: 步骤 8 中的图像 1,1
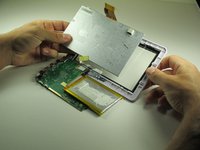
      • 黄色排线上应该有美纹纸。将美纹纸从主板上揭下,并将其缠绕在黄色排线上。

      • 不要将美纹纸完全从主板上撕下,因为它用于保护排线上的组件。

      • 要将排线从支架上拆下,请参照步骤 3 中的相同操作。

      询问修复机器人
      添加评论

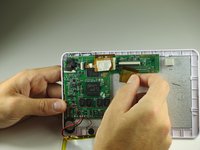
    5. Kurio 7 屏幕更换: 步骤 9 中的图像 1,1
      • 拉回排线,将电池放在 Kurio 的底部附近。

      • 现在主板已拆下,可以对其他组件进行操作了。

      询问修复机器人

      添加评论

    1. Kurio 7 屏幕更换, 屏幕: 步骤 10 中的图像 1,1
      • 将主板翻转至靠近设备底部的位置。

      • 在移动主板时,请小心不要拉扯到任何布线。

      询问修复机器人

      添加评论

    2. Kurio 7 屏幕更换: 步骤 11 中的图像 1,3 Kurio 7 屏幕更换: 步骤 11 中的图像 2,3 Kurio 7 屏幕更换: 步骤 11 中的图像 3,3
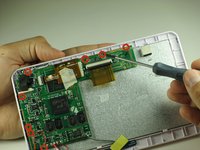
      • 这一步很有挑战性,如果有个人帮你扶着会容易些。使用开启工具从固定屏幕的卡扣下方撬开屏幕。

      • 一旦屏幕和盖板之间出现了一点缝隙,就将开启工具滑入屏幕下方。

      • 沿着屏幕外沿滑动开启工具,边滑边松开卡扣。

      • 操作时注意不要用力拉扯主板,因为设备主体上还连接着许多布线。

      询问修复机器人

      添加评论

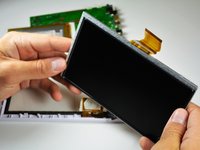
    3. Kurio 7 屏幕更换: 步骤 12 中的图像 1,3 Kurio 7 屏幕更换: 步骤 12 中的图像 2,3 Kurio 7 屏幕更换: 步骤 12 中的图像 3,3
      • 将屏幕从外壳中拉出。

      • 你已成功拆下屏幕!

      询问修复机器人

      添加评论

结论

换上新的替换屏幕。按照相反的顺序完成步骤进行重新组装。

取消:我没有完成这个指南。

14等其他人完成本指南。

Eric Rice

于04/14/14注册

913 声望

创作了3篇指南

团队

Cal Poly, Team 12-36, Maness Spring 2014 Cal Poly, Team 12-36, Maness Spring 2014 的会员

CPSU-MANESS-S14S12G36

4 名成员

创作了84篇指南

4指南评论

Hey Eric.

Nice guide with Pro-tricks.

Maybe you can tell me, where to buy new LCD-screen for Kurio 7S C13000

I've been Googled all places, but haven't found anything.

Hope to hear from you.

Please send a mail at us.oerbaek@gmail.com

Thanks a lot.

Mr. Skott, Denmark

Ulrich Juul - 回复 分享

Hi can you fix the kurio watch? My son got one for Christmas and broke it already. He has cracked the screen top half won't work but the bottom still works you can see everything still on the screen.

If anyone has any help could you email me please nchambers1@hotmail.co.uk

Nick chambers - 回复 分享

Hello, my son has a kurio table and the screen is crack. Would you be able to fix it for me if I get all the parts. My email is uriyah29@yahoo.com. Thank you

taniao129 - 回复 分享

Hello, I’m Jeremy. I have a Kurio 7s that screen has cracked. It used to wor, but progressively got worse. I used to not be able to get past the home screen. Now, it doesnt turn on and even if charged it always says low battery. If you can fix this, my email is germookd@gmail.com

2024_Jeremy Norris - 回复 分享

添加评论

浏览统计数据:

过去 24 小时: 8

过去 7 天: 41

过去 30 天: 128

总计 50,925