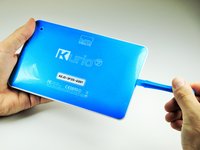
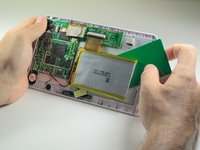
跳转到主内容

Kurio 7 Motherboard Removal Guide

你所需要的

  1. Kurio 7 Motherboard Removal Guide, Back Panel: 步骤 1 中的图像 1,3 Kurio 7 Motherboard Removal Guide, Back Panel: 步骤 1 中的图像 2,3 Kurio 7 Motherboard Removal Guide, Back Panel: 步骤 1 中的图像 3,3
    • Begin by removing the rubber cover from the Kurio 7.

  2. Kurio 7 Motherboard Removal Guide: 步骤 2 中的图像 1,2 Kurio 7 Motherboard Removal Guide: 步骤 2 中的图像 2,2
    • Remove the four 30 mm Phillips #00 screws from the outer case.

  3. Kurio 7 Motherboard Removal Guide: 步骤 3 中的图像 1,2 Kurio 7 Motherboard Removal Guide: 步骤 3 中的图像 2,2
    • Insert the plastic opening tool in the gap between the front cover and the back cover of the device.

    • Slide the plastic opening tool around the edge of the device. Gently pry apart the tabs that hold the front cover and the back cover together.

    • Be careful not to break off the tabs that hold the front cover and the back cover together.

  4. Kurio 7 Motherboard Removal Guide: 步骤 4 中的图像 1,2 Kurio 7 Motherboard Removal Guide: 步骤 4 中的图像 2,2
    • Once all of the tabs are removed, the back cover should come off easily.

    • Gently remove the back cover. There are wires inside that may get caught on the cover while removing it. These wires are soldered to their components and are difficult to reattach.

  5. Kurio 7 Motherboard Removal Guide, Kurio 7 Motherboard Removal Guide: 步骤 5 中的图像 1,2 Kurio 7 Motherboard Removal Guide, Kurio 7 Motherboard Removal Guide: 步骤 5 中的图像 2,2
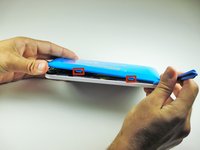
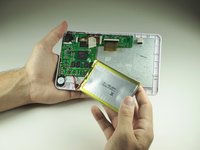
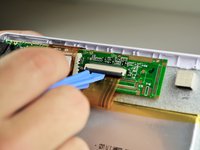
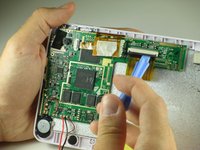
    • Use a plastic credit card, or other thin object, to separate the battery from the screen.

    • Be sure to work the card carefully and slowly around in order to not damage, break, or deform the battery.

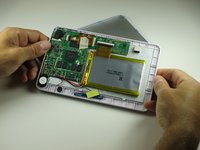
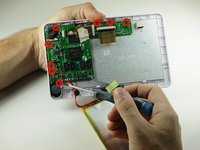
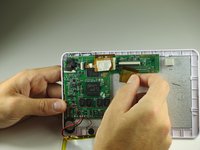
    • Carefully set the battery aside.

  6. Kurio 7 Motherboard Removal Guide: 步骤 6 中的图像 1,2 Kurio 7 Motherboard Removal Guide: 步骤 6 中的图像 2,2
    • Use a Phillips #00 screwdriver to remove the eight 40mm screws holding the motherboard in place.

  7. Kurio 7 Motherboard Removal Guide: 步骤 7 中的图像 1,3 Kurio 7 Motherboard Removal Guide: 步骤 7 中的图像 2,3 Kurio 7 Motherboard Removal Guide: 步骤 7 中的图像 3,3
    • Place the plastic opening tool on the base of the black ribbon clip and pull up, like a lever, to release the mount. This should release the clip holding the ribbon to the mount.

    • Pull the ribbon out of the mount.

  8. Kurio 7 Motherboard Removal Guide: 步骤 8 中的图像 1,1
    • There should be masking tape on the yellow ribbon. Pull the tape off of the motherboard and wrap it around the yellow ribbon.

    • Do not pull the tape completely off the motherboard, as it is used to protect components on the ribbon.

    • To remove the ribbon from the mount, follow the same steps in Step 3.

  9. Kurio 7 Motherboard Removal Guide: 步骤 9 中的图像 1,1
    • Pull back the ribbons and put the battery near the bottom of the Kurio.

    • The motherboard is now removed so that other components can be worked on.

结论

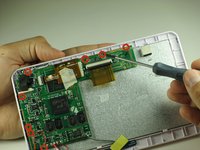
To reassemble your device, follow these instructions in reverse order.

5等其他人完成本指南。

Eric Rice

于04/14/14注册

913 声望

创作了3篇指南

团队

Cal Poly, Team 12-36, Maness Spring 2014 Cal Poly, Team 12-36, Maness Spring 2014 的会员

CPSU-MANESS-S14S12G36

4 名成员

创作了14篇指南

0条评论

添加评论

浏览统计数据:

过去 24 小时: 0

过去 7 天: 0

过去 30 天: 6

总计 3,454