跳转到主内容

Kodak Easyshare C183 LCD Replacement

你所需要的

  1. Kodak Easyshare C183 LCD Replacement, LCD: 步骤 1 中的图像 1,3 Kodak Easyshare C183 LCD Replacement, LCD: 步骤 1 中的图像 2,3 Kodak Easyshare C183 LCD Replacement, LCD: 步骤 1 中的图像 3,3
    • Remove the two screws from the right hand side

    • Remove the two screws from the left hand side

    • Remove the three screws from the bottom.

    • All the screws on this camera are the same size. No need to mark them by position.

  2. Kodak Easyshare C183 LCD Replacement: 步骤 2 中的图像 1,3 Kodak Easyshare C183 LCD Replacement: 步骤 2 中的图像 2,3 Kodak Easyshare C183 LCD Replacement: 步骤 2 中的图像 3,3
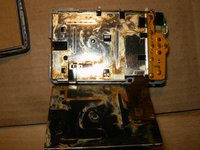
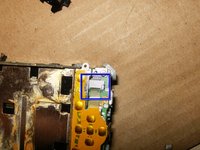
    • Open the battery compartment and start carefully to separate the front and back half of the camera. On this camera the front half will come of first.

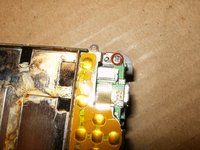
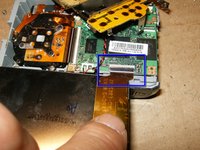
    • In the top left corner is one screw that will have to be removed. It holds the back cover to the body of the camera.

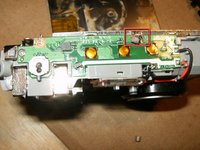
    • Once that screw is removed, the camera separates easy.

  3. Kodak Easyshare C183 LCD Replacement: 步骤 3 中的图像 1,3 Kodak Easyshare C183 LCD Replacement: 步骤 3 中的图像 2,3 Kodak Easyshare C183 LCD Replacement: 步骤 3 中的图像 3,3
    • Fold the LCD from the top downward. DO NOT try to remove the LCD, it is still attached. Obviously this camera has had water damage.

    • Remove the Kapton tape from the top of the camera.

    • you will have to de-solder the battery frame on one point.

  4. Kodak Easyshare C183 LCD Replacement: 步骤 4 中的图像 1,3 Kodak Easyshare C183 LCD Replacement: 步骤 4 中的图像 2,3 Kodak Easyshare C183 LCD Replacement: 步骤 4 中的图像 3,3
    • Remove the tape

    • Remove the single screw.

    • You can disconnect the ribbon cable, by carefully pulling on the end. I opted to leave it connected to minimize the risk of tearing the fragile cable. It is possible to just move the frame out of the way.

  5. Kodak Easyshare C183 LCD Replacement: 步骤 5 中的图像 1,3 Kodak Easyshare C183 LCD Replacement: 步骤 5 中的图像 2,3 Kodak Easyshare C183 LCD Replacement: 步骤 5 中的图像 3,3
    • Lift the LCD frame slightly up and fold the black clip gently to the back.

    • This will loosen the ribbon cable and lets your remove the LCD.

    • Insert the ribbon cable of the new LCD. there will be a solid white stripe on the cable. Insert the cable as shown, close the connector.

结论

To reassemble your device, follow these instructions in reverse order.

oldturkey03

于09/29/10注册

782,145 声望

创作了119篇指南

团队

Global Fixers Global Fixers 的会员

Community

33 名成员

创作了537篇指南

0条评论

添加评论

浏览统计数据:

过去 24 小时: 0

过去 7 天: 0

过去 30 天: 8

总计 2,317