跳转到主内容
加入维修社区 - 创建账户

Kodak EasyShare M381 Screen Replacement

你所需要的

  1. Kodak EasyShare M381 Screen Replacement, Battery: 步骤 1 中的图像 1,2 Kodak EasyShare M381 Screen Replacement, Battery: 步骤 1 中的图像 2,2
    • First, press in and slide forward the battery latch as indicated by the arrow.

    询问修复机器人

    添加评论

  2. Kodak EasyShare M381 Screen Replacement: 步骤 2 中的图像 1,1
    • Press down on battery until you hear a click and release it. Battery should easily slide out.

    询问修复机器人

    添加评论

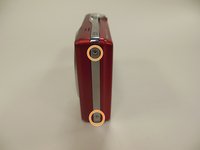
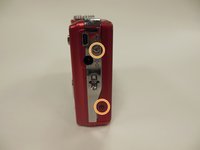
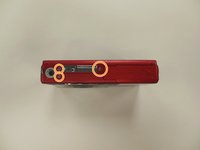
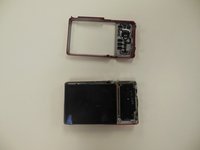
  3. Kodak EasyShare M381 Screen Replacement, Back Panel Frame: 步骤 3 中的图像 1,3 Kodak EasyShare M381 Screen Replacement, Back Panel Frame: 步骤 3 中的图像 2,3 Kodak EasyShare M381 Screen Replacement, Back Panel Frame: 步骤 3 中的图像 3,3
    • Remove the 3.9 mm frame screws using a Phillips #00 screwdriver.

    • Using a magnetized surface to keep from losing screws may be very helpful.

    询问修复机器人

    添加评论

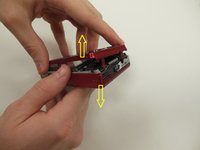
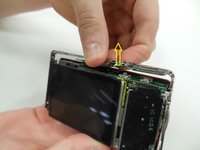
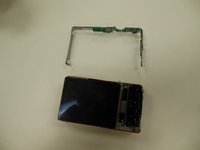
  4. Kodak EasyShare M381 Screen Replacement: 步骤 4 中的图像 1,2 Kodak EasyShare M381 Screen Replacement: 步骤 4 中的图像 2,2
    • Using both hands, carefully pull the frame apart from the camera.

    询问修复机器人

    添加评论

  5. Kodak EasyShare M381 Screen Replacement, Screen: 步骤 5 中的图像 1,1
    • Remove the two 3.85 mm screws on the bottom right of the camera, as indicated.

    询问修复机器人

    添加评论

  6. Kodak EasyShare M381 Screen Replacement: 步骤 6 中的图像 1,1
    • Remove dial button located on top of camera, by gently pulling up.

    询问修复机器人

    添加评论

  7. Kodak EasyShare M381 Screen Replacement: 步骤 7 中的图像 1,2 Kodak EasyShare M381 Screen Replacement: 步骤 7 中的图像 2,2
    • Starting at one side, carefully work the chrome frame off of the camera itself.

    • Be careful not to disturb the shutter or flash buttons on top of the camera.

    询问修复机器人

    添加评论

  8. Kodak EasyShare M381 Screen Replacement: 步骤 8 中的图像 1,1
    • On the right side of the camera, locate and remove the two 3.25 mm screws as highlighted.

    询问修复机器人

    添加评论

  9. Kodak EasyShare M381 Screen Replacement: 步骤 9 中的图像 1,3 Kodak EasyShare M381 Screen Replacement: 步骤 9 中的图像 2,3 Kodak EasyShare M381 Screen Replacement: 步骤 9 中的图像 3,3
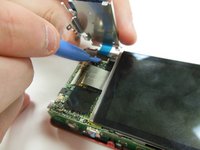
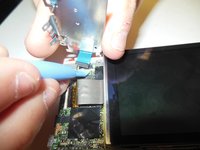
    • Carefully lift the motherboard panel up, pulling towards the left. Make sure you do not rip the blue ribbon.

    • Using a plastic opening tool, gently lift up on the ribbon fastener until it is in an upright position.

    • Slide panel away from camera.

    询问修复机器人

    添加评论

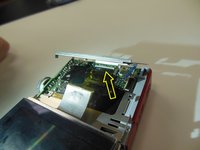
  10. Kodak EasyShare M381 Screen Replacement: 步骤 10 中的图像 1,2 Kodak EasyShare M381 Screen Replacement: 步骤 10 中的图像 2,2
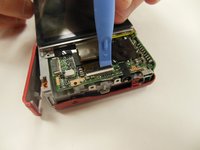
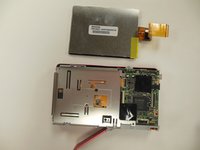
    • Using a plastic opening tool, gently lift ribbon clamp as indicated to remove the screen ribbon from the motherboard.

    • Screen should now be detached. Gently lift it away from the base of the camera.

    询问修复机器人

    添加评论

结论

To reassemble your device, follow these instructions in reverse order.

取消:我没有完成这个指南。

0指南评论

添加评论

浏览统计数据:

过去 24 小时: 0

过去 7 天: 5

过去 30 天: 32

总计 890