跳转到主内容
加入维修社区 - 创建账户

此翻译可能不反映源指南的最新更新。 帮助更新翻译查看源指南

JBL Charge Micro USB / Aux 接口更换

你所需要的

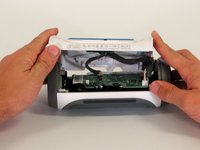
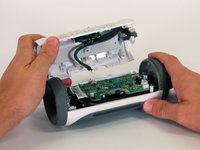
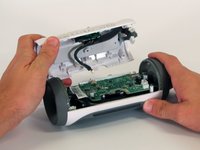
    1. JBL Charge Micro USB / Aux 接口更换, 拆卸JBLCharge Casing: 步骤 1 中的图像 1,3 JBL Charge Micro USB / Aux 接口更换, 拆卸JBLCharge Casing: 步骤 1 中的图像 2,3 JBL Charge Micro USB / Aux 接口更换, 拆卸JBLCharge Casing: 步骤 1 中的图像 3,3
      • 在开始之前,请确保设备已断开电源。

      • 在每个角落使用Jimmy或金属撬棒将外壳与设备分开。

      询问修复机器人
      添加评论

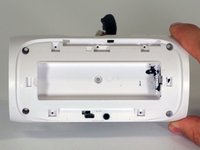
    2. JBL Charge Micro USB / Aux 接口更换: 步骤 2 中的图像 1,2 JBL Charge Micro USB / Aux 接口更换: 步骤 2 中的图像 2,2
      • 使用PH1螺丝刀从电池盖上取下五颗6毫米十字螺丝。

      • 取出电池盖并将其放在一边。

      询问修复机器人

      添加评论

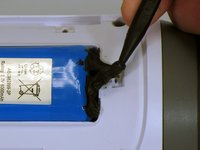
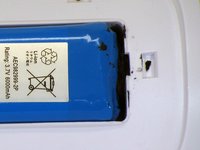
    3. JBL Charge Micro USB / Aux 接口更换: 步骤 3 中的图像 1,2 JBL Charge Micro USB / Aux 接口更换: 步骤 3 中的图像 2,2
      • 使用撬棒从电池和电池仓中取出大部分液态电工胶带。

      • 小心不要刺穿电池或损坏液态电工胶带下的电池线。

      添加评论

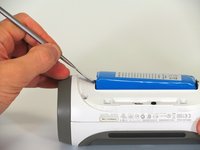
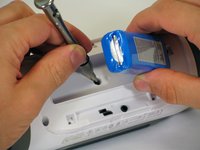
    4. JBL Charge Micro USB / Aux 接口更换: 步骤 4 中的图像 1,2 JBL Charge Micro USB / Aux 接口更换: 步骤 4 中的图像 2,2
      • 使用金属撬棒将电池从设备边缘翘出。

      • 将电池提起足够的电池,以将其下方的16mm PH2螺丝卸下。

      • 抬起电池太远会损坏电池线。

      询问修复机器人

      添加评论

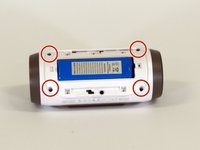
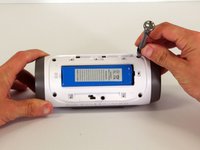
    5. JBL Charge Micro USB / Aux 接口更换: 步骤 5 中的图像 1,2 JBL Charge Micro USB / Aux 接口更换: 步骤 5 中的图像 2,2
      • 用PH2螺丝刀从白色塑料外壳上拆下剩下的四颗16mm十字螺丝。

      添加评论

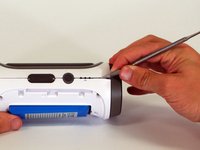
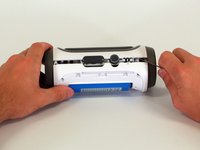
    6. JBL Charge Micro USB / Aux 接口更换: 步骤 6 中的图像 1,2 JBL Charge Micro USB / Aux 接口更换: 步骤 6 中的图像 2,2
      • 从一个角落开始,套管和侧面相遇。 用尖头的金属撬棒将这些接缝的胶水分开在一起。

      • 沿着这些接缝滑动金属撬棒,将后盖与扬声器的其余部分分开。

      询问修复机器人

      添加评论

    7. JBL Charge Micro USB / Aux 接口更换: 步骤 7 中的图像 1,2 JBL Charge Micro USB / Aux 接口更换: 步骤 7 中的图像 2,2
      • 一旦设备打开,请断开主板上的三个白色连接器。

      • 分离两个套管。

      添加评论

    1. JBL Charge Micro USB / Aux 接口更换, 电池: 步骤 8 中的图像 1,1
      • 将注意力转移到之前拆下的套管上。

      添加评论

    2. JBL Charge Micro USB / Aux 接口更换: 步骤 9 中的图像 1,1
      • 使用刀片,移除固定电池线缆的胶水。

      • 竖刀切,来移除固定胶水。

      • 小心,别切到电池线缆了。

      添加评论

    3. JBL Charge Micro USB / Aux 接口更换: 步骤 10 中的图像 1,1
      • 拉出电池线缆周围的海绵。

      添加评论

    4. JBL Charge Micro USB / Aux 接口更换: 步骤 11 中的图像 1,1
      • 从孔中穿过以移除线缆,然后移除电池。

      • 这整个白色的部分需要被更换。(如果需要更换 AUX/USB 接口).

      添加评论

    1. JBL Charge Micro USB / Aux 接口更换, Micro USB / Aux 接口: 步骤 12 中的图像 1,2 JBL Charge Micro USB / Aux 接口更换, Micro USB / Aux 接口: 步骤 12 中的图像 2,2
      • 打开设备,并在新的白色外壳里装入电池。

      • 组装设备

      添加评论

结论

按相反的步骤组装设备

取消:我没有完成这个指南。

14等其他人完成本指南。

由衷感谢以下译者:

en zh

80%

天下有狗狗正在帮助我们修复这个世界! 您也想加入吗?
开始翻译 ›

团队

Cal Poly, Team 12-4, Lancaster Spring 2015 Cal Poly, Team 12-4, Lancaster Spring 2015 的会员

CPSU-LANCASTER-S15S12G4

2 名成员

创作了24篇指南

21指南评论

Hi. This is the problem my speaker is having, but all I need to know is where to buy the replacement back. That's certainly something you should have included in your guide.

trevormeyer - 回复 分享

The purpose of a guide is to show how to fix the device, not obtain parts. I suggest eBay.

Joe Durand - 回复 分享

Joe Durand. Thank you for taking time out of your busy day to share such an enlightening comment.

Pete Hyde - 回复 分享

Yeah what was the point of this if people can't actually do it. BS

Gabriel Bohlmann - 回复 分享

The point is to guide people on the replacement of parts, not obtaining parts. I suggest eBay.

Joe Durand - 回复 分享

添加评论

浏览统计数据:

过去 24 小时: 5

过去 7 天: 24

过去 30 天: 101

总计 115,237