跳转到主内容

How to Open the Logitech G903

你所需要的

  1. How to Open the Logitech G903, Turn off the mouse: 步骤 1 中的图像 1,2 How to Open the Logitech G903, Turn off the mouse: 步骤 1 中的图像 2,2
    • Before you begin, flip the mouse's power switch to the OFF position.

    • A red indicator should be visible beneath the switch.

    • Unplug all cables from the mouse.

    • Throughout the repair, it may be helpful to lay the mouse on a soft cloth to stabilize it and prevent damage while you work.

  2. How to Open the Logitech G903, Heat the mouse foot: 步骤 2 中的图像 1,1
    • The feet are secured to the bottom of the mouse with strong adhesive. In order to cleanly remove them, the adhesive needs to be thoroughly heated.

    • Heat an iOpener and lay it on the mouse feet for one minute to heat the adhesive.

    • Alternatively, you can use a hair dryer on the Low heat setting to soften the adhesive.

    • If you're using a hair dryer, only heat the feet a few seconds at a time or you may warp the plastic shell.

  3. How to Open the Logitech G903, Separate the mouse foot adhesive: 步骤 3 中的图像 1,3 How to Open the Logitech G903, Separate the mouse foot adhesive: 步骤 3 中的图像 2,3 How to Open the Logitech G903, Separate the mouse foot adhesive: 步骤 3 中的图像 3,3
    • The feet have two layers—a rubberized one and an adhesive pad underneath.

    • If you're reusing the feet, be very careful not to separate the two layers or damage the feet.

    • Slide the tip of an opening pick under an edge of the bottom mouse foot, making sure it goes under both the foot and its adhesive pad.

    • If the foot feels stuck, apply more heat and try again.

    • Gently slide the pick farther under the foot and lift until you can grip it with your fingers.

    • Use your fingers to peel up and remove the foot.

  4. How to Open the Logitech G903, Clean off the old adhesive: 步骤 4 中的图像 1,3 How to Open the Logitech G903, Clean off the old adhesive: 步骤 4 中的图像 2,3 How to Open the Logitech G903, Clean off the old adhesive: 步骤 4 中的图像 3,3
    • If the rubber layer separated from its adhesive pad:

    • Slide the flat end of a spudger under an edge of the adhesive. If the adhesive seems stuck, you may need to heat it further.

    • Peel the adhesive off.

    • To install a new foot:

    • If any of the feet got damaged during removal or separated from their adhesive pads, replace them.

    • Use a spudger to carefully scrape up and remove any remaining adhesive bits.

    • Use isopropyl alcohol and a microfiber cloth to thoroughly clean all adhesive residue from the foot recesses. Allow the surface to completely dry (about 1–2 minutes).

    • Remove the feet from their backing and firmly press them into place.

  5. How to Open the Logitech G903, Remove the pentagonal mouse feet: 步骤 5 中的图像 1,2 How to Open the Logitech G903, Remove the pentagonal mouse feet: 步骤 5 中的图像 2,2
    • Repeat the process to remove the two pentagonal mouse feet on the left and right sides.

  6. How to Open the Logitech G903, Heat the Logitech sticker: 步骤 6 中的图像 1,1
    • The Logitech sticker on the bottom of the mouse is sensitive to heat and crumbles easily. If you want to keep that sticker intact, apply as little heat as possible and remove the sticker carefully.

    • If you don't want to remove the sticker all the way, you can puncture it with a screwdriver where the two screws are located beneath it.

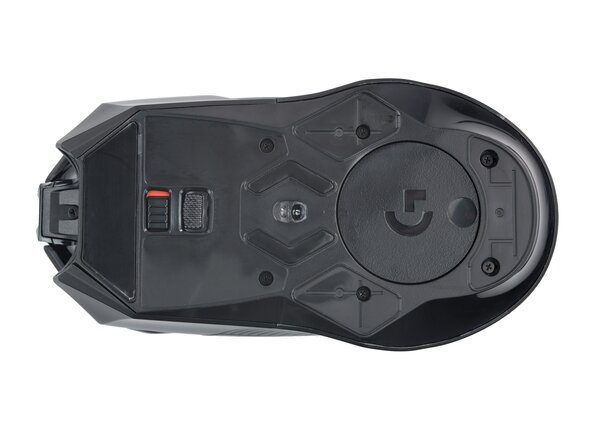
    • Heat an iOpener and apply it to the Logitech sticker for one minute to soften its adhesive.

    • Alternatively, you can use a hair dryer on the Low heat setting to soften the adhesive.

    • If you're using a hair dryer, only heat the sticker a few seconds at a time or you may warp the plastic shell.

  7. How to Open the Logitech G903, Remove the Logitech sticker: 步骤 7 中的图像 1,3 How to Open the Logitech G903, Remove the Logitech sticker: 步骤 7 中的图像 2,3 How to Open the Logitech G903, Remove the Logitech sticker: 步骤 7 中的图像 3,3
    • If you want to reuse the sticker, be delicate and work slowly.

    • Slide the tip of an opening pick under an edge of the Logitech sticker.

    • Gently slide the pick farther under the sticker and lift until you can grip it with your fingers.

    • If the sticker feels stuck, apply more heat and try again.

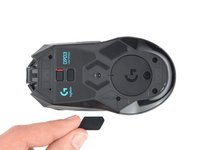
    • Use your fingers to peel up and remove the sticker.

  8. How to Open the Logitech G903, Remove the case screws: 步骤 8 中的图像 1,2 How to Open the Logitech G903, Remove the case screws: 步骤 8 中的图像 2,2
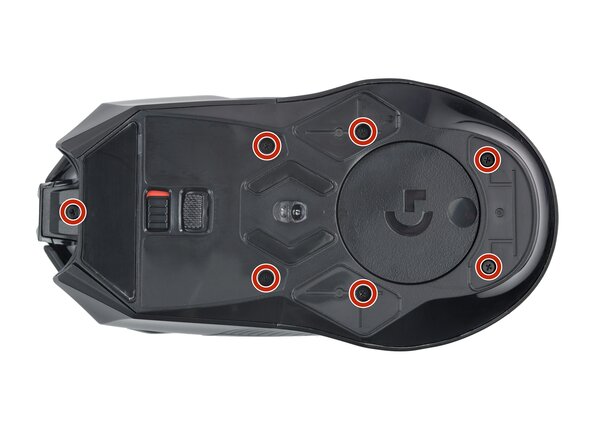
    • Use a Phillips screwdriver to remove the seven 4.5 mm‑long screws securing the two halves of the mouse together.

    • On older models, the top middle screw may be a Torx T5.

  9. How to Open the Logitech G903, Open the mouse: 步骤 9 中的图像 1,3 How to Open the Logitech G903, Open the mouse: 步骤 9 中的图像 2,3 How to Open the Logitech G903, Open the mouse: 步骤 9 中的图像 3,3
    • Don't completely separate the two halves yet—they're still connected together by a delicate cable.

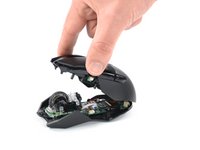
    • Swing the top case towards the rear of the mouse to access the internals.

    • Keep the top case lifted with one hand, or use something heavy to support it while you work.

    • Be careful not to strain the cable connecting the two halves.

  10. How to Open the Logitech G903, Disconnect the interconnect cable: 步骤 10 中的图像 1,2 How to Open the Logitech G903, Disconnect the interconnect cable: 步骤 10 中的图像 2,2
    • Use a spudger or clean fingernail to gently flip the hinged locking flap on the interconnect cable ZIF connector up and towards the front of the mouse.

  11. How to Open the Logitech G903: 步骤 11 中的图像 1,2 How to Open the Logitech G903: 步骤 11 中的图像 2,2
    • Use tweezers or your fingers to grip the interconnect cable by its pull tab and slide it out of the socket.

  12. How to Open the Logitech G903, Disconnect the battery: 步骤 12 中的图像 1,3 How to Open the Logitech G903, Disconnect the battery: 步骤 12 中的图像 2,3 How to Open the Logitech G903, Disconnect the battery: 步骤 12 中的图像 3,3
    • Use a pair of tweezers to firmly grasp the sides of the battery connector.

    • Hold the tweezers with your fingers as close to the connector as possible to get a firm grip.

    • Pull the connector up and out of its socket, gently rocking it back and forth to loosen it.

    • During reassembly, make sure the connector is properly oriented—it should slide into place easily.

  13. How to Open the Logitech G903, Remove the top half of the mouse: 步骤 13 中的图像 1,1
    • Remove the top half of the mouse.

结论

Compare your new replacement part to the original part—you may need to transfer remaining components or remove adhesive backings from the new part before installing.

To reassemble your device, follow the above steps in reverse order.

Take your e-waste to an R2 or e-Stewards certified recycler.

Repair didn’t go as planned? Check out our Answers community for troubleshooting help.

20等其他人完成本指南。

Dominik Schnabelrauch

于11/23/16注册

246,989 声望

创作了682篇指南

团队

iFixit iFixit 的会员

Staff

123 名成员

创作了23,649篇指南

2指南评论

Would this let me remove the left and right buttons to clean under? Because if there's an easier way to clean this godforsaken design I'd rather start there ;P

CrazineX UnbounD - 回复

There are several additional steps required to replace the Omron switches. This requires removal of the battery to access one of the screws. Beware when removing the battery that it's easy to puncture since you have to wedge a tool beneath it to pry it away from the double-sided tape.

Flabber Gasted - 回复

添加评论

浏览统计数据:

过去 24 小时: 16

过去 7 天: 91

过去 30 天: 457

总计 32,493