跳转到主内容

HTC One V Camera Replacement

你所需要的

  1. HTC One V Camera Replacement, Disassembling HTC ONE V Bottom Assembly: 步骤 1 中的图像 1,3 HTC One V Camera Replacement, Disassembling HTC ONE V Bottom Assembly: 步骤 1 中的图像 2,3 HTC One V Camera Replacement, Disassembling HTC ONE V Bottom Assembly: 步骤 1 中的图像 3,3
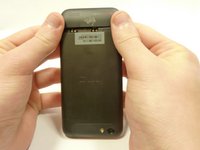
    • Power off your device.

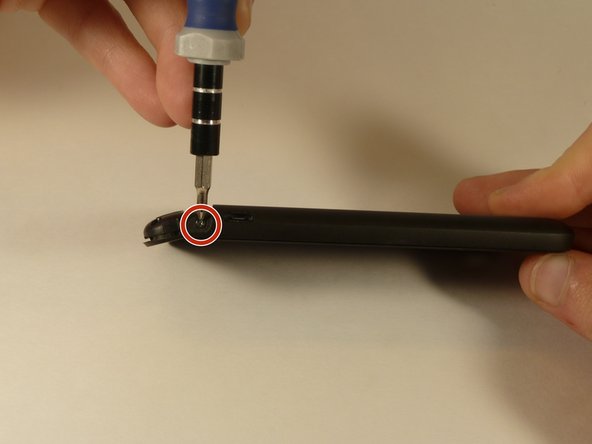
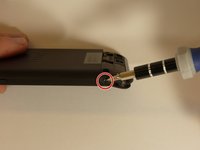
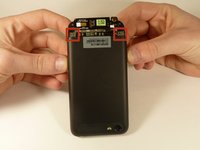
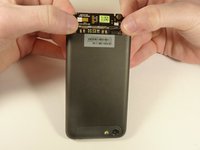
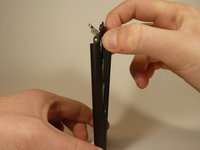
    • Remove the bottom cover by sliding it off.

  2. HTC One V Camera Replacement: 步骤 2 中的图像 1,1
    • Remove the SIM card.

    • Remove the four screws securing the bottom casing.

    • Two 3.0 mm Phillips #0 screws in the top left and right corners.

    • Two 2.0 mm Phillips #0 screws in the bottom left and right corners.

  3. HTC One V Camera Replacement: 步骤 3 中的图像 1,2 HTC One V Camera Replacement: 步骤 3 中的图像 2,2
    • Remove the 2.0 mm Phillips #0 screws on either side of the phone.

  4. HTC One V Camera Replacement: 步骤 4 中的图像 1,3 HTC One V Camera Replacement: 步骤 4 中的图像 2,3 HTC One V Camera Replacement: 步骤 4 中的图像 3,3
    • Use a plastic opening tool to pry open the bottom casing.

    • Remove the bottom casing by pulling it towards you.

  5. HTC One V Camera Replacement, Disassembling HTC One V Back Case: 步骤 5 中的图像 1,3 HTC One V Camera Replacement, Disassembling HTC One V Back Case: 步骤 5 中的图像 2,3 HTC One V Camera Replacement, Disassembling HTC One V Back Case: 步骤 5 中的图像 3,3
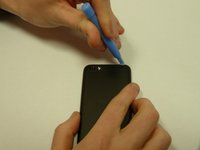
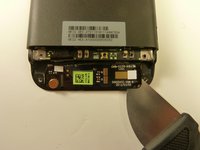
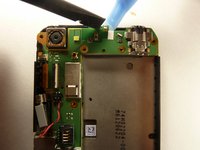
    • Use the plastic opening tool to pry open the rear camera panel.

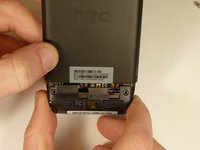
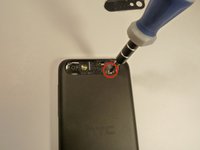
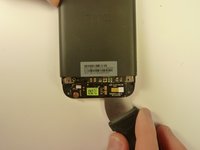
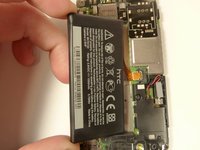
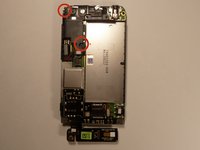
    • Remove both screws that are securing the back case.

    • One 4.0 mm Phillips #0 screw.

    • One 3.0 mm Phillips #0 screw.

  6. HTC One V Camera Replacement: 步骤 6 中的图像 1,3 HTC One V Camera Replacement: 步骤 6 中的图像 2,3 HTC One V Camera Replacement: 步骤 6 中的图像 3,3
    • Use a Jimmy to pry up the OEM SIM and SD card reader contact.

    • Pry from right to left to avoid potential damages to the ribbon.

  7. HTC One V Camera Replacement: 步骤 7 中的图像 1,3 HTC One V Camera Replacement: 步骤 7 中的图像 2,3 HTC One V Camera Replacement: 步骤 7 中的图像 3,3
    • Using both thumbs, gently push on the two bottom rear corners of the motherboard.

    • Gently and slowly pull the screen out from the front of the phone, while feeding the OEM reader contact through the opening.

  8. HTC One V Camera Replacement, Battery: 步骤 8 中的图像 1,1
    • Pry up the battery with the flat end of the spudger.

  9. HTC One V Camera Replacement: 步骤 9 中的图像 1,3 HTC One V Camera Replacement: 步骤 9 中的图像 2,3 HTC One V Camera Replacement: 步骤 9 中的图像 3,3
    • Gently lift up the battery away from the edge of its housing.

    • Use the point end of the spudger to push the connection out of its housing.

  10. HTC One V Camera Replacement, Camera Lens: 步骤 10 中的图像 1,3 HTC One V Camera Replacement, Camera Lens: 步骤 10 中的图像 2,3 HTC One V Camera Replacement, Camera Lens: 步骤 10 中的图像 3,3
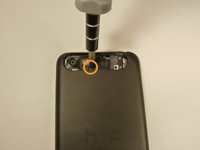
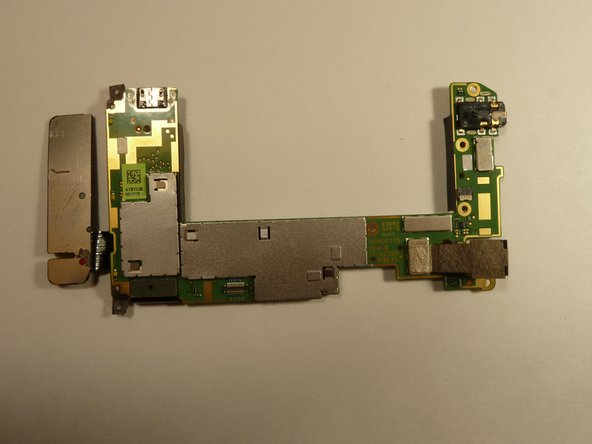
    • Remove the two 3.0 mm Phillips #0 screws, that are securing the camera lens.

  11. HTC One V Camera Replacement: 步骤 11 中的图像 1,1
    • Pry off the camera lens using a plastic opening tool.

  12. HTC One V Camera Replacement, Vibrator: 步骤 12 中的图像 1,2 HTC One V Camera Replacement, Vibrator: 步骤 12 中的图像 2,2
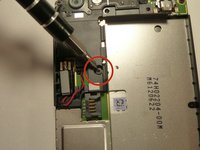
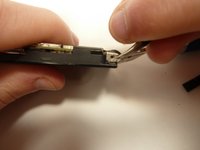
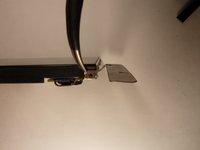
    • Pry the vibrator out of the housing with a spudger.

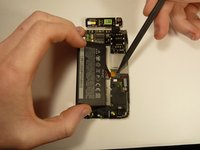
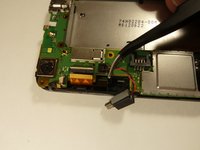
    • Using the tweezers, pull up on the connecting wires detaching the vibrator from the motherboard.

  13. HTC One V Camera Replacement, Motherboard: 步骤 13 中的图像 1,3 HTC One V Camera Replacement, Motherboard: 步骤 13 中的图像 2,3 HTC One V Camera Replacement, Motherboard: 步骤 13 中的图像 3,3
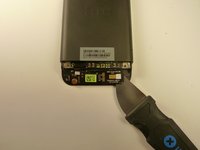
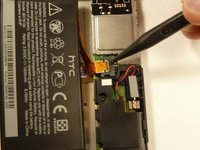
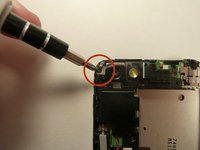
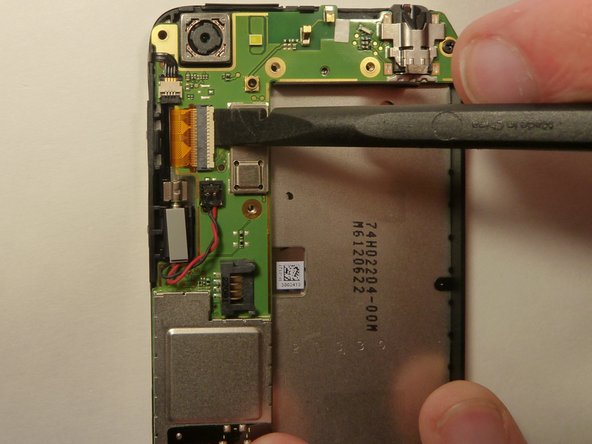
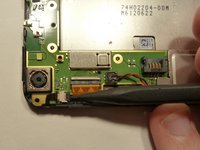
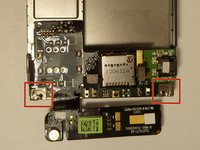
    • Using the spudger lift the tabs on the highlighted, red and orange, ribbon connectors. Gently pull out the ribbons from their connectors.

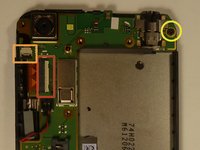
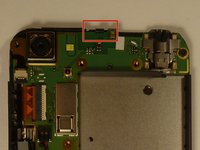
    • Remove the 3.0 mm Phillips #0 screw.

  14. HTC One V Camera Replacement: 步骤 14 中的图像 1,3 HTC One V Camera Replacement: 步骤 14 中的图像 2,3 HTC One V Camera Replacement: 步骤 14 中的图像 3,3
    • Using tweezers, pull back on the tape located on the bottom corners of the motherboard.

  15. HTC One V Camera Replacement: 步骤 15 中的图像 1,2 HTC One V Camera Replacement: 步骤 15 中的图像 2,2
    • Use the spudger to push back the latch holding on the motherboard. While the latch is pushed back use the plastic opening tool to pry up the motherboard.

  16. HTC One V Camera Replacement: 步骤 16 中的图像 1,1
    • Place your phone on its side so that you can gently pull up on the motherboard to expose its last connector.

    • Using the flat end of the spudger, pop of the connector.

  17. HTC One V Camera Replacement, Camera: 步骤 17 中的图像 1,2 HTC One V Camera Replacement, Camera: 步骤 17 中的图像 2,2
    • Flip motherboard over so the backside is up.

  18. HTC One V Camera Replacement: 步骤 18 中的图像 1,2 HTC One V Camera Replacement: 步骤 18 中的图像 2,2
    • Pull the camera back using the tweezers, and hold it.

    • Use the spudger to unlock the camera's ribbon from its connector.

    • Using the tweezers, pull up on the ribbon and release the camera form the motherboard.

    • The ribbon is connected to the back of the LCD display by tape. Slowly pull the ribbon back and the tape will follow.

结论

To reassemble your device, follow these instructions in reverse order.

2等其他人完成本指南。

Michael Lucido

于01/20/15注册

852 声望

创作了6篇指南

团队

USF Tampa, Team 1-3, Blackwell Winter 2015 USF Tampa, Team 1-3, Blackwell Winter 2015 的会员

USFT-BLACKWELL-W15S1G3

4 名成员

创作了16篇指南

0条评论

添加评论

浏览统计数据:

过去 24 小时: 0

过去 7 天: 0

过去 30 天: 0

总计 843