跳转到主内容
加入维修社区 - 创建账户

HP ProBook 4520s Optical Drive Replacement

你所需要的

  1. HP ProBook 4520s Optical Drive Replacement, Battery: 步骤 1 中的图像 1,2 HP ProBook 4520s Optical Drive Replacement, Battery: 步骤 1 中的图像 2,2
    • Flip the 4520s upside-down with the front toward you.

    • Push the two latches below the battery inwards at the same time.

    询问修复机器人
  2. HP ProBook 4520s Optical Drive Replacement: 步骤 2 中的图像 1,1
    • Remove the battery by holding the latches and sliding the battery away from you.

    询问修复机器人
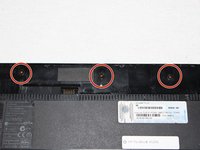
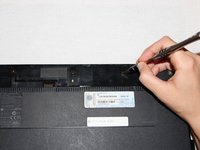
  3. HP ProBook 4520s Optical Drive Replacement, Switch Cover: 步骤 3 中的图像 1,2 HP ProBook 4520s Optical Drive Replacement, Switch Cover: 步骤 3 中的图像 2,2
    • Use a Phillips #1 screwdriver to remove three 2mm screws where the battery was located.

    询问修复机器人
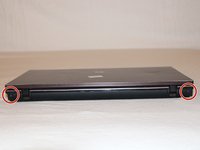
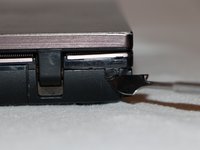
  4. HP ProBook 4520s Optical Drive Replacement: 步骤 4 中的图像 1,2 HP ProBook 4520s Optical Drive Replacement: 步骤 4 中的图像 2,2
    • Flip the 4520s over and rotate it so the back is facing you.

    • Use a metal spudger to peel off two rubber caps located on either side of the battery port.

    询问修复机器人
  5. HP ProBook 4520s Optical Drive Replacement: 步骤 5 中的图像 1,1
    • Use a Phillips #1 screwdriver to remove the 3mm screws behind the caps.

    询问修复机器人
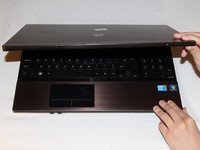
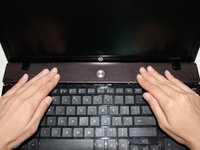
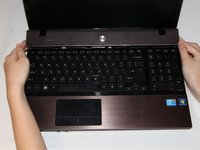
  6. HP ProBook 4520s Optical Drive Replacement: 步骤 6 中的图像 1,3 HP ProBook 4520s Optical Drive Replacement: 步骤 6 中的图像 2,3 HP ProBook 4520s Optical Drive Replacement: 步骤 6 中的图像 3,3
    • Rotate the 4520s and then open it with the screen facing you.

    • The switch cover is located above the keyboard. Push the switch cover away from you until it comes loose from the 4520s.

    • Lift the switch cover away from the 4520s and set it aside.

    询问修复机器人
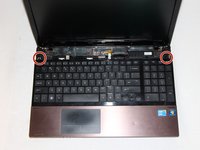
  7. HP ProBook 4520s Optical Drive Replacement, Keyboard: 步骤 7 中的图像 1,2 HP ProBook 4520s Optical Drive Replacement, Keyboard: 步骤 7 中的图像 2,2
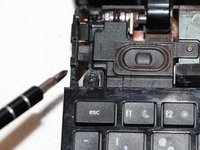
    • Use a Phillips #1 screwdriver to remove the two 7mm screws located on either side of the keyboard panel.

    询问修复机器人
  8. HP ProBook 4520s Optical Drive Replacement: 步骤 8 中的图像 1,1
    • Slide the keyboard panel away from you to free it from the 4520s.

    • Do not yank the keyboard panel away from the 4520s. This may damage the cable.

  9. HP ProBook 4520s Optical Drive Replacement: 步骤 9 中的图像 1,2 HP ProBook 4520s Optical Drive Replacement: 步骤 9 中的图像 2,2
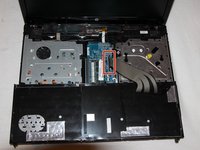
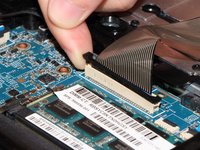
    • Gently raise up the keyboard and flip it over to reveal a ribbon cable.

    • Release the ribbon cable by carefully lifting the black tab upwards, one side at a time.

    • Remove the cable and lift the keyboard panel up. Set it aside.

    • When reassembling, feed the ribbon cable into the port. Press down on the tab to pinch the cable in place.

    询问修复机器人
  10. HP ProBook 4520s Optical Drive Replacement, Optical Drive: 步骤 10 中的图像 1,2 HP ProBook 4520s Optical Drive Replacement, Optical Drive: 步骤 10 中的图像 2,2
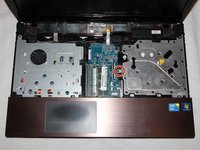
    • The housing for the optical drive is on the right of the device.

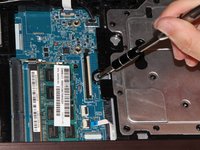
    • Remove the 5mm screw on the left side of the metal plate with a Phillips (PH1) head screwdriver.

    询问修复机器人
  11. HP ProBook 4520s Optical Drive Replacement: 步骤 11 中的图像 1,1
    • Use a metal spudger to push the optical drive to the right and partially out of the casing.

    询问修复机器人
  12. HP ProBook 4520s Optical Drive Replacement: 步骤 12 中的图像 1,1
    • Slide the optical drive outward from the 4520s.

    询问修复机器人
  13. HP ProBook 4520s Optical Drive Replacement: 步骤 13 中的图像 1,2 HP ProBook 4520s Optical Drive Replacement: 步骤 13 中的图像 2,2
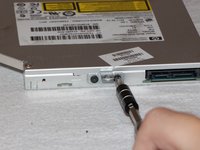
    • Use a Phillips (PH1) head screwdriver to remove two 2mm screws securing the metal tab to the optical drive.

    询问修复机器人
结论

To reassemble your device, follow these instructions in reverse order.

团队

UC Davis, Team 1-3, Oliver Fall 2016 UC Davis, Team 1-3, Oliver Fall 2016 的会员

UCD-OLIVER-F16S1G3

5 名成员

创作了8篇指南

0指南评论

添加评论

浏览统计数据:

过去 24 小时: 2

过去 7 天: 7

过去 30 天: 51

总计 2,789