跳转到主内容

HP G62-144DX Display Replacement

你所需要的

  1. HP G62-144DX Display Replacement, Battery: 步骤 1 中的图像 1,2 HP G62-144DX Display Replacement, Battery: 步骤 1 中的图像 2,2
    • Make sure to turn off the laptop before removing the battery.

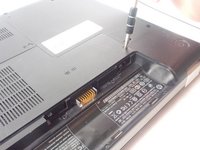
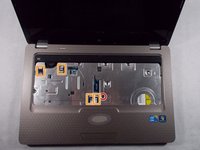
    • Slide the lock to the right, located slightly above the battery location.

    • While pulling the lock, pull the battery out, keeping it flat and parallel to the laptop so that it slides out easily.

  2. HP G62-144DX Display Replacement, Hard Drive: 步骤 2 中的图像 1,3 HP G62-144DX Display Replacement, Hard Drive: 步骤 2 中的图像 2,3 HP G62-144DX Display Replacement, Hard Drive: 步骤 2 中的图像 3,3
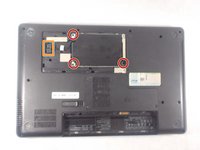
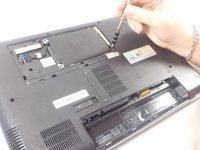
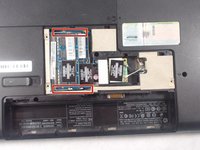
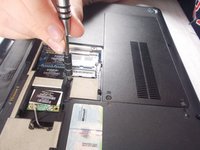
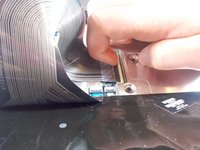
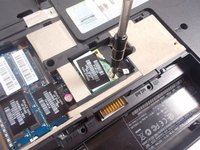
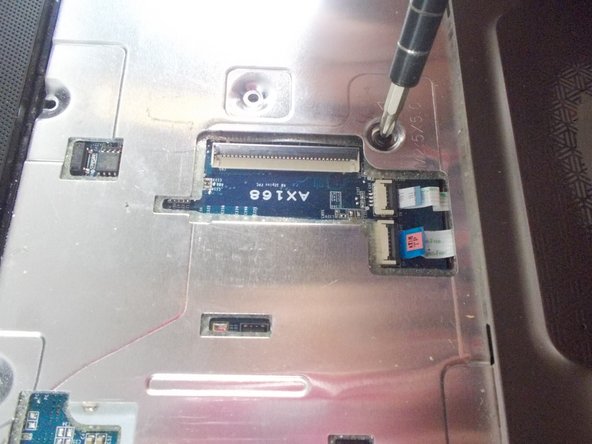
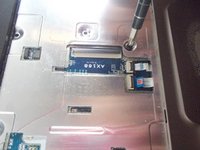
    • Loosen the 2 Phillips 2.5x6 screws in the rectangular panel with a Phillips #1 screwdriver.

    • The screws will stay in the panel, but come free from the body of the computer.

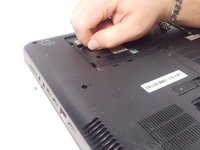
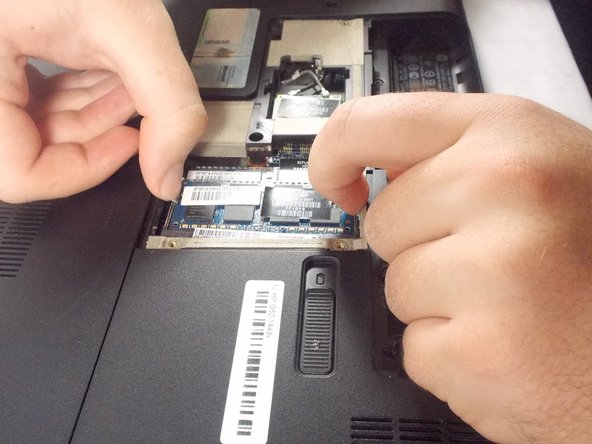
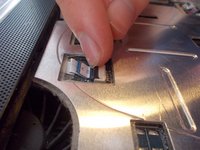
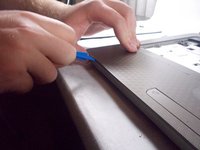
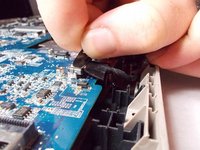
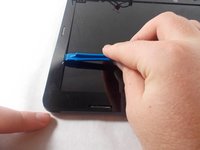
    • Gently remove the panel with a plastic opening tool.

  3. HP G62-144DX Display Replacement: 步骤 3 中的图像 1,3 HP G62-144DX Display Replacement: 步骤 3 中的图像 2,3 HP G62-144DX Display Replacement: 步骤 3 中的图像 3,3
    • Unscrew the three 3x4 Phillips screws holding the hard drive in with a Phillips #1 screwdriver.

    • Pull the hard drive cable out of the motherboard.

    • Pull the hard drive out of the computer.

  4. HP G62-144DX Display Replacement, RAM: 步骤 4 中的图像 1,3 HP G62-144DX Display Replacement, RAM: 步骤 4 中的图像 2,3 HP G62-144DX Display Replacement, RAM: 步骤 4 中的图像 3,3
    • Unscrew the three Phillips 2.5x6 screws in the L-shaped panel on the back with a Phillips #1 screwdriver.

    • The screws will stay in the panel, but will come loose from the body of the laptop.

    • Use a plastic opening tool to gently pry the panel free from the laptop.

  5. HP G62-144DX Display Replacement: 步骤 5 中的图像 1,3 HP G62-144DX Display Replacement: 步骤 5 中的图像 2,3 HP G62-144DX Display Replacement: 步骤 5 中的图像 3,3
    • Pull the two metal clips to the top RAM module outwards parallel to the laptop.

    • After the RAM module pops up, gently pull in out from the computer.

    • Repeat for the second RAM module.

  6. HP G62-144DX Display Replacement, Keyboard: 步骤 6 中的图像 1,1
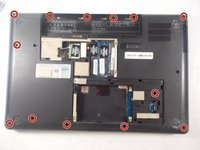
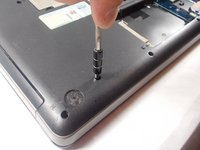
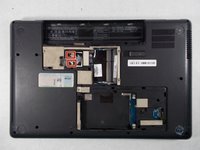
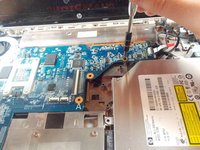
    • Remove the 3 Phillips 2.5x5 screws (closest to the battery slot) and the 2 Phillips 2.5x6.5 screws with a Phillips #1 screwdriver.

    • This screws will have a keyboard symbol inscribed next to them.

  7. HP G62-144DX Display Replacement: 步骤 7 中的图像 1,3 HP G62-144DX Display Replacement: 步骤 7 中的图像 2,3 HP G62-144DX Display Replacement: 步骤 7 中的图像 3,3
    • Use the Phillips # 1 screwdriver to unscrew the 2.5x6 Phillips screws holding the L-shaped back panel.

    • Screws should stay in panel, but come free of the laptop body.

    • Gently use a plastic opening tool to remove the panel.

  8. HP G62-144DX Display Replacement: 步骤 8 中的图像 1,2 HP G62-144DX Display Replacement: 步骤 8 中的图像 2,2
    • Unscrew the final Phillips 2.5x5 keyboard screw with a Phillips #1 screwdriver.

  9. HP G62-144DX Display Replacement: 步骤 9 中的图像 1,2 HP G62-144DX Display Replacement: 步骤 9 中的图像 2,2
    • Flip the laptop so the top is facing up again and open the cover.

    • Use a metal spudger to pry the keyboard up and pull it back.

    • Be sure to pry up the board itself and not an individual key.

    • This process has the risk of breaking keys.

  10. HP G62-144DX Display Replacement: 步骤 10 中的图像 1,2 HP G62-144DX Display Replacement: 步骤 10 中的图像 2,2
    • Pull up the latch that connects the keyboard connector the the motherboard.

  11. HP G62-144DX Display Replacement, Motherboard: 步骤 11 中的图像 1,2 HP G62-144DX Display Replacement, Motherboard: 步骤 11 中的图像 2,2
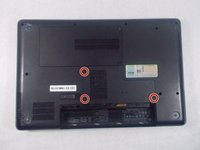
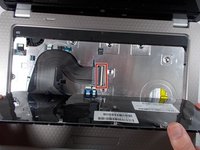
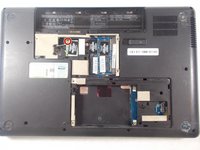
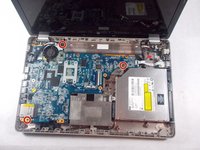
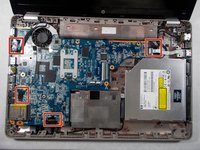
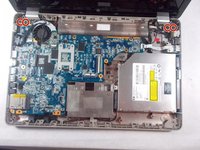
    • Remove four Phillips PM2.5x3 screws in the battery bay, and remove ten Phillips PM2.5x6.5 screws on the base enclosure with a Phillips #1 screwdriver.

  12. HP G62-144DX Display Replacement: 步骤 12 中的图像 1,2 HP G62-144DX Display Replacement: 步骤 12 中的图像 2,2
    • Remove the Phillips PM2.0×3.0 screw that secures the WLAN module to the computer with a Phillips #0 screwdriver.

  13. HP G62-144DX Display Replacement: 步骤 13 中的图像 1,3 HP G62-144DX Display Replacement: 步骤 13 中的图像 2,3 HP G62-144DX Display Replacement: 步骤 13 中的图像 3,3
    • Disconnect the two wires that attach the card to the motherboard by pulling them up individually.

    • Grab the card gently and pull it out after it pops up.

  14. HP G62-144DX Display Replacement: 步骤 14 中的图像 1,3 HP G62-144DX Display Replacement: 步骤 14 中的图像 2,3 HP G62-144DX Display Replacement: 步骤 14 中的图像 3,3
    • Flip the laptop over so that the top is facing upwards.

    • Remove the Phillips PM2.5×6.0 screw that secures the top cover to the computer with a Phillips #1 screwdriver.

    • Disconnect the 4 connectors to the motherboard.

  15. HP G62-144DX Display Replacement: 步骤 15 中的图像 1,2 HP G62-144DX Display Replacement: 步骤 15 中的图像 2,2
    • Take off the cover by prying open the cover with a plastic opening tool.

    • Lift the edge near the display first until it pops out, and then remove the cover by pulling it out.

    • The cover should come out with ease. If you having trouble pulling the cover out you should double check to see if any screws were left unscrew.

  16. HP G62-144DX Display Replacement: 步骤 16 中的图像 1,3 HP G62-144DX Display Replacement: 步骤 16 中的图像 2,3 HP G62-144DX Display Replacement: 步骤 16 中的图像 3,3
    • Remove the two motherboard screws and the fan screw that holds it on the the rest of the computer with a Phillips #1 screwdriver.

  17. HP G62-144DX Display Replacement: 步骤 17 中的图像 1,3 HP G62-144DX Display Replacement: 步骤 17 中的图像 2,3 HP G62-144DX Display Replacement: 步骤 17 中的图像 3,3
    • Remove the six connectors from the motherboard.

    • The power connector is located underneth the USB connector.

  18. HP G62-144DX Display Replacement: 步骤 18 中的图像 1,1
    • Lift up the right side of the motherboard and pull it out to the right carefully.

  19. HP G62-144DX Display Replacement, Display: 步骤 19 中的图像 1,2 HP G62-144DX Display Replacement, Display: 步骤 19 中的图像 2,2
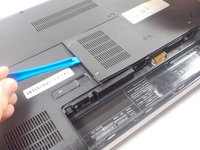
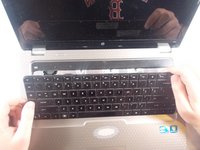
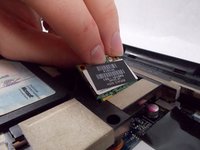
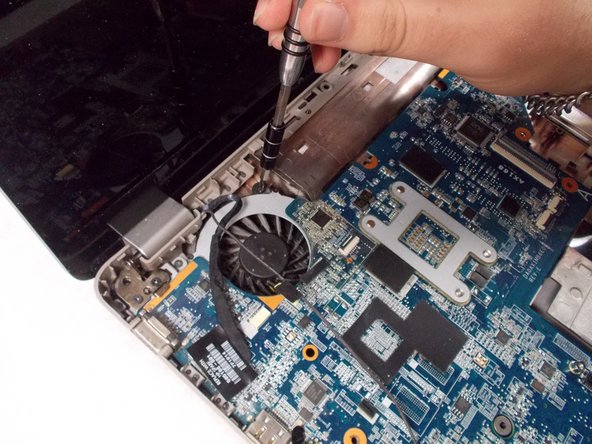
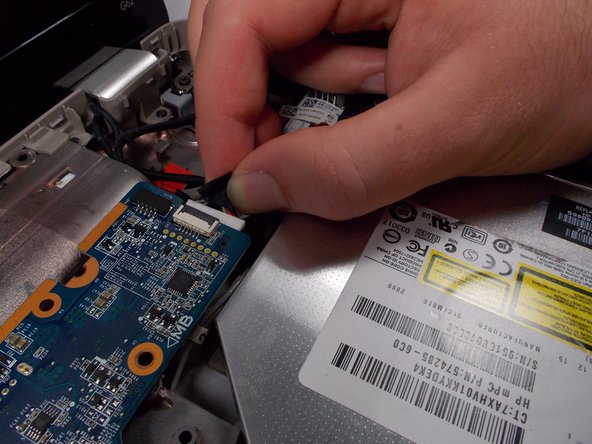
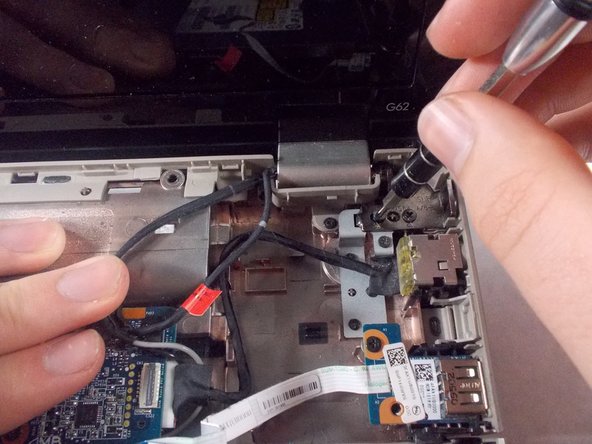
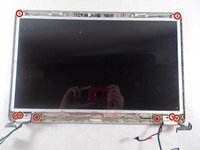
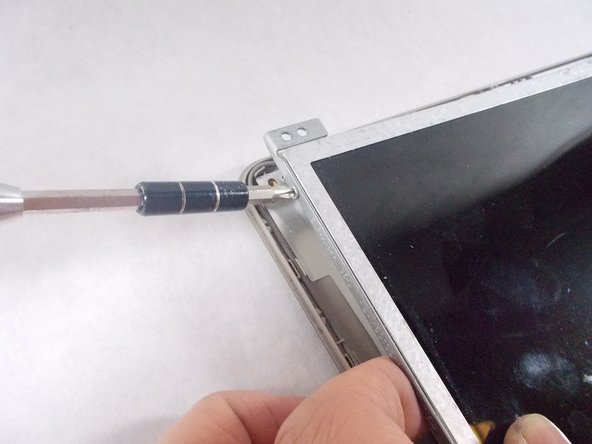
    • Remove the 4 screws holding the display to the body of the laptop with a Phillips #0 screwdriver.

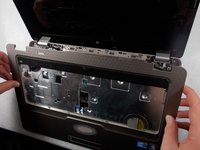
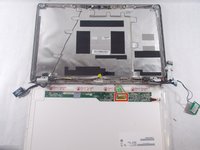
    • Remove the screen from the laptop body.

  20. HP G62-144DX Display Replacement: 步骤 20 中的图像 1,3 HP G62-144DX Display Replacement: 步骤 20 中的图像 2,3 HP G62-144DX Display Replacement: 步骤 20 中的图像 3,3
    在这个步骤中使用的工具:
    Tweezers
    $4.99
    购买
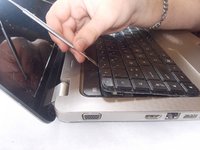
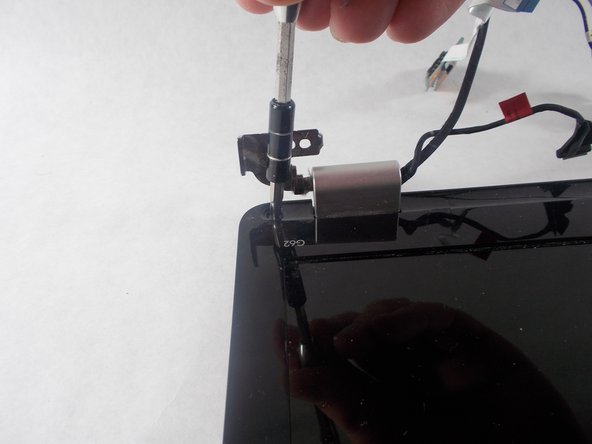
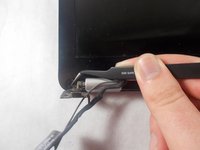
    • Find and remove the 2 cover stickers that are over the screws on the bezel using tweezers. These cover stickers are located on the bottom of the screen near the screen hinges on both sides of the screen.

    • After you remove the cover stickers you can remove the Two Phillips PM2.5×6.0 screws that are underneath with a Phillips #1 screwdriver

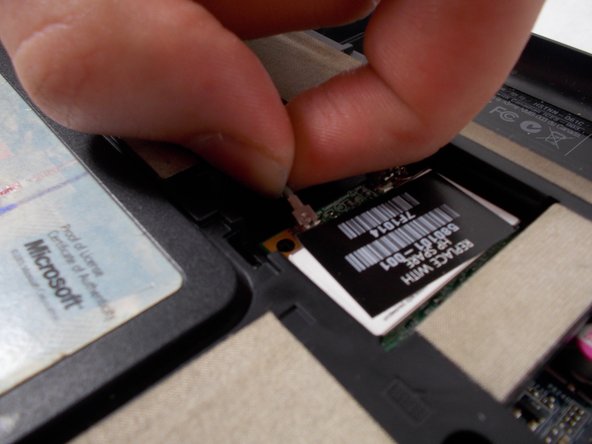
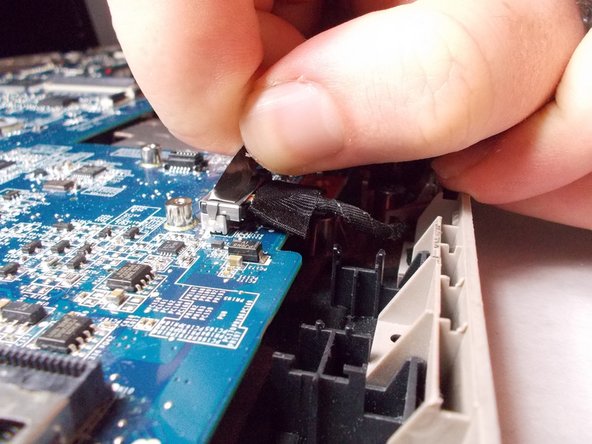
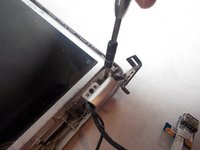
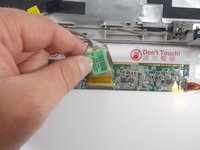
    • Start prying the screen bezel away from the screen case with a plastic opening tool and carefully snap it out from the front of the screen.

  21. HP G62-144DX Display Replacement: 步骤 21 中的图像 1,2 HP G62-144DX Display Replacement: 步骤 21 中的图像 2,2
    • After the bezel is removed you have to remove the 6 screws on the bottom corners and two that are located on the top corner with a Phillips #1 screwdriver.

  22. HP G62-144DX Display Replacement: 步骤 22 中的图像 1,2 HP G62-144DX Display Replacement: 步骤 22 中的图像 2,2
    • Then you with a Phillips #1 screwdriver must remove the 4 screws that are on the edges of the screen, which are holding the screen to the screen brackets. There are 2 on each edge.

  23. HP G62-144DX Display Replacement: 步骤 23 中的图像 1,2 HP G62-144DX Display Replacement: 步骤 23 中的图像 2,2
    • Lastly, place the back of the screen facing towards you and carefully unplug the connector.

    • The screen should then be disconnected and ready to be replaced.

结论

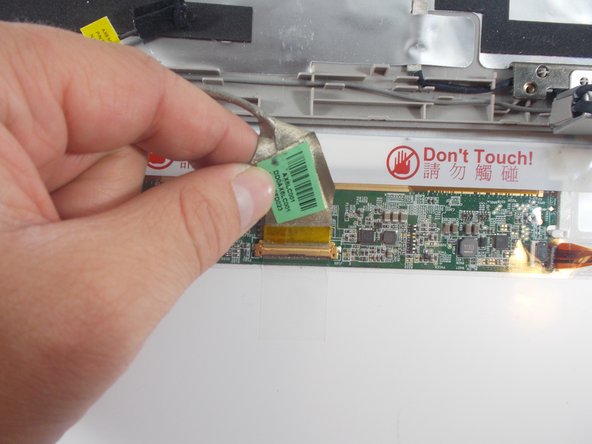
To reassemble your device, follow these instructions in reverse order.

5等其他人完成本指南。

Tom Pawlik

于10/19/17注册

318 声望

创作了2篇指南

团队

UMass Dartmouth, Team S4-G8, Julie Fall 2017 UMass Dartmouth, Team S4-G8, Julie Fall 2017 的会员

UMASSD-JULIE-F17S4G8

3 名成员

创作了7篇指南

0条评论

添加评论

浏览统计数据:

过去 24 小时: 0

过去 7 天: 0

过去 30 天: 7

总计 1,440