简介
This replacement guide is for the fan of the HP Envy x360 m6-w103dx. All you need to complete this guide is a plastic opening tool, a #0 Phillips screwdriver, a #00 Phillips screwdriver, and an anti-static wrist strap.
If you suspect there are issues with the fan, please refer to the troubleshooting guides here.
Wear the anti-static wrist strap and attach it to a metal surface to avoid damaging sensitive electrical components. Make sure the computer is unplugged and powered off before touching any internal parts.
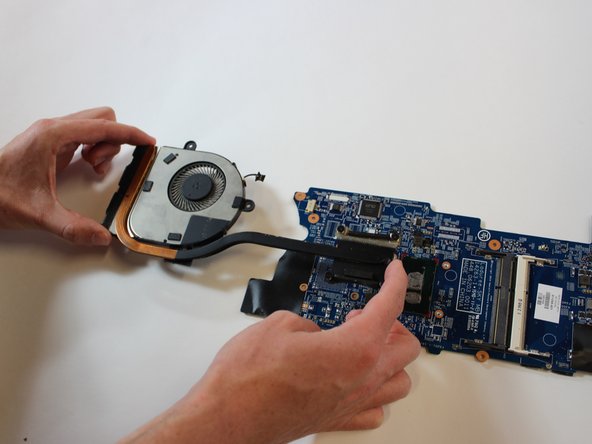
The fan is attached to the motherboard, so it will be necessary to also remove the motherboard. The motherboard isn’t a hazardous component to handle, but it is connected to many critical parts of the computer and must be removed with care.
你所需要的
-
-
Lift the keyboard until you can see the cables connected to the motherboard.
-
Gently lift the tab on each ZIF connector that connects each cable to the motherboard using a spudger. Once each tab is flipped up, the corresponding ribbon cable will come out easily.
-
Detach the keyboard.
-
-
-
-
Disconnect the pin head battery connection to remove power from the motherboard.
-
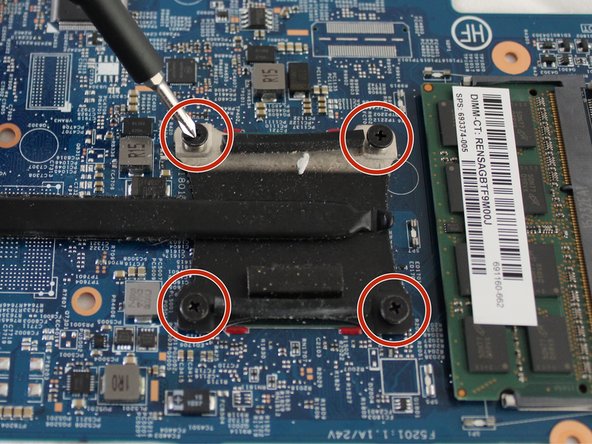
Unscrew the five 4mm screws holding the motherboard in place using a #0 Phillips screwdriver.
-


To reassemble your device, follow these instructions in reverse order.
To reassemble your device, follow these instructions in reverse order.
另外一个人完成了本指南。

团队

Cal Poly, Team S12-G2, Regan Fall 2019 Cal Poly, Team S12-G2, Regan Fall 2019 的会员
CPSU-REGAN-F19S12G2
4 名成员
创作了23篇指南