跳转到主内容
加入维修社区 - 创建账户

此翻译由机器生成,尚未经过人工审核。 会说这种语言吗? 查看评论

HP Chromebook 14 屏幕更换

你所需要的

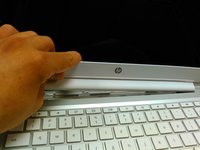
    1. HP Chromebook 14 屏幕更换, 尼龙盖板: 步骤 1 中的图像 1,3 HP Chromebook 14 屏幕更换, 尼龙盖板: 步骤 1 中的图像 2,3 HP Chromebook 14 屏幕更换, 尼龙盖板: 步骤 1 中的图像 3,3
      • 撬起显示屏左下角和右下角的尼龙盖板,露出两颗十字螺丝。

      添加评论

    2. HP Chromebook 14 屏幕更换, 拆下刚才露出的螺丝: 步骤 2 中的图像 1,2 HP Chromebook 14 屏幕更换, 拆下刚才露出的螺丝: 步骤 2 中的图像 2,2
      • 拧下两颗螺丝。

      询问修复机器人

      添加评论

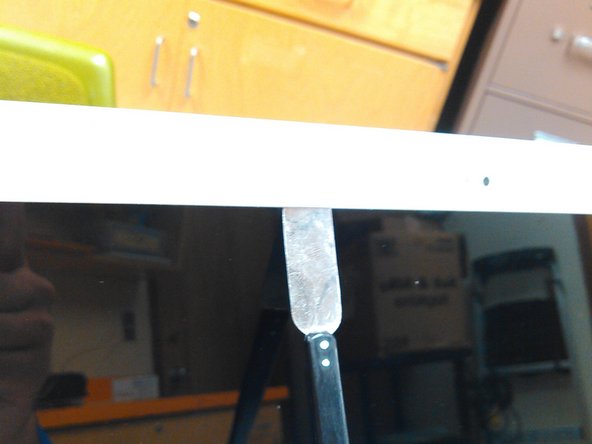
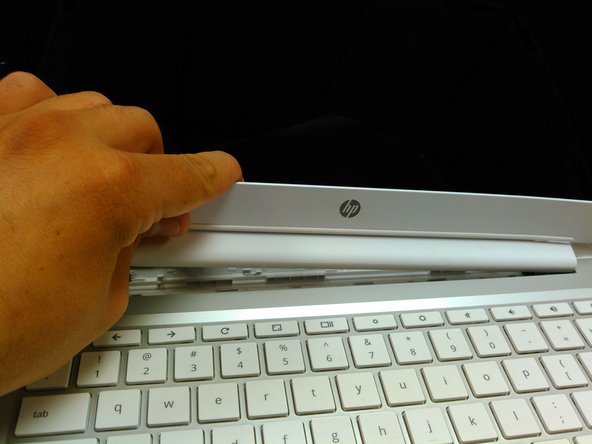
    3. HP Chromebook 14 屏幕更换, 撬起并拆下屏幕: 步骤 3 中的图像 1,3 HP Chromebook 14 屏幕更换, 撬起并拆下屏幕: 步骤 3 中的图像 2,3 HP Chromebook 14 屏幕更换, 撬起并拆下屏幕: 步骤 3 中的图像 3,3
      • 撬起时请小心,以免损坏边框。

      • 使用撬棒或其他撬起工具从四周撬起边框。

      • 所有卡扣松开后,从底部拉出边框。

      询问修复机器人

      添加评论

    4. HP Chromebook 14 屏幕更换, 拆下固定显示面板的四颗 Phillips 螺丝: 步骤 4 中的图像 1,1
      • 拆下固定显示面板的四颗螺丝。

      询问修复机器人

      添加评论

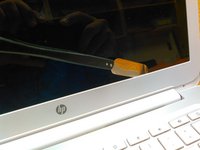
    5. HP Chromebook 14 屏幕更换, 从显示面板断开连接器/排线: 步骤 5 中的图像 1,1
      • 让显示面板搁置在键盘上。

      • 高亮显示区域通过胶带粘贴在显示面板背面。请将其撬起以松开。

      • 注意不要损坏连接器——轻轻向后拉动即可断开。

      询问修复机器人

      添加评论

结论

要重新组装设备,请按相反顺序执行这些说明。

取消:我没有完成这个指南。

23等其他人完成本指南。

Mario

于03/24/14注册

652 声望

撰写一个指南

团队

TechTucson WeFixThat TechTucson WeFixThat 的会员

Community

2 名成员

创作了31篇指南

8指南评论

Nylon covers are hard to see, they cover the entire area and peel off like a sticker, I didn't think mine had any and I pulled the screw socket out, not disastrous but I would have liked to have not done this.

madornetto - 回复 分享

Any idea where I can buy some replacement ones?

mcaddie7 - 回复 分享

I was able to complete it successfully though right now I can't get the bezel quite flush down on the bottom left. One clip doesn't seem to want to go in so I'm not sure if the display cable is in the way or not. Will have to give it another look here after work but otherwise easy enough!

Aysha Springston - 回复 分享

So what's the screen model used in this video?, I have the same laptop

seunoresegun - 回复 分享

Where could I find a replacement part for the 2 nylon screw covers?

mcaddie7 - 回复 分享

添加评论

浏览统计数据:

过去 24 小时: 0

过去 7 天: 9

过去 30 天: 46

总计 17,014