跳转到主内容

HP 2000 - 2D22DX Keyboard Assembly Replacement

你所需要的

  1. HP 2000 - 2D22DX Keyboard Assembly Replacement, Battery: 步骤 1 中的图像 1,2 HP 2000 - 2D22DX Keyboard Assembly Replacement, Battery: 步骤 1 中的图像 2,2
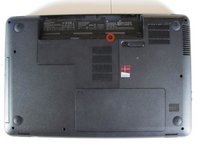
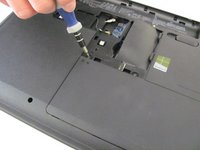
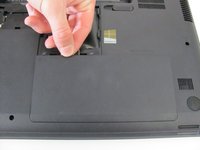
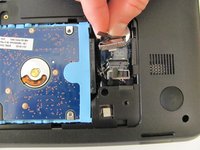
    • Flip the device over and locate the battery compartment.

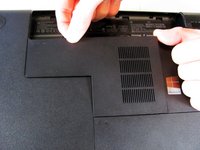
    • Slide the battery release latch to the left until the battery is detached from its slot.

    • A distinguishable pop will be heard when the battery is fully released.

  2. HP 2000 - 2D22DX Keyboard Assembly Replacement: 步骤 2 中的图像 1,2 HP 2000 - 2D22DX Keyboard Assembly Replacement: 步骤 2 中的图像 2,2
    • Slowly pull the battery out of its slot, being careful not to damage any of the connectors in the process.

  3. HP 2000 - 2D22DX Keyboard Assembly Replacement, Hard Drive: 步骤 3 中的图像 1,2 HP 2000 - 2D22DX Keyboard Assembly Replacement, Hard Drive: 步骤 3 中的图像 2,2
    • Loosen the Phillips #00 screw securing the RAM compartment cover.

    • The screw is permanently attached to the RAM compartment cover. Do not try to remove it completely.

  4. HP 2000 - 2D22DX Keyboard Assembly Replacement: 步骤 4 中的图像 1,2 HP 2000 - 2D22DX Keyboard Assembly Replacement: 步骤 4 中的图像 2,2
    • Once the screw is sufficiently loosened, slowly unclip the RAM compartment cover from its slots in the plastic chassis.

    • When unclipped completely, pull the compartment door out and away from the chassis.

  5. HP 2000 - 2D22DX Keyboard Assembly Replacement: 步骤 5 中的图像 1,3 HP 2000 - 2D22DX Keyboard Assembly Replacement: 步骤 5 中的图像 2,3 HP 2000 - 2D22DX Keyboard Assembly Replacement: 步骤 5 中的图像 3,3
    • Loosen the two Phillips #00 screws that are securing the hard drive compartment.

    • The screws are permanently attached to the hard drive compartment cover. Do not try to remove them completely.

    • Once the screws are sufficiently loosened, disconnect the clips holding the cover in place and slowly pull the cover away from the plastic chassis.

  6. HP 2000 - 2D22DX Keyboard Assembly Replacement: 步骤 6 中的图像 1,3 HP 2000 - 2D22DX Keyboard Assembly Replacement: 步骤 6 中的图像 2,3 HP 2000 - 2D22DX Keyboard Assembly Replacement: 步骤 6 中的图像 3,3
    • Using a spudger, disconnect the hard drive connecting cable. Use a slow, prying motion as if pulling a nail out of wood.

    • Be very gentle with the connecting cable and its respective port on the logic board. Both are very fragile and can be easily damaged.

  7. HP 2000 - 2D22DX Keyboard Assembly Replacement: 步骤 7 中的图像 1,3 HP 2000 - 2D22DX Keyboard Assembly Replacement: 步骤 7 中的图像 2,3 HP 2000 - 2D22DX Keyboard Assembly Replacement: 步骤 7 中的图像 3,3
    • Using your fingers, grab the blue tab on the right side of the hard drive and slowly pull upwards.

    • Lift the hard drive out and away from its socket in the plastic chassis.

  8. HP 2000 - 2D22DX Keyboard Assembly Replacement, Keyboard Assembly: 步骤 8 中的图像 1,3 HP 2000 - 2D22DX Keyboard Assembly Replacement, Keyboard Assembly: 步骤 8 中的图像 2,3 HP 2000 - 2D22DX Keyboard Assembly Replacement, Keyboard Assembly: 步骤 8 中的图像 3,3
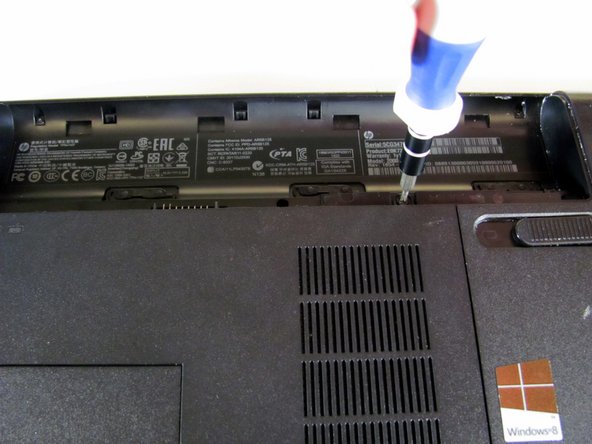
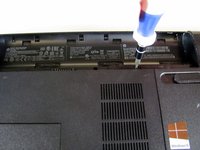
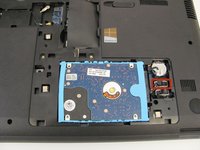
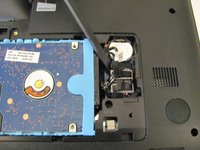
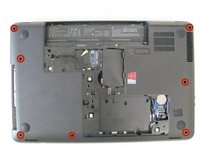
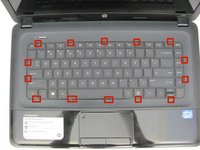
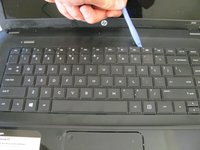
    • Locate all seven Phillips head screws around the borders of the plastic chassis.

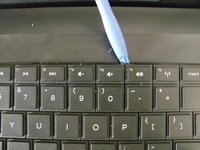
    • Locate the small Phillips head screw next to the wireless chip.

    • Using a #00 Phillips head screwdriver, remove all eight screws listed above.

    • These screws are known to get stuck on occasion. If this occurs, try using a slower unscrewing motion with a magnetic screwdriver. Then, utilize the magnetism of the screwdriver to simply pull the screw from its "well".

  9. HP 2000 - 2D22DX Keyboard Assembly Replacement: 步骤 9 中的图像 1,3 HP 2000 - 2D22DX Keyboard Assembly Replacement: 步骤 9 中的图像 2,3 HP 2000 - 2D22DX Keyboard Assembly Replacement: 步骤 9 中的图像 3,3
    • Locate the fourteen clips in the small gap that runs between the keyboard assembly and the chassis.

    • Using a plastic opening tool, slowly press down the keyboard clips and begin pulling the keyboard upwards.

    • This step requires a little bit of force. The clips are quite sturdy and can take a lot of pressure but the keyboard itself is still possible to bend or damage.

  10. HP 2000 - 2D22DX Keyboard Assembly Replacement: 步骤 10 中的图像 1,3 HP 2000 - 2D22DX Keyboard Assembly Replacement: 步骤 10 中的图像 2,3 HP 2000 - 2D22DX Keyboard Assembly Replacement: 步骤 10 中的图像 3,3
    • Do not try to remove the keyboard immediately. It is still connected to the motherboard by a ribbon cable that can be easily damaged.

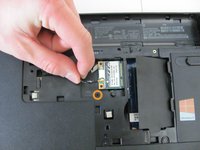
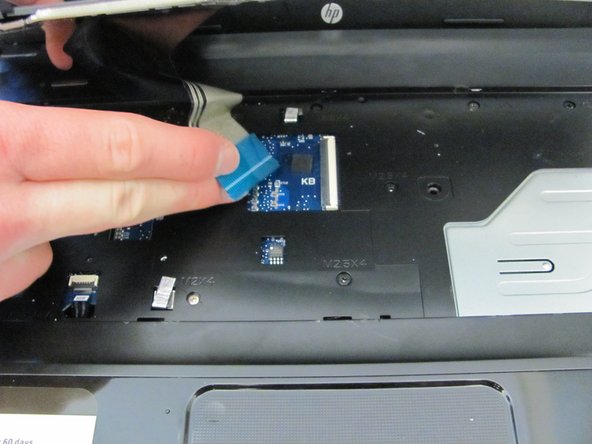
    • Once the keyboard is unscrewed, the ribbon cable below will also need to be disconnected.

    • Lift up the "flap" securing the ribbon cable to their slot on logic board and slowly pull the cables away from their connections.

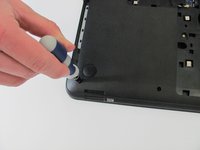
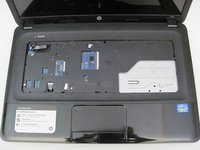
    • Lift the keyboard assembly up and away from the plastic chassis.

结论

To reassemble your device, follow these instructions in reverse order.

27等其他人完成本指南。

Conor Most

于04/14/14注册

2,687 声望

创作了6篇指南

团队

Cal Poly, Team 3-40, Maness Spring 2014 Cal Poly, Team 3-40, Maness Spring 2014 的会员

CPSU-MANESS-S14S3G40

4 名成员

创作了6篇指南

3条评论

Hi, can one fix the keyboard when a spillage has occurred? The key buttons aren't functioning.

Bontle - 回复

Step 5, 6, and 7 are completely unnecessary. You do not need to remove all those screws to replace the keyboard. You only need to remove the Hard Drive panel bolt in step 3, and the bolt in step 8 that has a keyboard logo next to it. You can confirm that this is the only bolt necessary to remove by viewing the underneath of the keyboard in step 10.

Keil Miller - 回复

Agree with Keil, steps 5-7 are unnecessary, but an interesting experience. 63-year old grandma successfully replaced the keyboard so granddaughter can have a computer. Thanks for the great instructions!

Laura Hult - 回复

添加评论

浏览统计数据:

过去 24 小时: 0

过去 7 天: 11

过去 30 天: 28

总计 16,005