跳转到主内容

HP 2000 - 2D22DX Hard Drive Replacement

你所需要的

  1. HP 2000 - 2D22DX Hard Drive Replacement, Battery: 步骤 1 中的图像 1,2 HP 2000 - 2D22DX Hard Drive Replacement, Battery: 步骤 1 中的图像 2,2
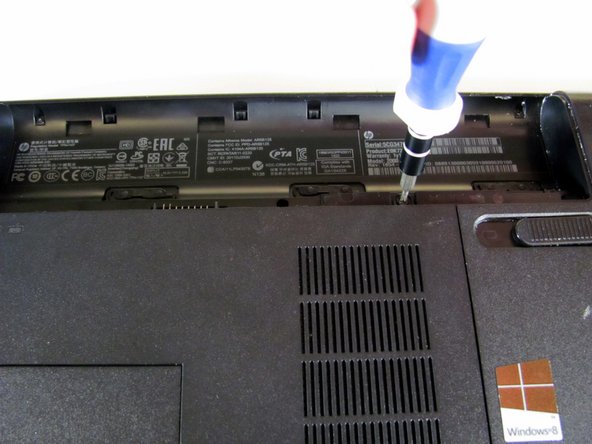
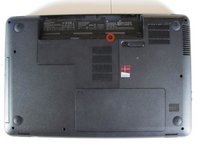
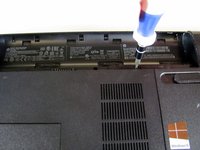
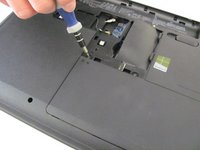
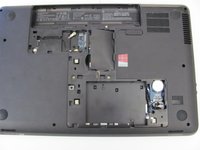
    • Flip the device over and locate the battery compartment.

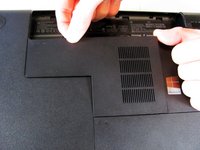
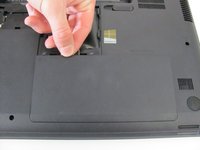
    • Slide the battery release latch to the left until the battery is detached from its slot.

    • A distinguishable pop will be heard when the battery is fully released.

  2. HP 2000 - 2D22DX Hard Drive Replacement: 步骤 2 中的图像 1,2 HP 2000 - 2D22DX Hard Drive Replacement: 步骤 2 中的图像 2,2
    • Slowly pull the battery out of its slot, being careful not to damage any of the connectors in the process.

  3. HP 2000 - 2D22DX Hard Drive Replacement, Hard Drive: 步骤 3 中的图像 1,2 HP 2000 - 2D22DX Hard Drive Replacement, Hard Drive: 步骤 3 中的图像 2,2
    • Loosen the Phillips #00 screw securing the RAM compartment cover.

    • The screw is permanently attached to the RAM compartment cover. Do not try to remove it completely.

  4. HP 2000 - 2D22DX Hard Drive Replacement: 步骤 4 中的图像 1,2 HP 2000 - 2D22DX Hard Drive Replacement: 步骤 4 中的图像 2,2
    • Once the screw is sufficiently loosened, slowly unclip the RAM compartment cover from its slots in the plastic chassis.

    • When unclipped completely, pull the compartment door out and away from the chassis.

  5. HP 2000 - 2D22DX Hard Drive Replacement: 步骤 5 中的图像 1,3 HP 2000 - 2D22DX Hard Drive Replacement: 步骤 5 中的图像 2,3 HP 2000 - 2D22DX Hard Drive Replacement: 步骤 5 中的图像 3,3
    • Loosen the two Phillips #00 screws that are securing the hard drive compartment.

    • The screws are permanently attached to the hard drive compartment cover. Do not try to remove them completely.

    • Once the screws are sufficiently loosened, disconnect the clips holding the cover in place and slowly pull the cover away from the plastic chassis.

  6. HP 2000 - 2D22DX Hard Drive Replacement: 步骤 6 中的图像 1,3 HP 2000 - 2D22DX Hard Drive Replacement: 步骤 6 中的图像 2,3 HP 2000 - 2D22DX Hard Drive Replacement: 步骤 6 中的图像 3,3
    • Using a spudger, disconnect the hard drive connecting cable. Use a slow, prying motion as if pulling a nail out of wood.

    • Be very gentle with the connecting cable and its respective port on the logic board. Both are very fragile and can be easily damaged.

  7. HP 2000 - 2D22DX Hard Drive Replacement: 步骤 7 中的图像 1,3 HP 2000 - 2D22DX Hard Drive Replacement: 步骤 7 中的图像 2,3 HP 2000 - 2D22DX Hard Drive Replacement: 步骤 7 中的图像 3,3
    • Using your fingers, grab the blue tab on the right side of the hard drive and slowly pull upwards.

    • Lift the hard drive out and away from its socket in the plastic chassis.

结论

To reassemble your device, follow these instructions in reverse order.

27等其他人完成本指南。

Conor Most

于04/14/14注册

2,687 声望

创作了6篇指南

团队

Cal Poly, Team 3-40, Maness Spring 2014 Cal Poly, Team 3-40, Maness Spring 2014 的会员

CPSU-MANESS-S14S3G40

4 名成员

创作了6篇指南

0条评论

添加评论

浏览统计数据:

过去 24 小时: 1

过去 7 天: 13

过去 30 天: 45

总计 14,493