跳转到主内容
加入维修社区 - 创建账户

HP 15-R263DX Hard Drive Replacement

你所需要的

    1. HP 15-R263DX Hard Drive Replacement, Battery: 步骤 1 中的图像 1,2 HP 15-R263DX Hard Drive Replacement, Battery: 步骤 1 中的图像 2,2
      • Eject the battery from the computer by sliding the two clips on the bottom of the computer toward the center of the computer.

      • Slide the battery out as shown in the picture.

      询问修复机器人

      添加评论

    1. HP 15-R263DX Hard Drive Replacement, Optical Drive: 步骤 2 中的图像 1,2 HP 15-R263DX Hard Drive Replacement, Optical Drive: 步骤 2 中的图像 2,2
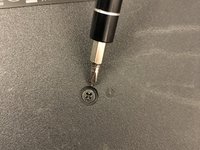
      • Using a Phillips #1 screwdriver, remove the small screw next to the disc engraving shown in the picture.

      询问修复机器人

      添加评论

    2. HP 15-R263DX Hard Drive Replacement: 步骤 3 中的图像 1,1
      • Gently slide the optical drive out of the side of the computer.

      询问修复机器人

      添加评论

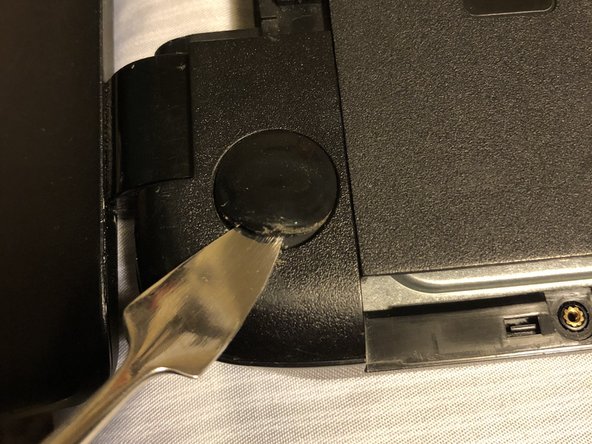
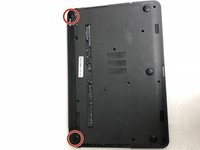
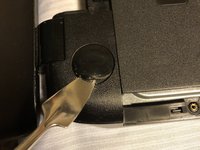
    1. HP 15-R263DX Hard Drive Replacement, HP 15-R263DX Disassembly: 步骤 4 中的图像 1,2 HP 15-R263DX Hard Drive Replacement, HP 15-R263DX Disassembly: 步骤 4 中的图像 2,2
      • Locate the two corner grips on the hinge side of the computer.

      • Using a metal spudger, remove the two corner grips to reveal the screws.

      询问修复机器人

      添加评论

    2. HP 15-R263DX Hard Drive Replacement: 步骤 5 中的图像 1,1
      • Remove the 11 small screws on the bottom of the computer that are shown in the picture.

      询问修复机器人

      添加评论

    3. HP 15-R263DX Hard Drive Replacement: 步骤 6 中的图像 1,1
      • Remove the 2 small screws that are on the bottom side of the disc tray slot.

      • These screws are shorter and wider than the others.

      询问修复机器人

      添加评论

    4. HP 15-R263DX Hard Drive Replacement: 步骤 7 中的图像 1,2 HP 15-R263DX Hard Drive Replacement: 步骤 7 中的图像 2,2
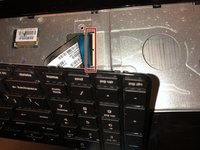
      • Once the keyboard is loose, do not immediately pull away from computer. It is attached by the ribbon connector.

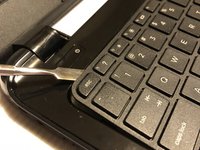
      • Using a spudger, pry around the edges of the keyboard until all clips are disengaged and the keyboard is loose from the computer.

      • To disconnect the ribbon connector, flip up the black clip shown in the picture.

      • Gently pull the ribbon until disconnected.

      添加评论

    5. HP 15-R263DX Hard Drive Replacement: 步骤 8 中的图像 1,2 HP 15-R263DX Hard Drive Replacement: 步骤 8 中的图像 2,2
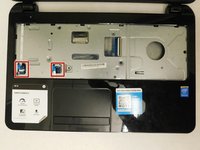
      • Disconnect the other two ribbon connectors underneath the keyboard by fliping up the black clips.

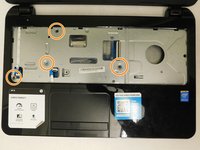
      • Remove the 4 small screws shown in the picture.

      询问修复机器人

      添加评论

    6. HP 15-R263DX Hard Drive Replacement: 步骤 9 中的图像 1,1
      • Disengage the face plate clips by prying the case away from around the outer edge of the face plate with a metal wedge.

      • The face plate can then be lifted away from the computer.

      询问修复机器人

      添加评论

    1. HP 15-R263DX Hard Drive Replacement, Hard Drive: 步骤 10 中的图像 1,1
      • Remove the 2 black screws holding the hard drive to the computer frame.

      询问修复机器人

      添加评论

    2. HP 15-R263DX Hard Drive Replacement: 步骤 11 中的图像 1,2 HP 15-R263DX Hard Drive Replacement: 步骤 11 中的图像 2,2
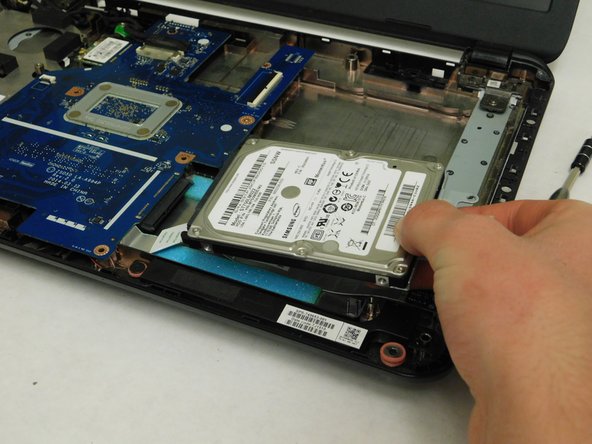
      • Gently slide the hard drive away from the motherboard to disconnect it.

      • After it's disconnected, lift the hard drive up to remove it from the computer.

      询问修复机器人

      添加评论

结论

To reassemble your device, follow these instructions in reverse order.

取消:我没有完成这个指南。

2等其他人完成本指南。

Drake Hort

于03/05/18注册

487 声望

创作了3篇指南

团队

0指南评论

添加评论

浏览统计数据:

过去 24 小时: 1

过去 7 天: 5

过去 30 天: 24

总计 1,923