跳转到主内容

Google Pixel 3 XL Partial Motherboard Separation

仅作为前提条件
本指南仅用作其他指南的先决条件。不能单独食用。

你所需要的

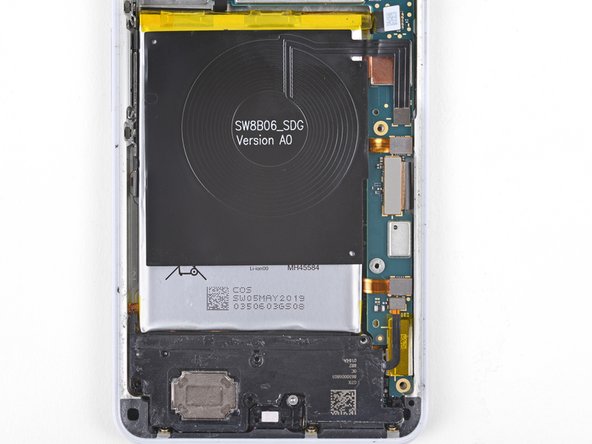
  1. Google Pixel 3 XL Partial Motherboard Separation, Remove one loudspeaker screw: 步骤 1 中的图像 1,1
    • Remove the 4 mm long T3 screw securing the top-right corner of the loudspeaker.

    • Removing this screw will give you slightly more wiggle room when removing the motherboard.

  2. Google Pixel 3 XL Partial Motherboard Separation, Remove the button array connector bracket: 步骤 2 中的图像 1,1
    • Remove the two 3 mm long T3 screws securing the button array connector bracket.

  3. Google Pixel 3 XL Partial Motherboard Separation: 步骤 3 中的图像 1,1
    • Remove the button array connector bracket.

  4. Google Pixel 3 XL Partial Motherboard Separation, Disconnect the earpiece speaker: 步骤 4 中的图像 1,2 Google Pixel 3 XL Partial Motherboard Separation, Disconnect the earpiece speaker: 步骤 4 中的图像 2,2
    • Use the point of a spudger to pry up and disconnect the earpiece connector from its motherboard socket.

    • Carefully remove the connector pad surrounding the earpiece socket.

  5. Google Pixel 3 XL Partial Motherboard Separation, Disconnect the motherboard connectors: 步骤 5 中的图像 1,1
    • Use the point of a spudger to pry up and disconnect the following:

    • Microphone connector

    • Button array connector

    • Earpiece connector (should already be disconnected)

  6. Google Pixel 3 XL Partial Motherboard Separation: 步骤 6 中的图像 1,2 Google Pixel 3 XL Partial Motherboard Separation: 步骤 6 中的图像 2,2
    • Use the point of a spudger to pry up and disconnect the following:

    • Charging coil connector

    • Left squeeze sensor connector

    • Display connector

    • Right squeeze sensor connector

    • Loudspeaker connector

    • USB-C port connector

  7. Google Pixel 3 XL Partial Motherboard Separation, Remove the motherboard screws: 步骤 7 中的图像 1,1
    • Remove the two 3 mm long T3 screws securing the motherboard.

  8. Google Pixel 3 XL Partial Motherboard Separation, Loosen the motherboard: 步骤 8 中的图像 1,3 Google Pixel 3 XL Partial Motherboard Separation, Loosen the motherboard: 步骤 8 中的图像 2,3 Google Pixel 3 XL Partial Motherboard Separation, Loosen the motherboard: 步骤 8 中的图像 3,3
    • Insert the point of a spudger underneath the motherboard, near the rear-facing camera module.

    • Pry up gently to loosen the motherboard from its recess.

    • If the motherboard is not budging, make sure you have disconnected all the connectors.

    • The motherboard has to squeeze past the earpiece speaker cable. If too much pressure is put on the earpiece cable, the earpiece speaker will pop open. You can prevent this by pressing on the earpiece module with a finger while you maneuver the motherboard out.

    • If the earpiece speaker pops open (as shown in the third photo of this step), carefully align and press the module back in place.

  9. Google Pixel 3 XL Partial Motherboard Separation: 步骤 9 中的图像 1,3 Google Pixel 3 XL Partial Motherboard Separation: 步骤 9 中的图像 2,3 Google Pixel 3 XL Partial Motherboard Separation: 步骤 9 中的图像 3,3
    • Don't attempt to remove the motherboard from the phone. It's still attached to the phone.

    • While you perform this step, take care to keep slack on the antenna cables attached to the bottom leg of the motherboard.

    • Lift the top half of the motherboard slightly to clear the board from its recess.

    • Twist the left edge of the board over and out of the phone and rest the board on the right edge of the phone.

结论

To reassemble your device, follow these instructions in reverse order.

3等其他人完成本指南。

Arthur Shi

于01/03/18注册

249,846 声望

创作了503篇指南

团队

iFixit iFixit 的会员

Staff

135 名成员

创作了16,732篇指南

0条评论

添加评论

浏览统计数据:

过去 24 小时: 0

过去 7 天: 0

过去 30 天: 2

总计 802