跳转到主内容
加入维修社区 - 创建账户

Disassembling PlayStation Vita Screen & Digitizer (Video Tutorial/Guide)

你所需要的

视频概述

    1. Disassembling PlayStation Vita Screen & Digitizer (Video Tutorial/Guide), Case Separation: 步骤 1 中的图像 1,2 Disassembling PlayStation Vita Screen & Digitizer (Video Tutorial/Guide), Case Separation: 步骤 1 中的图像 2,2
      • Power off and remove the memory card.

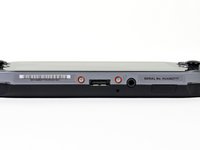
      • Using a Phillips #00 screwdriver, remove the four 6.4mm screws on the back casing.

      询问修复机器人

      添加评论

    2. Disassembling PlayStation Vita Screen & Digitizer (Video Tutorial/Guide): 步骤 2 中的图像 1,3 Disassembling PlayStation Vita Screen & Digitizer (Video Tutorial/Guide): 步骤 2 中的图像 2,3 Disassembling PlayStation Vita Screen & Digitizer (Video Tutorial/Guide): 步骤 2 中的图像 3,3
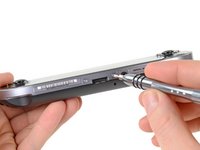
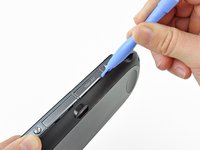
      • Using your fingernail or a spudger, pry open the accessory port cover on the top of the device.

      • Using a Phillips #00 screwdriver, remove the two 5.4mm screws hidden beneath the accessory port cover.

      添加评论

    3. Disassembling PlayStation Vita Screen & Digitizer (Video Tutorial/Guide): 步骤 3 中的图像 1,2 Disassembling PlayStation Vita Screen & Digitizer (Video Tutorial/Guide): 步骤 3 中的图像 2,2
      • Remove the two 5.4mm Phillips #00 screws on the bottom of the device near the charging port.

      询问修复机器人

      添加评论

    4. Disassembling PlayStation Vita Screen & Digitizer (Video Tutorial/Guide): 步骤 4 中的图像 1,3 Disassembling PlayStation Vita Screen & Digitizer (Video Tutorial/Guide): 步骤 4 中的图像 2,3 Disassembling PlayStation Vita Screen & Digitizer (Video Tutorial/Guide): 步骤 4 中的图像 3,3
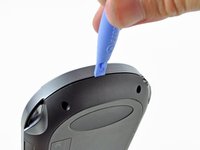
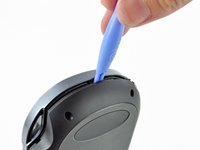
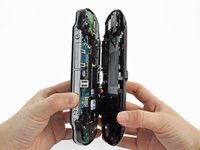
      • Beginning at the sides of the device, use a plastic opening tool to separate the front and rear cases.

      • Continue working your way around the device gently prying it open.

      • There are still wires holding the front and rear cases together. You may damage the connections if you yank the cases completely apart.

      询问修复机器人

      添加评论

    5. Disassembling PlayStation Vita Screen & Digitizer (Video Tutorial/Guide): 步骤 5 中的图像 1,2 Disassembling PlayStation Vita Screen & Digitizer (Video Tutorial/Guide): 步骤 5 中的图像 2,2
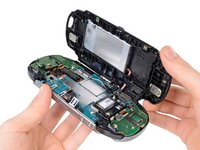
      • Gently separate the two cases, minding the battery and the touch screen controller connectors holding the two cases together.

      添加评论

    6. Disassembling PlayStation Vita Screen & Digitizer (Video Tutorial/Guide): 步骤 6 中的图像 1,1
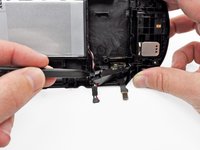
      • Using a spudger, free the touch screen controller flex cable by gently prying up the connection.

      添加评论

    7. Disassembling PlayStation Vita Screen & Digitizer (Video Tutorial/Guide): 步骤 7 中的图像 1,1
      • Free the battery cable by gently prying up on the connection with a spudger.

      添加评论

    8. Disassembling PlayStation Vita Screen & Digitizer (Video Tutorial/Guide): 步骤 8 中的图像 1,1
      • Separate the front and rear cases.

      询问修复机器人

      添加评论

    1. Disassembling PlayStation Vita Screen & Digitizer (Video Tutorial/Guide), Battery: 步骤 9 中的图像 1,2 Disassembling PlayStation Vita Screen & Digitizer (Video Tutorial/Guide), Battery: 步骤 9 中的图像 2,2
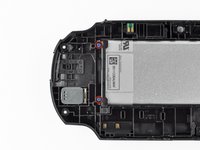
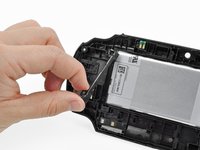
      • With the help of a spudger, gently pry off and remove the battery cable retainer on the back casing assembly.

      • The easiest access to the battery cable retainer is where the battery cable comes out.

      • You can also use the two small tabs on the side of the cable retainer. Locate the tabs and release one at a time. Be a little careful not to push the cover in and re-lock it.

      添加评论

    2. Disassembling PlayStation Vita Screen & Digitizer (Video Tutorial/Guide): 步骤 10 中的图像 1,2 Disassembling PlayStation Vita Screen & Digitizer (Video Tutorial/Guide): 步骤 10 中的图像 2,2
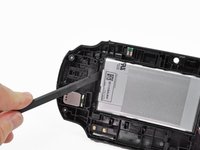
      • Using a Phillips #00 screwdriver, remove the two 5.0mm blue battery case screws.

      • Remove the plastic battery retaining bar.

      添加评论

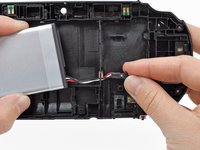
    3. Disassembling PlayStation Vita Screen & Digitizer (Video Tutorial/Guide): 步骤 11 中的图像 1,3 Disassembling PlayStation Vita Screen & Digitizer (Video Tutorial/Guide): 步骤 11 中的图像 2,3 Disassembling PlayStation Vita Screen & Digitizer (Video Tutorial/Guide): 步骤 11 中的图像 3,3
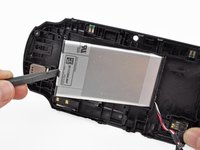
      • Using your finger or a spudger, lift the battery out and remove it.

      • Guide the battery wires through the hole in the back casing as you remove the battery.

      询问修复机器人

      添加评论

结论

To reassemble your device, follow these instructions in reverse order.

取消:我没有完成这个指南。

7等其他人完成本指南。

djgodmandj

于10/24/14注册

302 声望

撰写一个指南

1指南评论

So is there any chance that this could be used as a modding possibility, where we could install a higher resolution /quality screen?

TheHeavy - 回复 分享

添加评论

浏览统计数据:

过去 24 小时: 6

过去 7 天: 56

过去 30 天: 230

总计 10,269