跳转到主内容
加入维修社区 - 创建账户

Dell Photo Printer 540 Case Replacement

你所需要的

    1. Dell Photo Printer 540 Case Replacement, Case: 步骤 1 中的图像 1,1
      • Rotate the photo printer so that the bottom of the case faces upward.

      询问修复机器人

      添加评论

    2. Dell Photo Printer 540 Case Replacement: 步骤 2 中的图像 1,1
      • Use a Phillips #2 screwdriver to remove the three 5.65 mm screws on the bottom panel of the case in a counter-clockwise fashion.

      询问修复机器人

      添加评论

    3. Dell Photo Printer 540 Case Replacement: 步骤 3 中的图像 1,1
      • Rotate the device so that it is upright again. Under the LCD Panel there is a 9.62 mm screw, unscrew using a Phillips #2 screwdriver.

      询问修复机器人

      添加评论

    4. Dell Photo Printer 540 Case Replacement: 步骤 4 中的图像 1,1
      • Remove the back panel of the case by pulling directly back.

      • Some carefully applied force may be required to remove this part.

      询问修复机器人

      添加评论

    5. Dell Photo Printer 540 Case Replacement: 步骤 5 中的图像 1,1
      • Rotate the photo printer so that the bottom panel faces up once again. Now lift off the bottom panel of the case to access all internal components.

      询问修复机器人

      添加评论

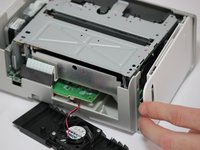
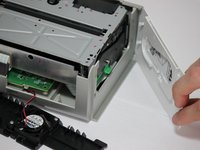
    6. Dell Photo Printer 540 Case Replacement: 步骤 6 中的图像 1,2 Dell Photo Printer 540 Case Replacement: 步骤 6 中的图像 2,2
      • Finally remove the side panel with the ink-cartridge door by holding the right side and pulling backwards with the left side.

      • Caution! The side panel is held in by tabs; don't break these.

      询问修复机器人

      添加评论

结论

To reassemble your device, follow these instructions in reverse order.

取消:我没有完成这个指南。

团队

Cal Poly, Team 14-7, Forte Spring 2012 Cal Poly, Team 14-7, Forte Spring 2012 的会员

CPSU-FORTE-S12S14G7

4 名成员

创作了18篇指南

0指南评论

添加评论

浏览统计数据:

过去 24 小时: 1

过去 7 天: 3

过去 30 天: 28

总计 1,059