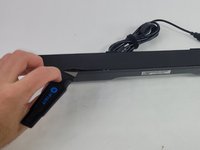
跳转到主内容

Dell AC511 Front Panel Replacement

你所需要的

  1. Dell AC511 Front Panel Replacement, Front Panel: 步骤 1 中的图像 1,3 Dell AC511 Front Panel Replacement, Front Panel: 步骤 1 中的图像 2,3 Dell AC511 Front Panel Replacement, Front Panel: 步骤 1 中的图像 3,3
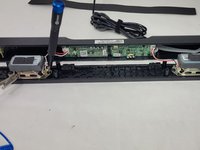
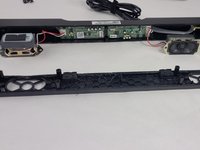
    • Use a Jimmy to peel off the screen stuck to the front of the speaker.

    • Start from any corner and use the Jimmy to get under the screen. Once one side lifts up, you can use your fingers to peel the rest off.

    • Be careful to avoid damage to the rest of the speaker and especially to yourself.

    • Don't worry if it tears; use the Jimmy again to peel off the rest.

  2. Dell AC511 Front Panel Replacement: 步骤 2 中的图像 1,2 Dell AC511 Front Panel Replacement: 步骤 2 中的图像 2,2
    • Remove ten 6 mm screws using a Phillips #1 screwdriver.

  3. Dell AC511 Front Panel Replacement: 步骤 3 中的图像 1,2 Dell AC511 Front Panel Replacement: 步骤 3 中的图像 2,2
    • Lift the front panel off of the rest of the device.

    • The speakers will still be attached to the front panel. Being too rough could damage them.

    • Remove the 4 mm screws from the speakers using a JIS #1 screwdriver.

    • Remove the front panel from the device.

结论

To reassemble your device, follow these instructions in reverse order.

另外一个人完成了本指南。

William Cook

于03/19/24注册

653 声望

创作了6篇指南

团队

UMass Dartmouth, Team 4-6, Shaddix Spring 2024 UMass Dartmouth, Team 4-6, Shaddix Spring 2024 的会员

UMASSD-SHADDIX-S24S4G6

4 名成员

创作了6篇指南

0指南评论

添加评论

浏览统计数据:

过去 24 小时: 0

过去 7 天: 8

过去 30 天: 48

总计 907