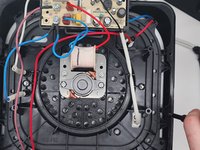
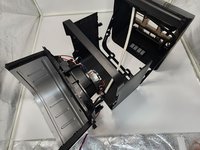
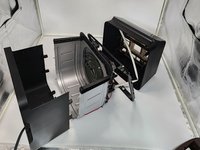
跳转到主内容

Cosori Pro II Shell Replacement

你所需要的

  1. Cosori Pro II Shell Replacement, Shell: 步骤 1 中的图像 1,1
    • Flip the device upside down and remove all of the Phillips #1 screws.

  2. Cosori Pro II Shell Replacement: 步骤 2 中的图像 1,2 Cosori Pro II Shell Replacement: 步骤 2 中的图像 2,2
    • Use an opening tool to push on the retaining hooks to disengage them while prying slightly.

    • Remove the panel.

  3. Cosori Pro II Shell Replacement: 步骤 3 中的图像 1,1
    • Use a Phillips #1 screwdriver to remove all four screws.

    • Lift off the bracket.

    • When lifting this off be careful to not unplug the screen.

  4. Cosori Pro II Shell Replacement: 步骤 4 中的图像 1,2 Cosori Pro II Shell Replacement: 步骤 4 中的图像 2,2
    • Use a Phillips #0 screwdriver to remove all the screws connecting to the shell.

    • Dissemble the shell going up to separate the basket holder.

  5. Cosori Pro II Shell Replacement: 步骤 5 中的图像 1,2 Cosori Pro II Shell Replacement: 步骤 5 中的图像 2,2
    • Use a Phillips #0 screwdriver and the 150 mm Flex Extension to unscrew the bottom plastic connecting to the basket holder.

    • Be careful to not apply too much force to the metal as it can cause it to warp it, and so it is easy rescrew the plastic piece in place.

  6. Cosori Pro II Shell Replacement: 步骤 6 中的图像 1,2 Cosori Pro II Shell Replacement: 步骤 6 中的图像 2,2
    • Pull the bottom shell down pulling at the sides to get them over screw holes.

结论

To reassemble your device, follow these instructions in reverse order.

0指南评论

添加评论

浏览统计数据:

过去 24 小时: 2

过去 7 天: 7

过去 30 天: 45

总计 421