跳转到主内容

Canon PowerShot A550 LCD Screen Replacement

你所需要的

  1. Canon PowerShot A550 LCD Screen Replacement, Front and Back Covers: 步骤 1 中的图像 1,3 Canon PowerShot A550 LCD Screen Replacement, Front and Back Covers: 步骤 1 中的图像 2,3 Canon PowerShot A550 LCD Screen Replacement, Front and Back Covers: 步骤 1 中的图像 3,3
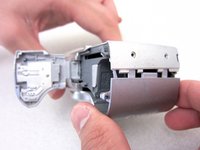
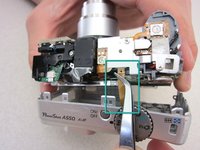
    • Unscrew a total of 6 4.45 mm phillips head screws using a #00 phillips head screwdriver.

    • There are 2 screws on the left side (when looking at the front of the camera).

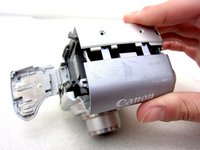
    • There are 3 screws on the bottom

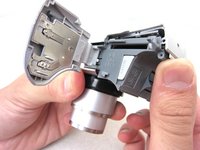
    • There is 1 screw on the right side

  2. Canon PowerShot A550 LCD Screen Replacement: 步骤 2 中的图像 1,1
    • Turn to the bottom of the camera.

    • Open the memory card cover by sliding the "CARD/BATT." button up, and then pulling the cover to the left.

  3. Canon PowerShot A550 LCD Screen Replacement: 步骤 3 中的图像 1,1
    • This is what the SD card/battery compartment looks like when opened.

    • Remove one 4.45mm phillips head screw from the SD card/battery compartment using a #00 phillips head screwdriver.

  4. Canon PowerShot A550 LCD Screen Replacement: 步骤 4 中的图像 1,2 Canon PowerShot A550 LCD Screen Replacement: 步骤 4 中的图像 2,2
    • Gently remove the front cover away from the camera body.

    • Tip: Start by loosening the teeth on the left side of the camera next to the battery compartment.

  5. Canon PowerShot A550 LCD Screen Replacement: 步骤 5 中的图像 1,1
    • The camera should look like this once the front cover is removed.

  6. Canon PowerShot A550 LCD Screen Replacement: 步骤 6 中的图像 1,3 Canon PowerShot A550 LCD Screen Replacement: 步骤 6 中的图像 2,3 Canon PowerShot A550 LCD Screen Replacement: 步骤 6 中的图像 3,3
    • Start from the battery compartment and remove the back cover.

    • Caution: Do not tug on the back cover after it is removed. This could tear the ribbon attaching the back cover to the camera body.

    • Remove the connecting ribbon from the body of the camera using a pair of tweezers.

  7. Canon PowerShot A550 LCD Screen Replacement: 步骤 7 中的图像 1,1
    • Once the ribbon connecting the back cover is removed, the back of the camera body should look like this.

  8. Canon PowerShot A550 LCD Screen Replacement, LCD Screen: 步骤 8 中的图像 1,1
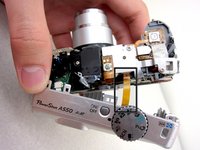
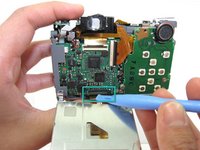
    • Use a #00 phillips head screwdriver to remove 2 3.34mm phillips screws holding the LCD screen in place.

  9. Canon PowerShot A550 LCD Screen Replacement: 步骤 9 中的图像 1,2 Canon PowerShot A550 LCD Screen Replacement: 步骤 9 中的图像 2,2
    • Use an iPod Opening Tool to lift the brown portion of the connector to unlock it.

    • Slide the data cable out of the connector.

    • Caution: Do not force the data cable out of the connector. It may rip!

  10. Canon PowerShot A550 LCD Screen Replacement: 步骤 10 中的图像 1,1
    • The LCD screen can now be be removed to be fixed/replaced.

结论

To reassemble your device, follow these instructions in reverse order.

2等其他人完成本指南。

Precilla Tang

于04/19/11注册

162 声望

创作了2篇指南

团队

Cal Poly, Team 8-6, Regan Spring 2011 Cal Poly, Team 8-6, Regan Spring 2011 的会员

CPSU-REGAN-S11S8G6

4 名成员

创作了22篇指南

0条评论

添加评论

浏览统计数据:

过去 24 小时: 0

过去 7 天: 2

过去 30 天: 5

总计 3,557