跳转到主内容
加入维修社区 - 创建账户

Canon PowerShot A460 LCD Screen Replacement

你所需要的

    1. Canon PowerShot A460 LCD Screen Replacement, Battery: 步骤 1 中的图像 1,1
      • Slide the switch on the battery cover labeled "CARD/BATT. OPEN." to the right.

      • While still holding the switch, pull the cover down, allowing it to release and open.

      询问修复机器人

      添加评论

    2. Canon PowerShot A460 LCD Screen Replacement: 步骤 2 中的图像 1,1
      • Tilt the camera slightly to allow the batteries to fall out.

      询问修复机器人

      添加评论

    3. Canon PowerShot A460 LCD Screen Replacement: 步骤 3 中的图像 1,1
      • Press on and release the memory card to eject it.

      询问修复机器人

      添加评论

    1. Canon PowerShot A460 LCD Screen Replacement, Front Casing: 步骤 4 中的图像 1,1
      • Unscrew the 5mm Phillips #00 screw from the bottom of the camera.

      • Make sure to keep the different size screws organized to make reassembling the camera simpler.

      询问修复机器人

      添加评论

    2. Canon PowerShot A460 LCD Screen Replacement: 步骤 5 中的图像 1,1
      • Unscrew the three 2mm Phillips #00 screws that are located on the bottom of the camera.

      询问修复机器人

      添加评论

    3. Canon PowerShot A460 LCD Screen Replacement: 步骤 6 中的图像 1,1
      • Remove the 4mm Phillips #00 screw that is located on the left side of the camera, if the display screen is facing you.

      询问修复机器人

      添加评论

    4. Canon PowerShot A460 LCD Screen Replacement: 步骤 7 中的图像 1,1
      • Take out the 4mm Phillips #00 screw under the rubber flap on the right end of the camera.

      询问修复机器人

      添加评论

    5. Canon PowerShot A460 LCD Screen Replacement: 步骤 8 中的图像 1,2 Canon PowerShot A460 LCD Screen Replacement: 步骤 8 中的图像 2,2
      • Remove the second battery cover on the bottom of camera.

      • Take the silver battery out of the camera.

      询问修复机器人

      添加评论

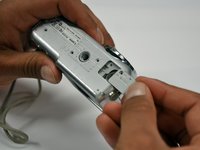
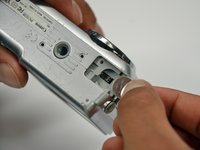
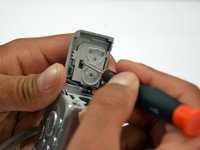
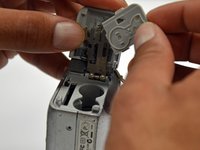
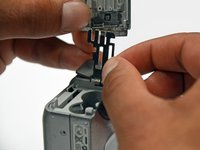
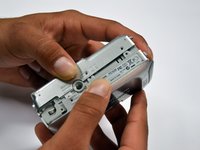
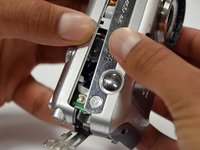
    6. Canon PowerShot A460 LCD Screen Replacement: 步骤 9 中的图像 1,3 Canon PowerShot A460 LCD Screen Replacement: 步骤 9 中的图像 2,3 Canon PowerShot A460 LCD Screen Replacement: 步骤 9 中的图像 3,3
      • Remove the 4mm Phillips #00 screw on the inside of the flap that hides the battery and memory card slots.

      • Remove the light grey, plastic piece.

      • Remove the plastic portion of the battery flap cover. The metal piece will remain attached.

      询问修复机器人

      添加评论

    7. Canon PowerShot A460 LCD Screen Replacement: 步骤 10 中的图像 1,3 Canon PowerShot A460 LCD Screen Replacement: 步骤 10 中的图像 2,3 Canon PowerShot A460 LCD Screen Replacement: 步骤 10 中的图像 3,3
      • Slightly pull on each side of the camera. It should loosen up and come apart.

      • If it does not pull apart right away, use a little more force.

      • Do not give up!

      询问修复机器人

      添加评论

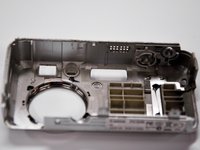
    1. Canon PowerShot A460 LCD Screen Replacement, Back Casing: 步骤 11 中的图像 1,1
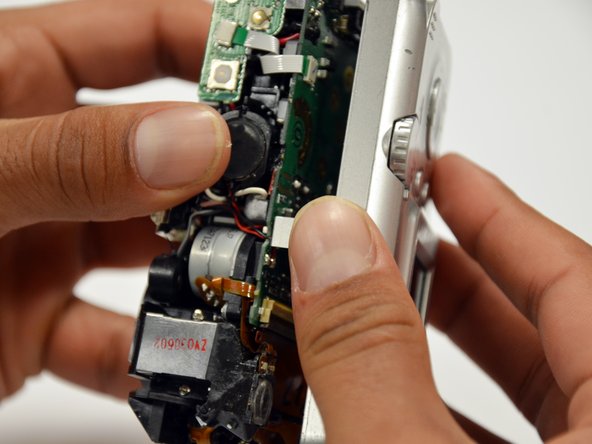
      • Remove the back case of the camera by pulling from the top.

      • Be careful when pulling off the case. There is a delicate gold ribbon connecting the bottom of the camera to the back case.

      询问修复机器人

      添加评论

    1. Canon PowerShot A460 LCD Screen Replacement, LCD Screen: 步骤 12 中的图像 1,1
      • Remove the 4mm Phillips #00 screw from above the ribbon.

      询问修复机器人

      添加评论

    2. Canon PowerShot A460 LCD Screen Replacement: 步骤 13 中的图像 1,1
      • Gently peel off the blue tape on the top of the LCD screen.

      询问修复机器人

      添加评论

    3. Canon PowerShot A460 LCD Screen Replacement: 步骤 14 中的图像 1,1
      • Remove the 4mm Phillips #00 screw previously concealed by the blue tape.

      询问修复机器人

      添加评论

    4. Canon PowerShot A460 LCD Screen Replacement: 步骤 15 中的图像 1,1
      • Gently lift the LCD screen off of the front casing by pulling up a tab on the side of the camera.

      询问修复机器人

      添加评论

    5. Canon PowerShot A460 LCD Screen Replacement: 步骤 16 中的图像 1,1
      • Using a spudger, lift the grey tabs to allow the ribbon to slide out.

      添加评论

    6. Canon PowerShot A460 LCD Screen Replacement: 步骤 17 中的图像 1,1
      • Since the tabs have been lifted, the ribbon should now slide out out easily.

      • Be careful not to distort the ribbon in any way.

      添加评论

结论

To reassemble your device, follow these instructions in reverse order.

取消:我没有完成这个指南。

3等其他人完成本指南。

Alex

于01/18/13注册

112 声望

创作了2篇指南

团队

Cal Poly, Team 19-42, Regan Winter 2013 Cal Poly, Team 19-42, Regan Winter 2013 的会员

CPSU-REGAN-W13S19G42

4 名成员

创作了18篇指南

2指南评论

Thanks for this super documented guide.

I did it!! I found a second hand lcd on Ebay.

Now my camera is working again.

Super DIY guide!! Thanks a lot!!

Pierre - 回复 分享

Explained in detail, very clear, easy to understand. I just unpacked it for the first time. Still able to do as told. Thank you.

Rachsuthee Waiprib - 回复 分享

添加评论

浏览统计数据:

过去 24 小时: 2

过去 7 天: 8

过去 30 天: 46

总计 2,189