跳转到主内容

Canon EOS Rebel G Back Panel Latch Replacement

你所需要的

  1. Canon EOS Rebel G Back Panel Latch Replacement, Front Panel: 步骤 1 中的图像 1,1
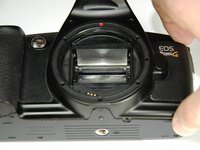
    • Using a #00 Phillips screw driver, remove three 4.4 mm Phillips screws as indicated by the red circles.

  2. Canon EOS Rebel G Back Panel Latch Replacement: 步骤 2 中的图像 1,2 Canon EOS Rebel G Back Panel Latch Replacement: 步骤 2 中的图像 2,2
    • Using your finger, peel back the textured grip so the components are separated.

  3. Canon EOS Rebel G Back Panel Latch Replacement: 步骤 3 中的图像 1,3 Canon EOS Rebel G Back Panel Latch Replacement: 步骤 3 中的图像 2,3 Canon EOS Rebel G Back Panel Latch Replacement: 步骤 3 中的图像 3,3
    • Using the flat end of a spudger, loosen the connection between the front panel and the device.

    • Remove the front panel using your hands.

  4. Canon EOS Rebel G Back Panel Latch Replacement, Back Panel Latch: 步骤 4 中的图像 1,1
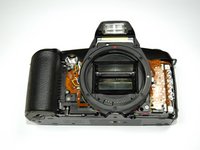
    • Using a 00 Phillips screw driver, unscrew the two screws located on the side of the camera.

    • Two 4.3 mm Phillips screws

  5. Canon EOS Rebel G Back Panel Latch Replacement: 步骤 5 中的图像 1,1
    • Open the back panel by pushing the locking latch up.

    • Lift the latch cover off of the camera body.

  6. Canon EOS Rebel G Back Panel Latch Replacement: 步骤 6 中的图像 1,1
    • Slide the side latch (for the back door) up and then lift straight away from the camera body.

    • Sometimes the latch will detach while pushing it up.

结论

To reassemble your device, follow these instructions in reverse order.

Zach

于04/04/12注册

43 声望

创作了8篇指南

团队

Cal Poly, Team 14-9, Forte Spring 2012 Cal Poly, Team 14-9, Forte Spring 2012 的会员

CPSU-FORTE-S12S14G9

5 名成员

创作了36篇指南

0条评论

添加评论

浏览统计数据:

过去 24 小时: 1

过去 7 天: 2

过去 30 天: 18

总计 2,521