跳转到主内容
加入维修社区 - 创建账户

Asus Q525U RAM Replacement

你所需要的

    1. Asus Q525U RAM Replacement, Back Cover: 步骤 1 中的图像 1,3 Asus Q525U RAM Replacement, Back Cover: 步骤 1 中的图像 2,3 Asus Q525U RAM Replacement, Back Cover: 步骤 1 中的图像 3,3
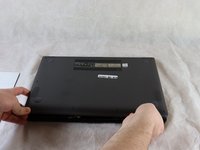
      • Begin by powering off the device and flipping the device over.

      • Carefully remove the two longer 9.5 mm screws on the corners with a Phillips #1 screwdriver.

      • Remove the eight 7.5 mm Phillips #1 screws on the back of the device.

      询问修复机器人

      添加评论

    2. Asus Q525U RAM Replacement: 步骤 2 中的图像 1,3 Asus Q525U RAM Replacement: 步骤 2 中的图像 2,3 Asus Q525U RAM Replacement: 步骤 2 中的图像 3,3
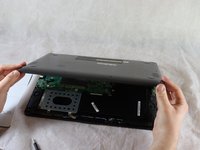
      • Use an opening pick to separate the back cover from the device.

      • For easiest removal, begin by prying at one of the front corners and sliding the tool under the cover in a counter-clockwise motion (to the left) toward the laptop hinge.

      询问修复机器人

      添加评论

    3. Asus Q525U RAM Replacement: 步骤 3 中的图像 1,3 Asus Q525U RAM Replacement: 步骤 3 中的图像 2,3 Asus Q525U RAM Replacement: 步骤 3 中的图像 3,3
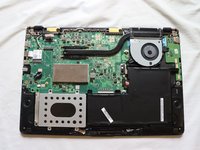
      • Once the cover has been separated from the device, carefully lift the back cover off the device (begin by lifting from the front of the cover first).

      • The back cover should be easily removable, allowing full access to all of the internal components.

      询问修复机器人

      添加评论

    1. Asus Q525U RAM Replacement, RAM: 步骤 4 中的图像 1,1
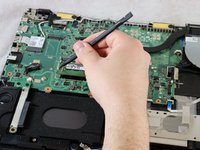
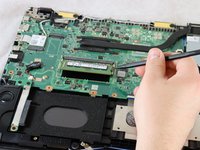
      • Position the flat end of the Spudger under one of the corners on the RAM cover and pry it up slightly.

      • Move the spudger around the periphery of the cover to lift the cover up.

      询问修复机器人

      添加评论

    2. Asus Q525U RAM Replacement: 步骤 5 中的图像 1,1
      • Lift the RAM cover off.

      • The RAM should now be fully exposed.

      询问修复机器人

      添加评论

    3. Asus Q525U RAM Replacement: 步骤 6 中的图像 1,3 Asus Q525U RAM Replacement: 步骤 6 中的图像 2,3 Asus Q525U RAM Replacement: 步骤 6 中的图像 3,3
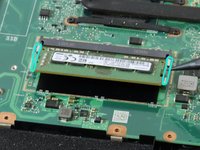
      • Using a spudger or your fingers, gently pull the metal brackets away from the RAM.

      • After pulling both brackets away from the component, the RAM should release at an upward angle (allowing for removal and replacement).

      询问修复机器人

      添加评论

    4. Asus Q525U RAM Replacement: 步骤 7 中的图像 1,1
      • Slide the RAM stick out of the socket.

      询问修复机器人

      添加评论

结论

To reassemble your device, follow these instructions in reverse order.

取消:我没有完成这个指南。

另外一个人完成了本指南。

团队

Clemson, Team 2-5, Hunter Spring 2022 Clemson, Team 2-5, Hunter Spring 2022 的会员

CLEM-HUNTER-S22S2G5

4 名成员

创作了44篇指南

0指南评论

添加评论

浏览统计数据:

过去 24 小时: 1

过去 7 天: 6

过去 30 天: 22

总计 1,608