跳转到主内容
加入维修社区 - 创建账户

Asus Q525U Back Cover Replacement

你所需要的

  1. Asus Q525U Back Cover Replacement, Back Cover: 步骤 1 中的图像 1,3 Asus Q525U Back Cover Replacement, Back Cover: 步骤 1 中的图像 2,3 Asus Q525U Back Cover Replacement, Back Cover: 步骤 1 中的图像 3,3
    • Begin by powering off the device and flipping the device over.

    • Carefully remove the two longer 9.5 mm screws on the corners with a Phillips #1 screwdriver.

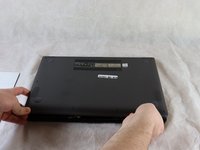
    • Remove the eight 7.5 mm Phillips #1 screws on the back of the device.

  2. Asus Q525U Back Cover Replacement: 步骤 2 中的图像 1,3 Asus Q525U Back Cover Replacement: 步骤 2 中的图像 2,3 Asus Q525U Back Cover Replacement: 步骤 2 中的图像 3,3
    • Use an opening pick to separate the back cover from the device.

    • For easiest removal, begin by prying at one of the front corners and sliding the tool under the cover in a counter-clockwise motion (to the left) toward the laptop hinge.

  3. Asus Q525U Back Cover Replacement: 步骤 3 中的图像 1,3 Asus Q525U Back Cover Replacement: 步骤 3 中的图像 2,3 Asus Q525U Back Cover Replacement: 步骤 3 中的图像 3,3
    • Once the cover has been separated from the device, carefully lift the back cover off the device (begin by lifting from the front of the cover first).

    • The back cover should be easily removable, allowing full access to all of the internal components.

结论

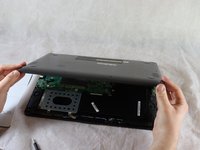
To reassemble your device, follow these instructions in reverse order.

另外一个人完成了本指南。

团队

Clemson, Team 2-5, Hunter Spring 2022 Clemson, Team 2-5, Hunter Spring 2022 的会员

CLEM-HUNTER-S22S2G5

4 名成员

创作了12篇指南

0指南评论

添加评论

浏览统计数据:

过去 24 小时: 2

过去 7 天: 8

过去 30 天: 27

总计 974