当前版本的文档还未经巡查,您可以查看最新的已查核版本。
你所需要的
-
这个步骤还没有翻译 帮忙翻译一下
-
While holding the device firmly, wedge the iFixit Opening Tool into the crease along the outer edge of the device (as shown in the image).
-
Slowly, grind the iFixit Opening Tool into the crease along the outer edges of the device until the entire back cover loosens.
-
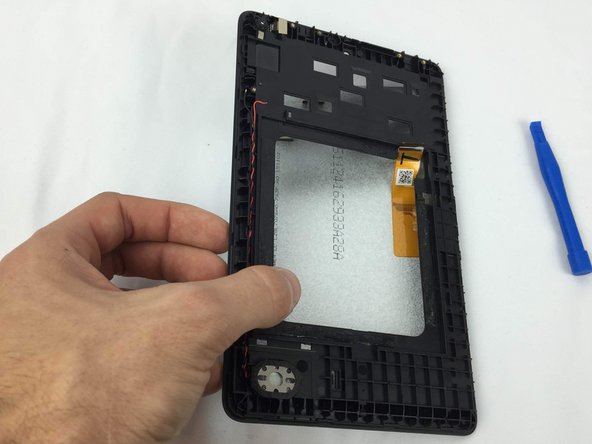
Then, remove the back cover from the device.
-
-
-
这个步骤还没有翻译 帮忙翻译一下
-
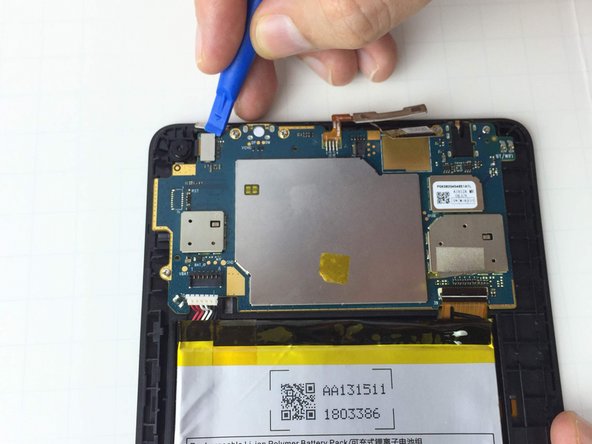
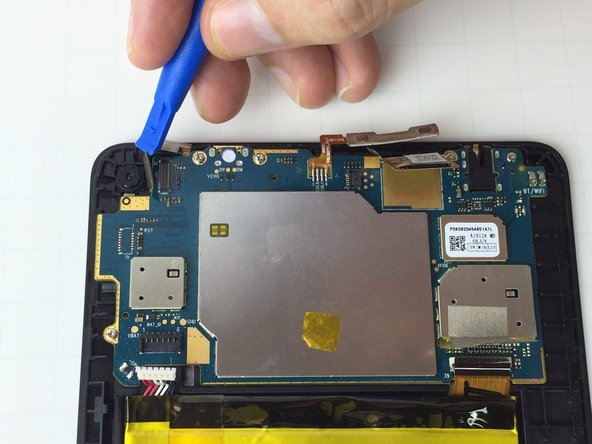
The LCD Digitizer on the Amazon Fire tablet has a locking cable connector that holds it in place on the motherboard.
-
To remove the cable, use the iFixit Opening Tool to unlock the LCD Digitizer cable connector.
-
Once the wire connector is removed, use the iFixit Opening Tool to pry the entire LCD Digitizer away from the motherboard.
-
-
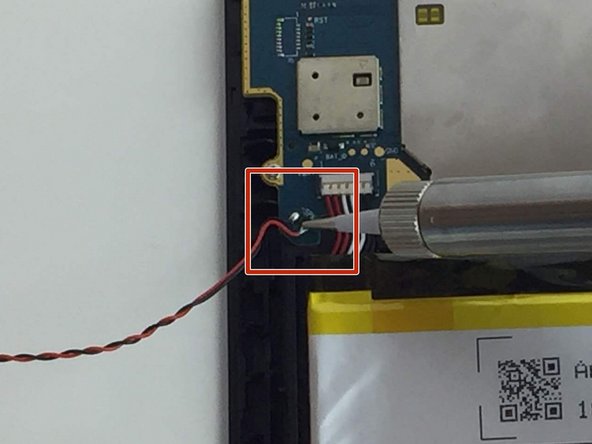
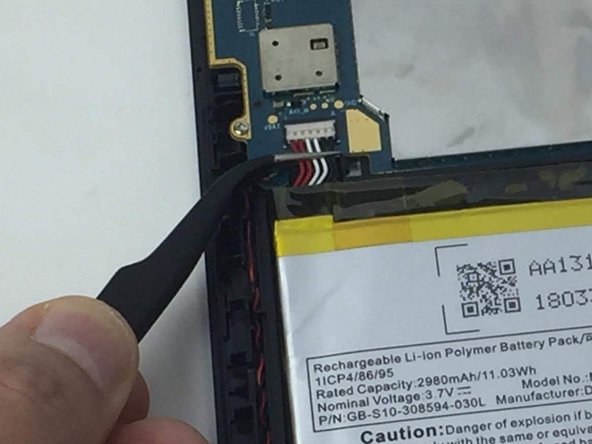
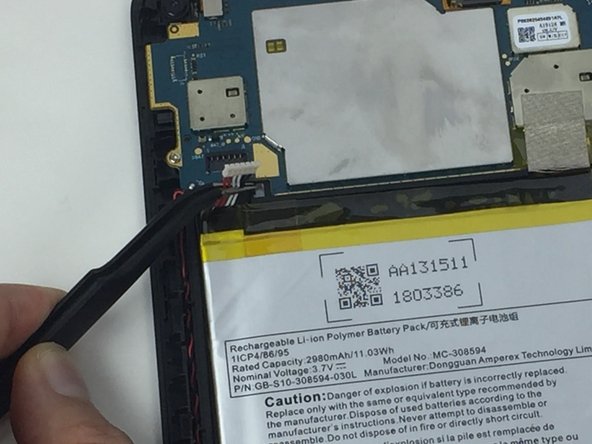
这个步骤还没有翻译 帮忙翻译一下
-
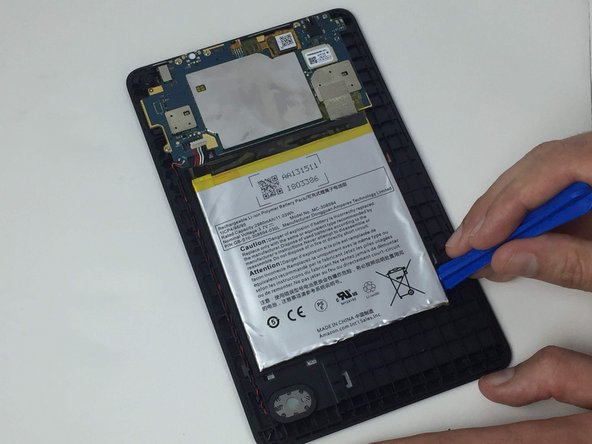
Carefully and slowly work the iFixit Opening Tool down the edge of the battery pack. Angle the tool to pry it up.
-
When you have successfully lifted the battery pack up on one side or corner, carefully wedge the iFixit Opening Tool under the pack about 1/2" and work around the rest of the sides.
-
-
这个步骤还没有翻译 帮忙翻译一下
-
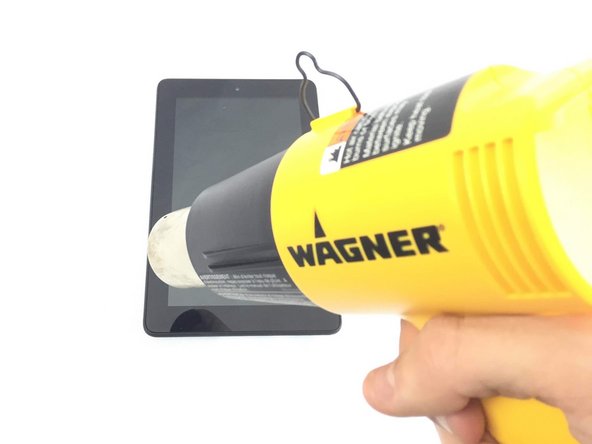
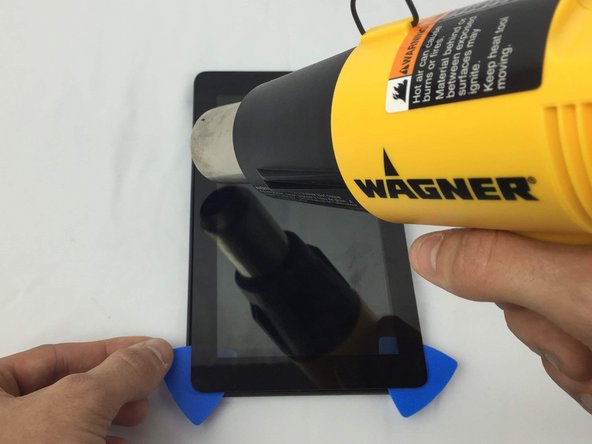
Use a heating tool such as an iOpener or Heat gun around the edges of the Amazon Fire's glass screen. The iOpener may take longer to use. However, a heat gun can warp the plastic if used incorrectly.
-
As you heat the edges, use a separator tool such as a guitar pick to lift the glass panel up and hold it up as you work around the device.
-


37等其他人完成本指南。
团队

USF Tampa, Team 1-2, Nance Spring 2016 USF Tampa, Team 1-2, Nance Spring 2016 的会员
USFT-NANCE-S16S1G2
3 名成员
创作了13篇指南
46条评论
So....... what's that Glass panel part number?
Where can I get the Digitizer? It appears to me (from your guide) the screens (Digitizer and LCD) DO in fact, separate. It does seem odd to me, from being in the industry for so long, that the digitizer has a polarizer attached to it. That polarizer is usually adhered to the LCD screen and that usually suggests that the repair part would call for a screen assembly.. Not just a digitizer. Can you attach some more pictures of the digitizer and the connector itself to clarify? Also, If you know where to order the part domestically and can you post a link? Thank you! Great guide BTW.
If the speaker and wire (twisted red&white) are removed from the case (step 2 above), then you won't need to desolder the connection to the motherboard (step 3 above). Just leave it soldered and remove with motherboard (step 10 above).
....or desolder connection and leave the speaker & wire in the case, if you like to "play with powertools?" ;-)
Why remove the battery? It was by far the most tricky operation and exposed the battery to damage prying it out with a flat tool. Any puncture of the plastic jacket qoulds mean instant death to the battery and if any metal tool in contact, a fire hazard. BTW where do you get a replacement digitized for the 7inch 5th generation Kindle?