跳转到主内容
加入维修社区 - 创建账户

Alienware M17-R1 Screen Lock Assembly Replacement

你所需要的

    1. Alienware M17-R1 Screen Lock Assembly Replacement, Screen Lock Assembly: 步骤 1 中的图像 1,1
      • Open the screen until it is flat.

      • Ensure that the surface you are working on can support both the screen and the base of the laptop.

      询问修复机器人

      添加评论

    2. Alienware M17-R1 Screen Lock Assembly Replacement: 步骤 2 中的图像 1,2 Alienware M17-R1 Screen Lock Assembly Replacement: 步骤 2 中的图像 2,2
      • Remove the eight 7 mm screws around the edge of the screen using a Phillips #1 screwdriver.

      • Support the screen from the bottom to make it easier to remove the screws.

      询问修复机器人

      添加评论

    3. Alienware M17-R1 Screen Lock Assembly Replacement: 步骤 3 中的图像 1,2 Alienware M17-R1 Screen Lock Assembly Replacement: 步骤 3 中的图像 2,2
      • Insert the plastic opening tool and gently slide it around the edge of the screen to lift the face of the screen away from its base.

      • Be careful not to break the face of the screen when lifting it.

      询问修复机器人

      添加评论

    4. Alienware M17-R1 Screen Lock Assembly Replacement: 步骤 4 中的图像 1,3 Alienware M17-R1 Screen Lock Assembly Replacement: 步骤 4 中的图像 2,3 Alienware M17-R1 Screen Lock Assembly Replacement: 步骤 4 中的图像 3,3
      • Remove the two 3 mm Phillips #1 screws using a Phillips #1 screwdriver.

      • Pull the assembly grip away to remove it.

      • Remove the two 5 mm screws using a Phillips #1 screwdriver.

      询问修复机器人

      添加评论

    5. Alienware M17-R1 Screen Lock Assembly Replacement: 步骤 5 中的图像 1,2 Alienware M17-R1 Screen Lock Assembly Replacement: 步骤 5 中的图像 2,2
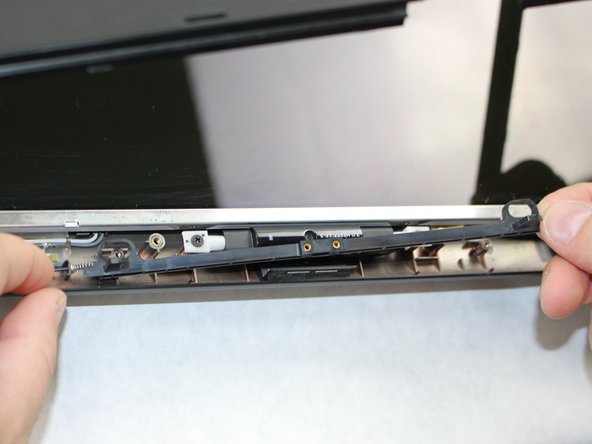
      • Push in the assembly towards the spring.

      • Gently lift the slider from the side opposite to the spring and pull the slider away from the spring.

      • The spring is loosely secured to the slider and may fall off and become lost when removing the slider.

      询问修复机器人

      添加评论

    6. Alienware M17-R1 Screen Lock Assembly Replacement: 步骤 6 中的图像 1,2 Alienware M17-R1 Screen Lock Assembly Replacement: 步骤 6 中的图像 2,2
      • If the spring is defective, slide it off the end of the assembly and replace it.

      询问修复机器人

      添加评论

结论

To reassemble your device, follow these instructions in reverse order.

取消:我没有完成这个指南。

William Davis

于10/09/18注册

323 声望

创作了2篇指南

团队

0指南评论

添加评论

浏览统计数据:

过去 24 小时: 0

过去 7 天: 5

过去 30 天: 42

总计 748