简介
你的 Time Capsule 空间也不够了?这篇文字记录了将 AirPort Time Capsule A1470 原厂的 2TB 希捷硬盘 替换为 6TB 西数绿盘的操作方法以及注意事项。
你所需要的
-
-
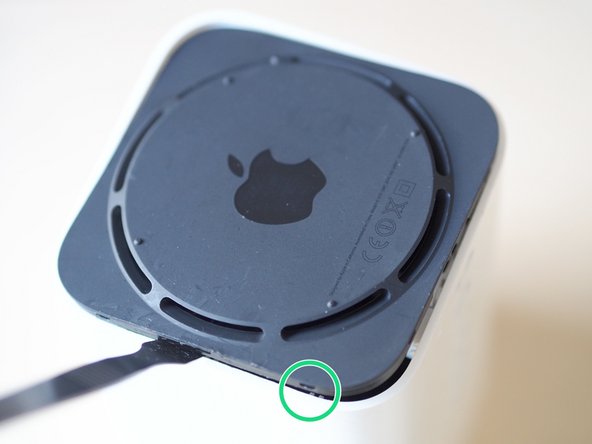
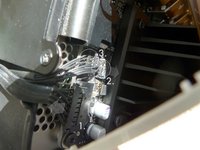
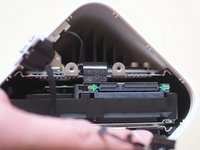
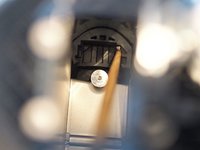
顶部的金属板,电源线和三根细电缆保护硬盘驱动器托架的入口。
-
带插座的电源线很容易抬起。
-
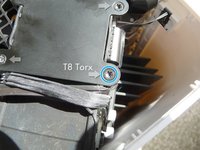
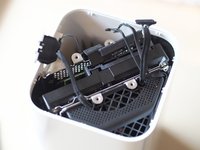
卸下四颗T8 Torx螺钉,就可以松开板子。使用T8螺丝刀,因为很难买到L型的螺丝,而且有可能把它们弄圆。
-
当四个螺丝被移除,金属板就会轻松取下。
-
-
-
-
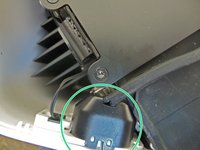
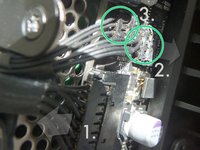
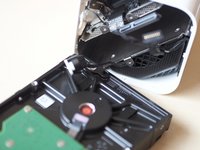
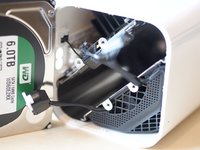
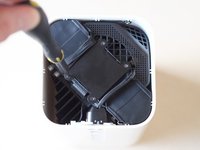
把橡胶垫轻轻掀开,露出下面的硬盘。 尽管如此,仍然无法取下 - 里面有组合驱动器的 SATA 和电源连接器。
-
SATA 连接器的两端都有两个接线片 - 轻轻地用塑料撬棒或镊子的角将接头从驱动器上移开。
-
-
-
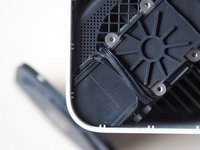
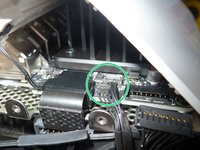
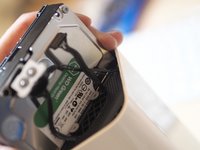
将硬盘拔出来,应该不会太紧。洞的底部有两个用于固定位置的橡胶材料部件。不幸的是这些橡胶件形状和硬盘是配套的,而且和厚度稍大点的新硬盘不匹配。
-
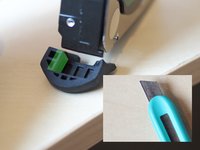
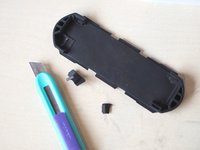
接下来要将两个橡胶件取出修剪,然后再用长的木质工具准确地放回去,比如用筷子钩出来,修剪完后再用筷子戳进去。
-
进行下一步之前,确保修剪过的橡胶件都正确放在了硬盘仓底部的位置。
-
-
-
将新的硬盘推进去,确保过程中没有卡到各类线。确保硬盘落在修剪过的橡胶件上,而不是顶到硬盘盒。
-
重新接上SATA线和电源线。
-
顶端的橡胶板也要根据新的硬盘位置修剪一点。
-
更换橡胶垫
-


综上 - 即是本次 Time Capsule 升级的全过程
参考及引用来源: Detailed Removal 2TB HD Plus Install 4TB HD + Formating
综上 - 即是本次 Time Capsule 升级的全过程
参考及引用来源: Detailed Removal 2TB HD Plus Install 4TB HD + Formating
304等其他人完成本指南。

147条评论
Considering the pain of pulling the base off the device, I'd recommend testing the new drive before putting that back on. I had an old Mac Mini with the same design, and it was an absolute pain to upgrade the RAM and HDD for the same reasons. Nothing like realizing that the SATA port isn't _quite_ seated right after reassembling the whole thing... O_O
Absolutely — as soon as you have the cables hooked up to the drive and board again, you can just plug the power cable into the jack even before re-seating it, check the drive out and then finish with the plate, power jack and base.
Thank you for this step-by-step lesson. Apart from a skinned finger joint and playing hide and seek with a mounting screw, my 2TB Airport Time Capsule now has a 5TB Seagate drive that fit perfectly into the rubber mounting blocks. Those pesky micro connectors are not designed to be fitted by fat old Western fingers. And yes, having fiddled with Macs of yore, I too have leart it pays to test a drive in situ before reassembling.
I put in a WD Green 3 TB disk(WD30EZRX), everything came apart and went together fine, but when I started it back up, still have the same issue of "internal disk needs repair". Any ideas on what the problem might be?
"Launch Airport Utility to check the disk is recognised OK, and erase it if necessary." Try repeating that last step in Airport Utility - your TimeCapsule may need to erase the disk itself before use.
Cascade -