跳转到主内容

ASUS TUF Gaming F15 FX506HEB-DB74 Battery Replacement

你所需要的

  1. ASUS TUF Gaming F15 FX506HEB-DB74 Battery Replacement, Unfasten the lower case: 步骤 1 中的图像 1,2 ASUS TUF Gaming F15 FX506HEB-DB74 Battery Replacement, Unfasten the lower case: 步骤 1 中的图像 2,2
    • Remove the 11 Phillips screws securing the lower case:

    • Seven 11.6 mm screws

    • Two 14.6 mm screws

    • Two 6.1 mm screws

  2. ASUS TUF Gaming F15 FX506HEB-DB74 Battery Replacement, Insert an opening pick: 步骤 2 中的图像 1,2 ASUS TUF Gaming F15 FX506HEB-DB74 Battery Replacement, Insert an opening pick: 步骤 2 中的图像 2,2
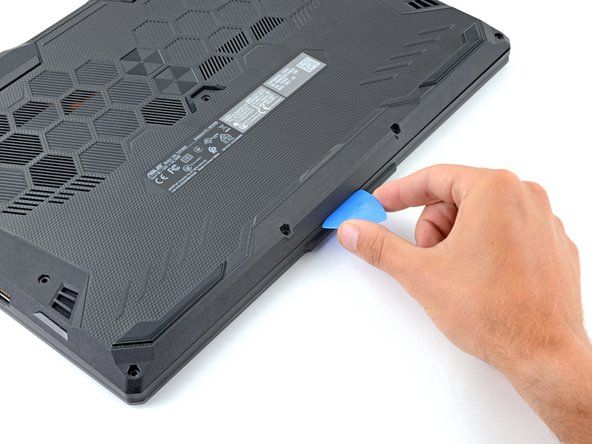
    • Insert an opening pick between the lower case and the chassis on the front right edge.

  3. ASUS TUF Gaming F15 FX506HEB-DB74 Battery Replacement, Release the right edge clips: 步骤 3 中的图像 1,2 ASUS TUF Gaming F15 FX506HEB-DB74 Battery Replacement, Release the right edge clips: 步骤 3 中的图像 2,2
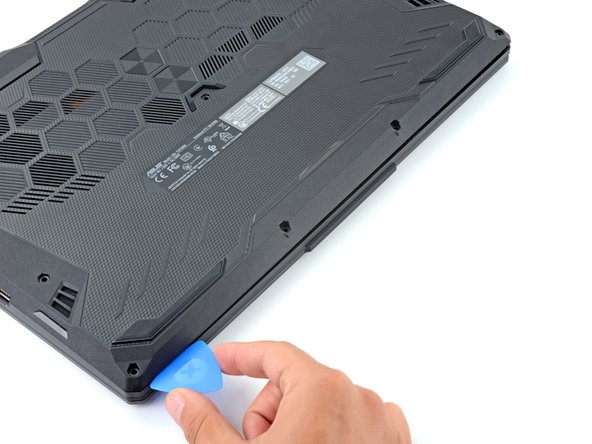
    • Slide the pick along the right edge to release the clips securing the lower case.

  4. ASUS TUF Gaming F15 FX506HEB-DB74 Battery Replacement, Release the remaining clips: 步骤 4 中的图像 1,3 ASUS TUF Gaming F15 FX506HEB-DB74 Battery Replacement, Release the remaining clips: 步骤 4 中的图像 2,3 ASUS TUF Gaming F15 FX506HEB-DB74 Battery Replacement, Release the remaining clips: 步骤 4 中的图像 3,3
    • Continue sliding the opening pick along the perimeter of the lower case to release the remaining clips.

  5. ASUS TUF Gaming F15 FX506HEB-DB74 Battery Replacement: 步骤 5 中的图像 1,3 ASUS TUF Gaming F15 FX506HEB-DB74 Battery Replacement: 步骤 5 中的图像 2,3 ASUS TUF Gaming F15 FX506HEB-DB74 Battery Replacement: 步骤 5 中的图像 3,3
    • Lift the lower case from the chassis and remove it.

    • During reassembly, this is a good point to power on your laptop and test all functions before sealing it up. Be sure to power your laptop back down before you continue working.

  6. ASUS TUF Gaming F15 FX506HEB-DB74 Battery Replacement, Reposition the plastic: 步骤 6 中的图像 1,2 ASUS TUF Gaming F15 FX506HEB-DB74 Battery Replacement, Reposition the plastic: 步骤 6 中的图像 2,2
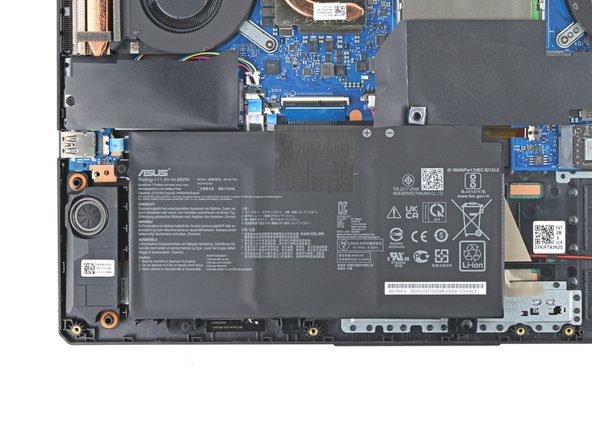
    • Use your fingers to move the plastic that covers the battery connector out of the way.

    • If the plastic is not staying out of the way use a piece of tape to secure it.

  7. ASUS TUF Gaming F15 FX506HEB-DB74 Battery Replacement, Disconnect the battery: 步骤 7 中的图像 1,3 ASUS TUF Gaming F15 FX506HEB-DB74 Battery Replacement, Disconnect the battery: 步骤 7 中的图像 2,3 ASUS TUF Gaming F15 FX506HEB-DB74 Battery Replacement, Disconnect the battery: 步骤 7 中的图像 3,3
    • Use the flat end of a spudger to push each side of the battery connector until it comes out of the socket.

  8. ASUS TUF Gaming F15 FX506HEB-DB74 Battery Replacement, Unfasten the battery: 步骤 8 中的图像 1,2 ASUS TUF Gaming F15 FX506HEB-DB74 Battery Replacement, Unfasten the battery: 步骤 8 中的图像 2,2
    • Use a Phillips screwdriver to remove the two 6.1 mm-long screws securing the battery.

  9. ASUS TUF Gaming F15 FX506HEB-DB74 Battery Replacement, Remove the battery: 步骤 9 中的图像 1,3 ASUS TUF Gaming F15 FX506HEB-DB74 Battery Replacement, Remove the battery: 步骤 9 中的图像 2,3 ASUS TUF Gaming F15 FX506HEB-DB74 Battery Replacement, Remove the battery: 步骤 9 中的图像 3,3
    • Lift the battery straight out of its recess and remove it.

结论

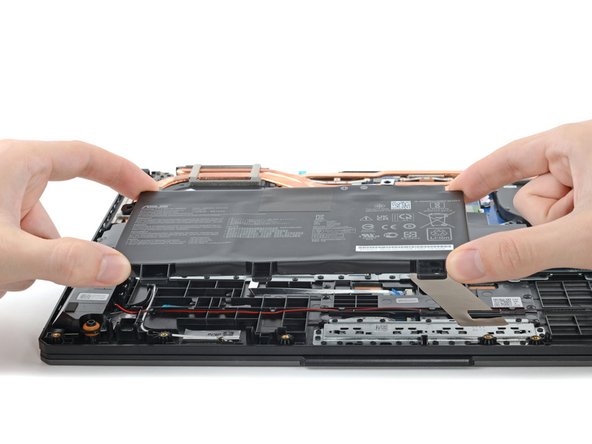
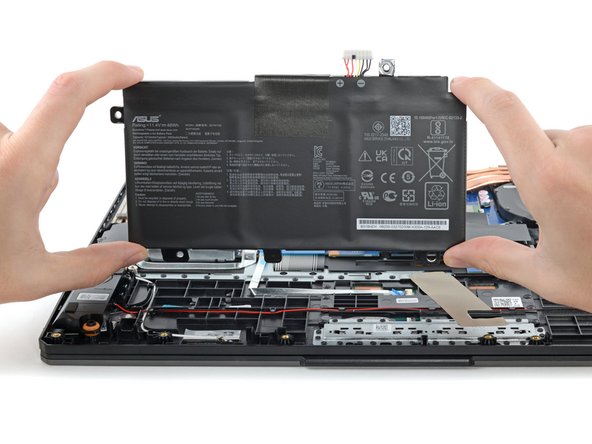
To reassemble your device, follow these instructions in reverse order.

For optimal performance, calibrate your newly installed battery after completing this guide.

Take your e-waste to an R2 or e-Stewards certified recycler.

Repair didn’t go as planned? Try some basic troubleshooting, or ask our Answers community for help.

另外一个人完成了本指南。

Alex Diaz-Kokaisl

于01/16/22注册

119,448 声望

创作了549篇指南

团队

iFixit iFixit 的会员

Staff

135 名成员

创作了16,818篇指南

0条评论

添加评论

浏览统计数据:

过去 24 小时: 2

过去 7 天: 14

过去 30 天: 50

总计 794